User Manual |
107
Laser Engraving and Cutting - 03 How to Laser Engrave and Cut
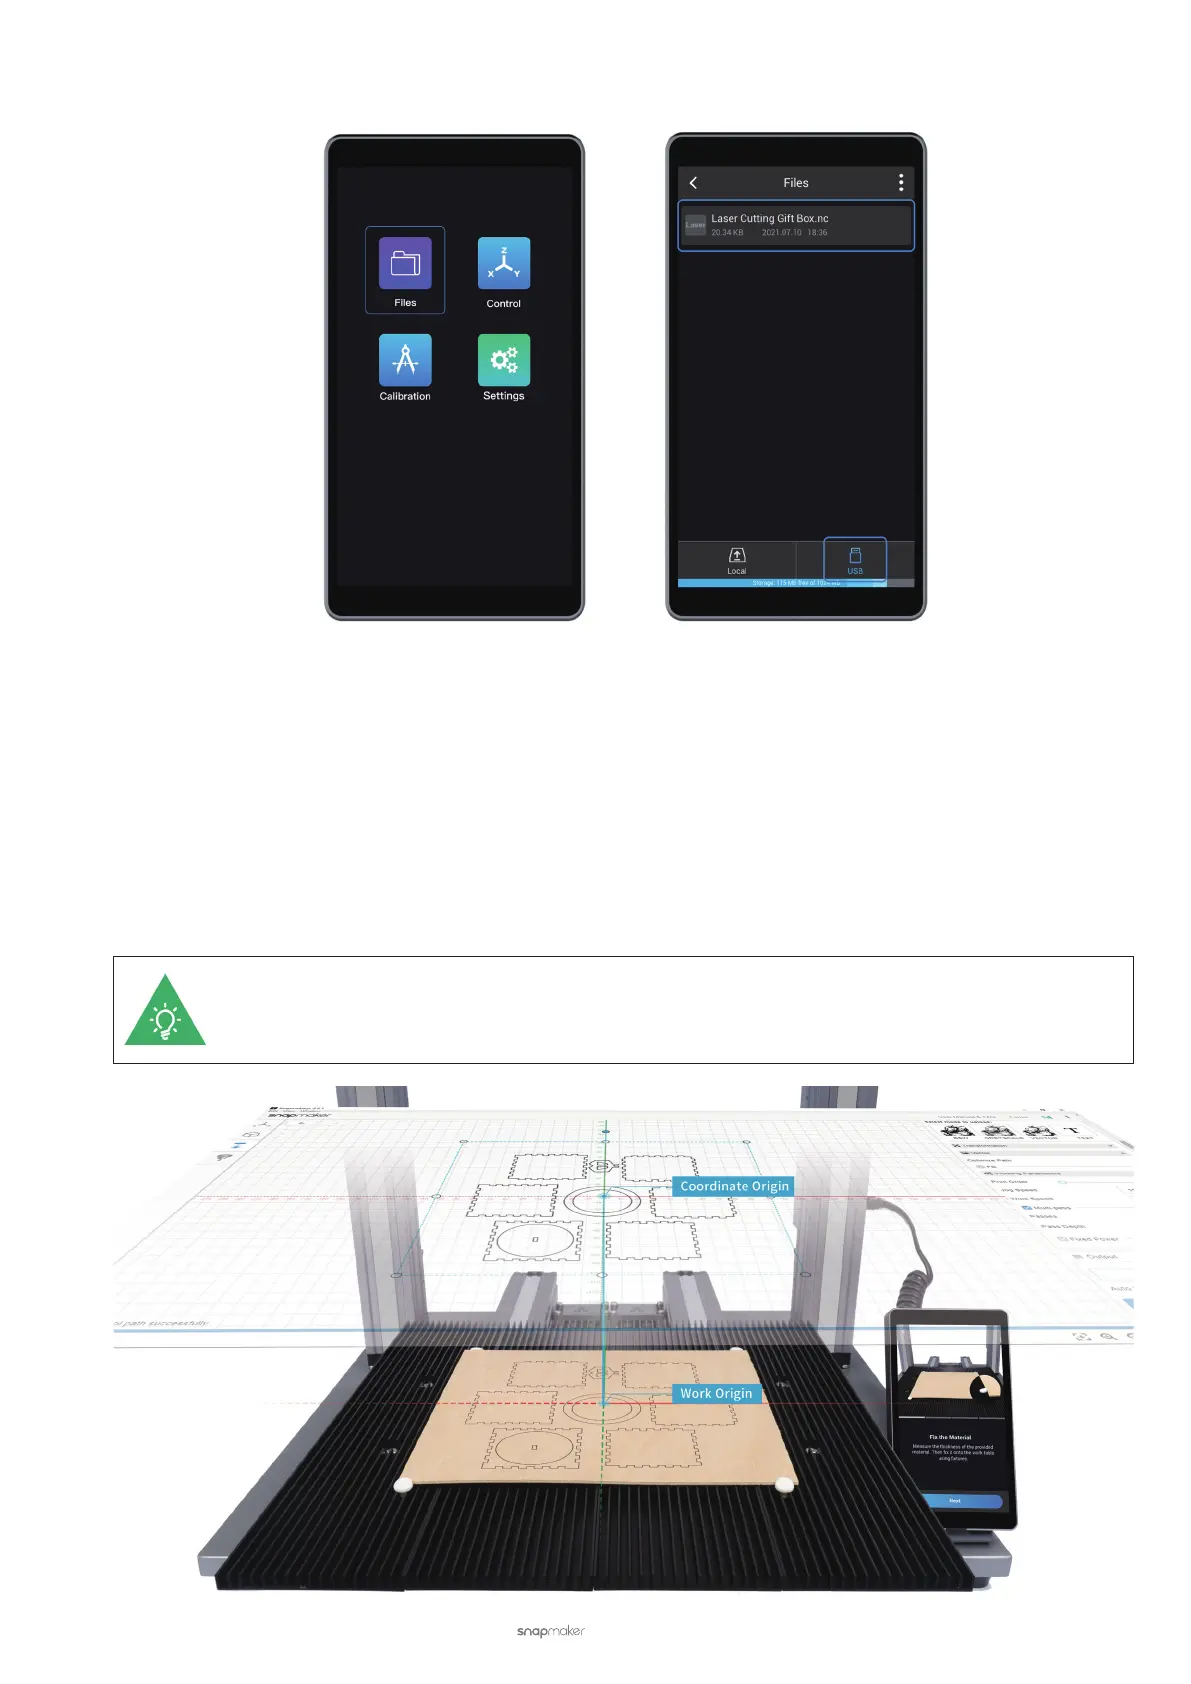
(3) On the Touchscreen, nd the G-code le by tapping Files > USB.
3.9 Start Engraving and Cutting
After the machine, material, and G-code le are ready, you can start engraving and cutting. The operating console
can be Luban or the Touchscreen. Set Work Origin is a crucial step to start engraving and cutting. This section
explains work origin and describes how to start engraving and cutting in Luban or on the Touchscreen.
How It Works: Work Origin
The work origin corresponds to the (0, 0) coordinate origin in Luban. By setting the work origin and running boundary,
you can nd out where the engraving and cutting will take place.
If you use the camera capture feature to determine the engraving and cutting position, you do not
need to set the work origin.