User Manual |
159
CNC Carving - 04 How to CNC Carve
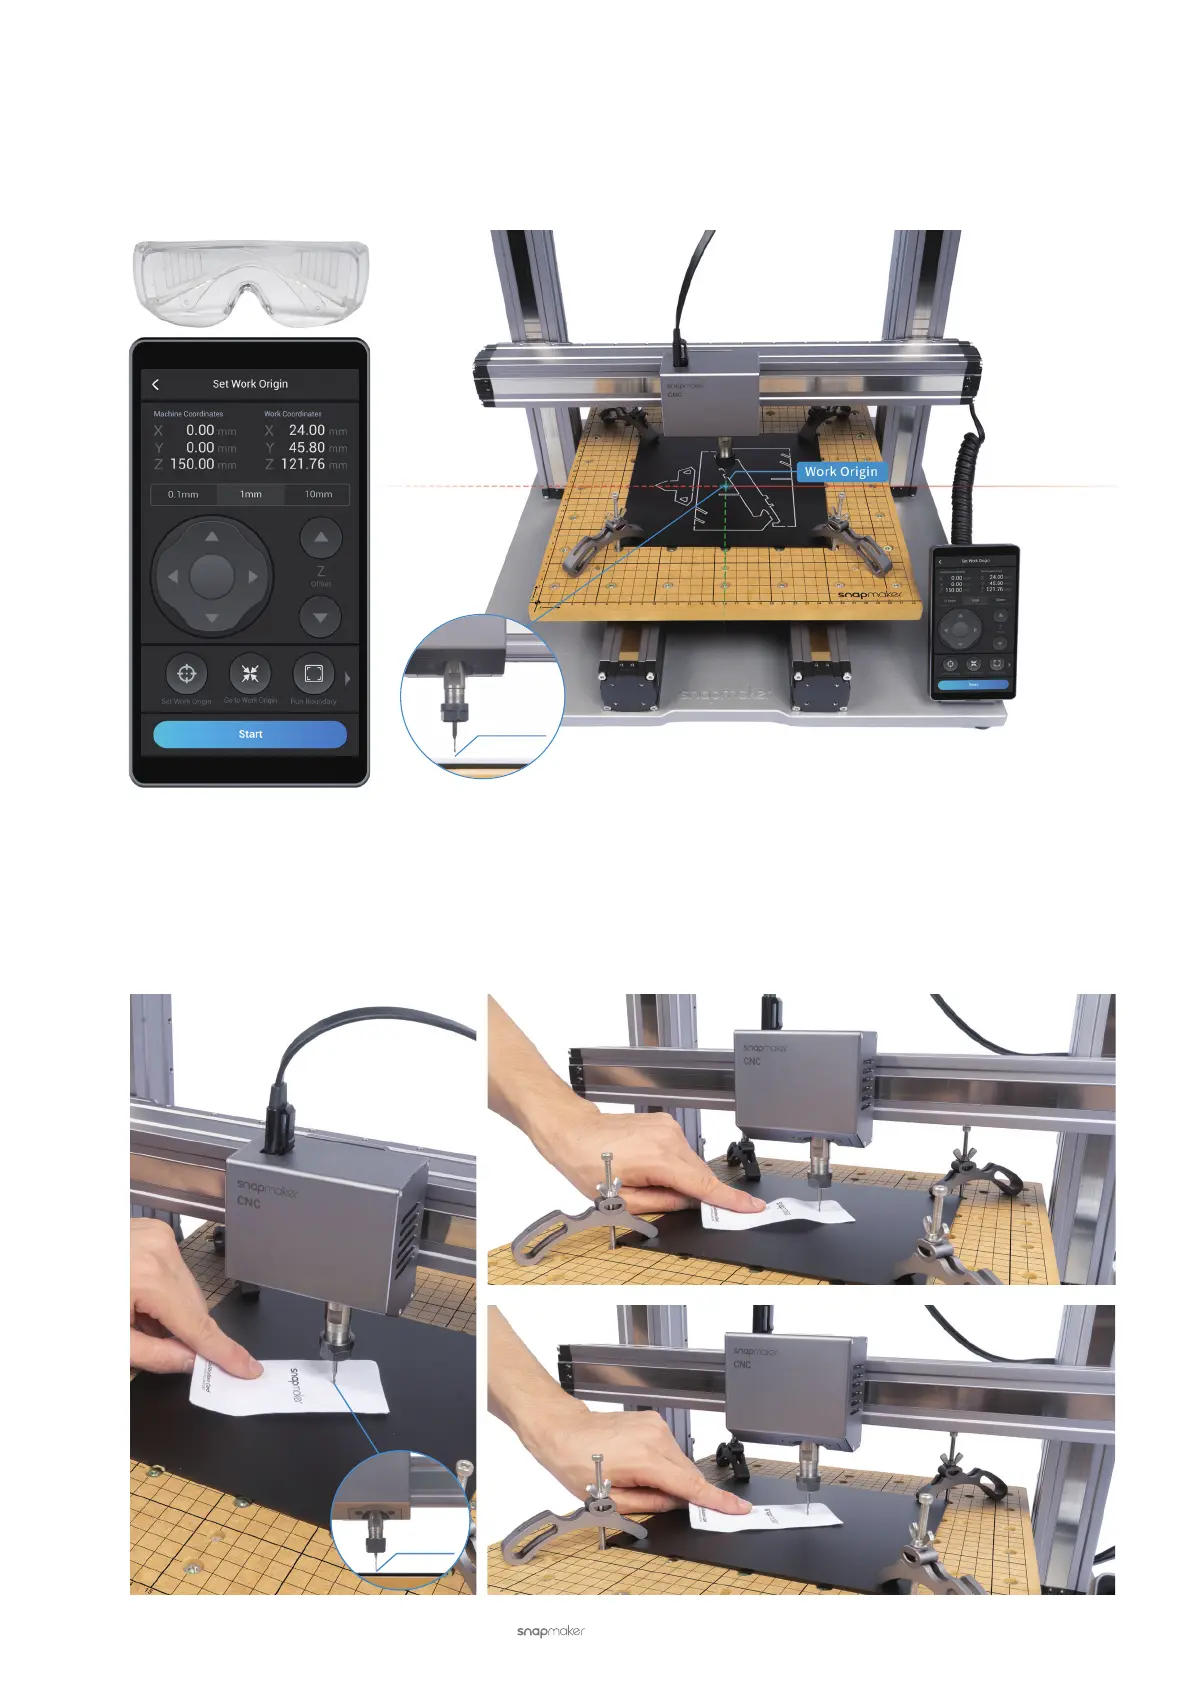
(2) Wear the CNC Safety Goggles. Previously, we have set the image center as the Work Origin of the design
coordinate system on Luban. Now we need to set the material center as the Work Origin of the physical
coordinate system. On the Set Work Origin screen, tap X, Y, and Z Offsets to move the CNC bit to where the
Work Origin will be. Now the CNC bit should be 5 mm above the material.
(3) Fine-tune the work origin. Place the Calibration Card (0.1 mm in thickness) or a piece of A4 paper between the
CNC bit and the material. Keep adjusting the height of the CNC bit by tapping the Z Offset, until you feel slight
resistance when you pull out the Calibration Card, and it should be wrinkled when you push it forward. Tap Set
Work Origin.
5 mm
0.1 mm
Slight Resistance
Wrinkled Calibration Card