NOTE: Many serial connections require TX, RX, and GND only. However some devices, do not use all of pins
listed. If you are unsure then use all pins.
NOTE: It is important to note the gender required at each end of a serial cable before acquiring or making a cable.
NOTE: The pin number is usually written next to the pin on the serial connectors themselves in very small writing.
NOTE: Do NOT connect the MAXPage to a printer (or parallel) port output unless you use a parallel to serial
converter. A printer port looks similar to a DB25 serial port but is female.
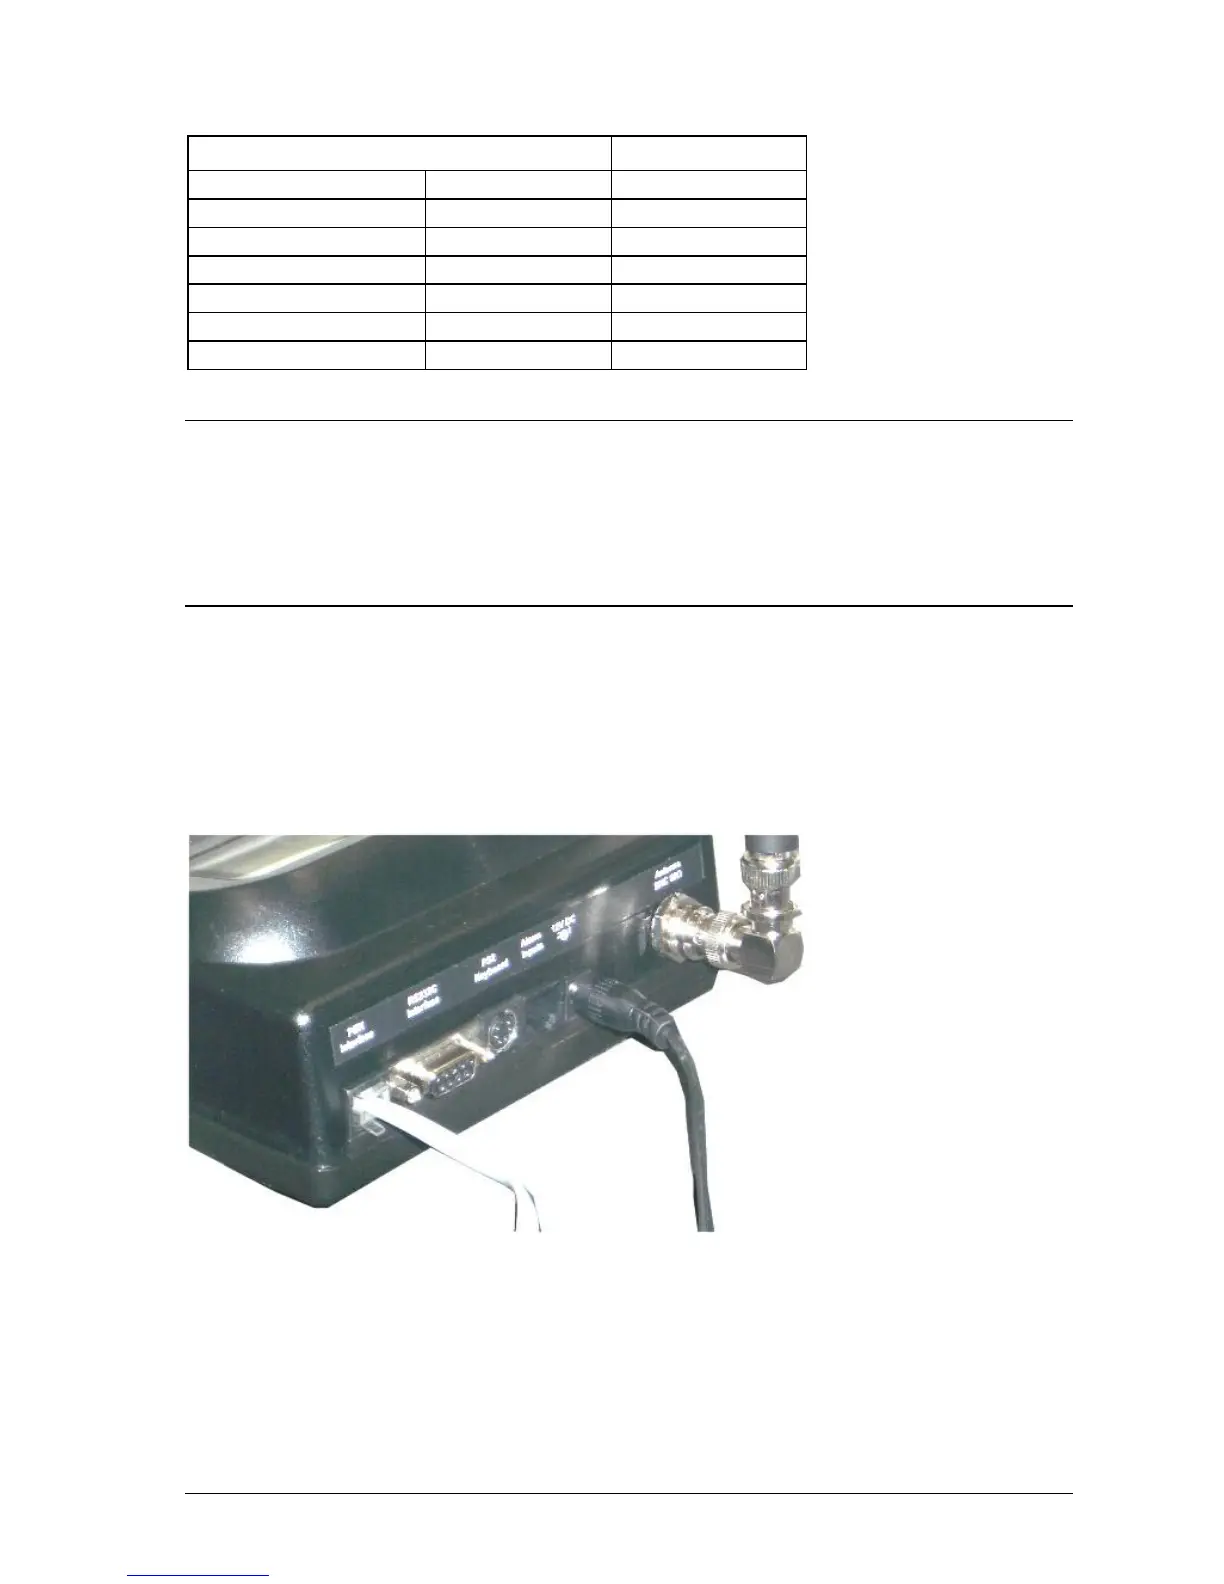
PBX Interface
If you wish to use the Telephone interface (a.k.a. PBX interface), run a standard phone cable from a spare analogue
PBX extension or standard phone line to the connector shown in the diagram below. Make note of the extension or
phone number MAXPage is connected to. The customers need to be told which extension or phone number to dial in
order to reach the unit.