59
1. Press the New button to create a new group entry in the database.
2. Once all fields have been filled out correctly, press the Save button to save changes.
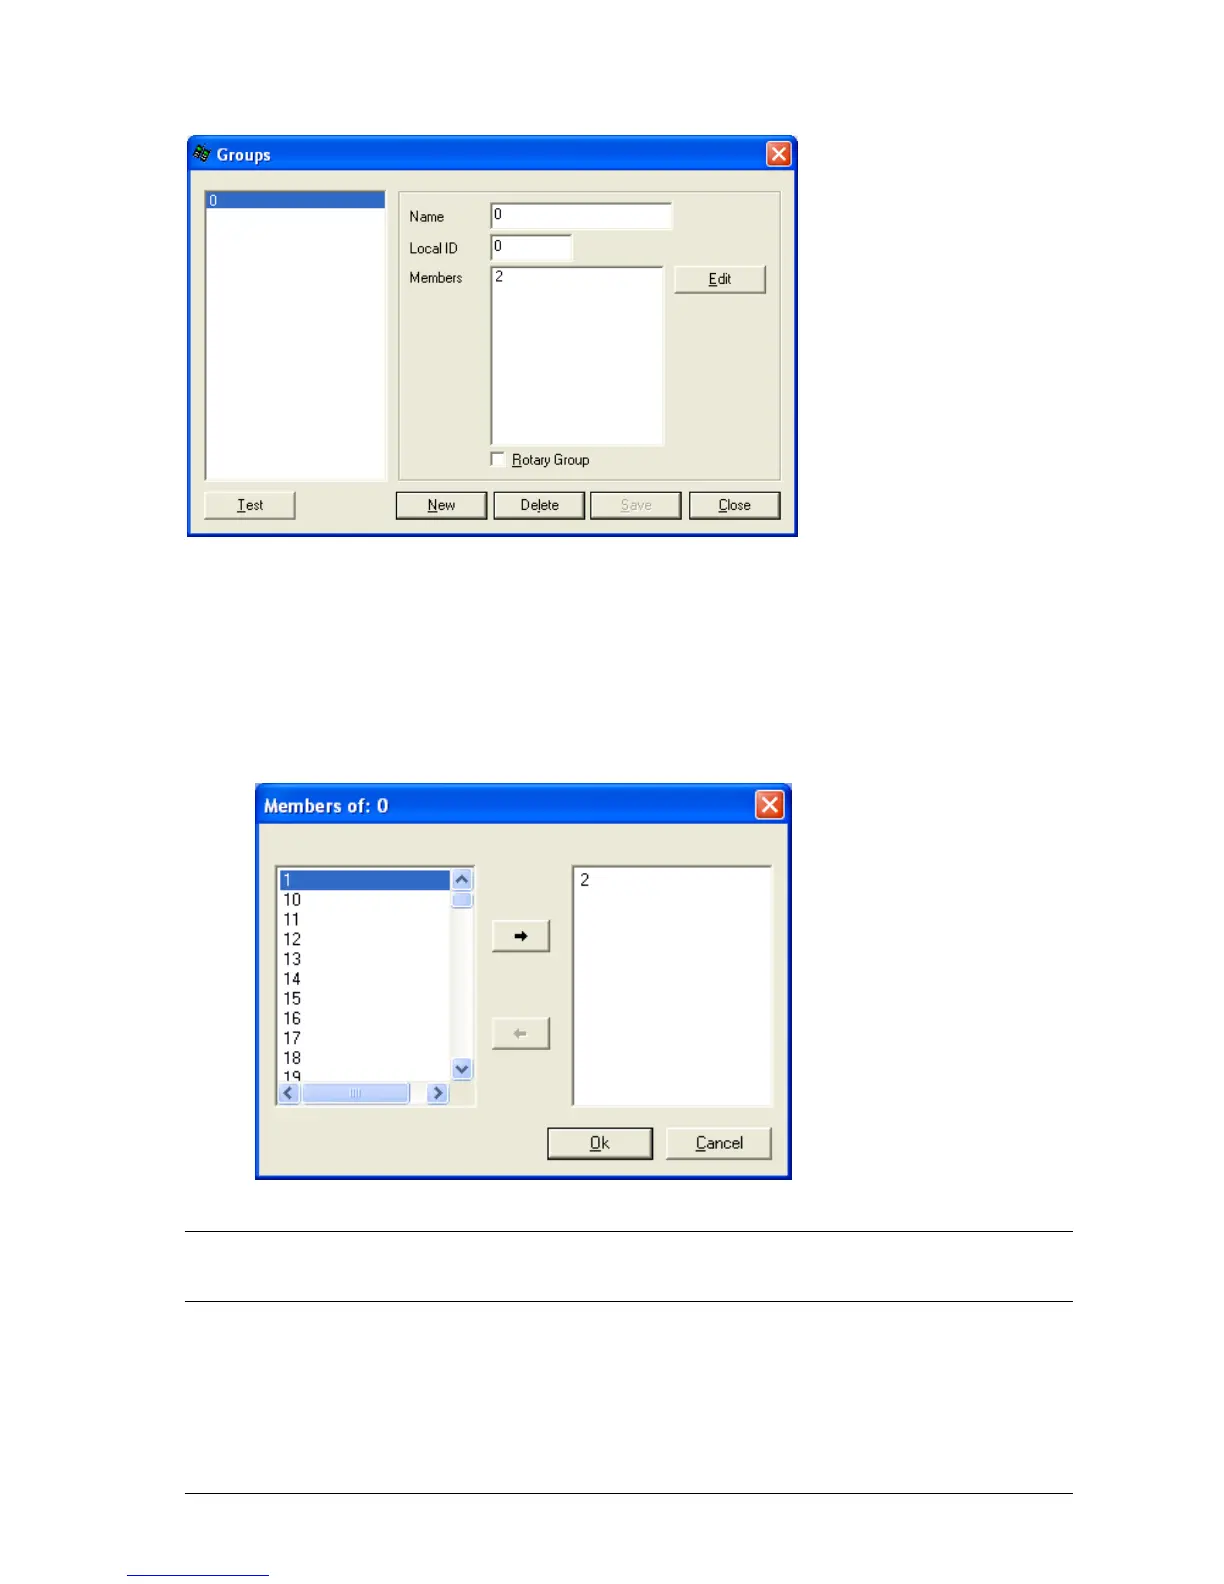
3. Press the Edit button to select which members should belong to the group. The window below is shown.
The left hand side of the window contains members that can be added to the list. The right-hand side shows
recipients that are already in the group.
4. Click OK when finished.
NOTE: Voice pagers (Two Tone & Group Tone) cannot be added to groups. If you wish to have a group of voice
pagers, create a new pager with the Receiver Type set to Group Tone and enter the common Group Tone for the
group of voice pagers into the cap code field.
5. Select a group in the left window and then press the Delete button to delete a group.
6. When you have finished with the Groups screen, click the Close button to return to the main screen.
7. The Rotary Group checkbox is used to enable/disable the rotary function. The rotary function is a special
mode whereby when a message is sent to the group, one user at a time receives a message. For example, if