4-11
764333-098
6. Press FEED Button to get desired length of paper
fed through mechanism. Do not pull paper in
either direction through printer mechanism (see
Figure 4-10).
7. Remove take-up spool and insert leading edge of
paper into slit on its shaft. Wrap paper around spool
two or three times tightly and install take-up spool
in printer. First make sure that gear on take-up
spool aligns with gear on printer and then press the
other end of shaft so it snaps in on metal frame.
8. Close paper cover and then close front cover.
NOTE: When changing paper roll, take note of the
following:
1 Use a paper that meets printer specifications.
2 Do not use a paper that is glued to core.
3 Do not fold leading edge of paper when you use a
new roll.
4) Do not operate printer without paper or ribbon;
this leads to rapid deterioration of print head.
5) Do not use any sharp object to remove paper jams.
6) Do not pull on paper while printer is printing.
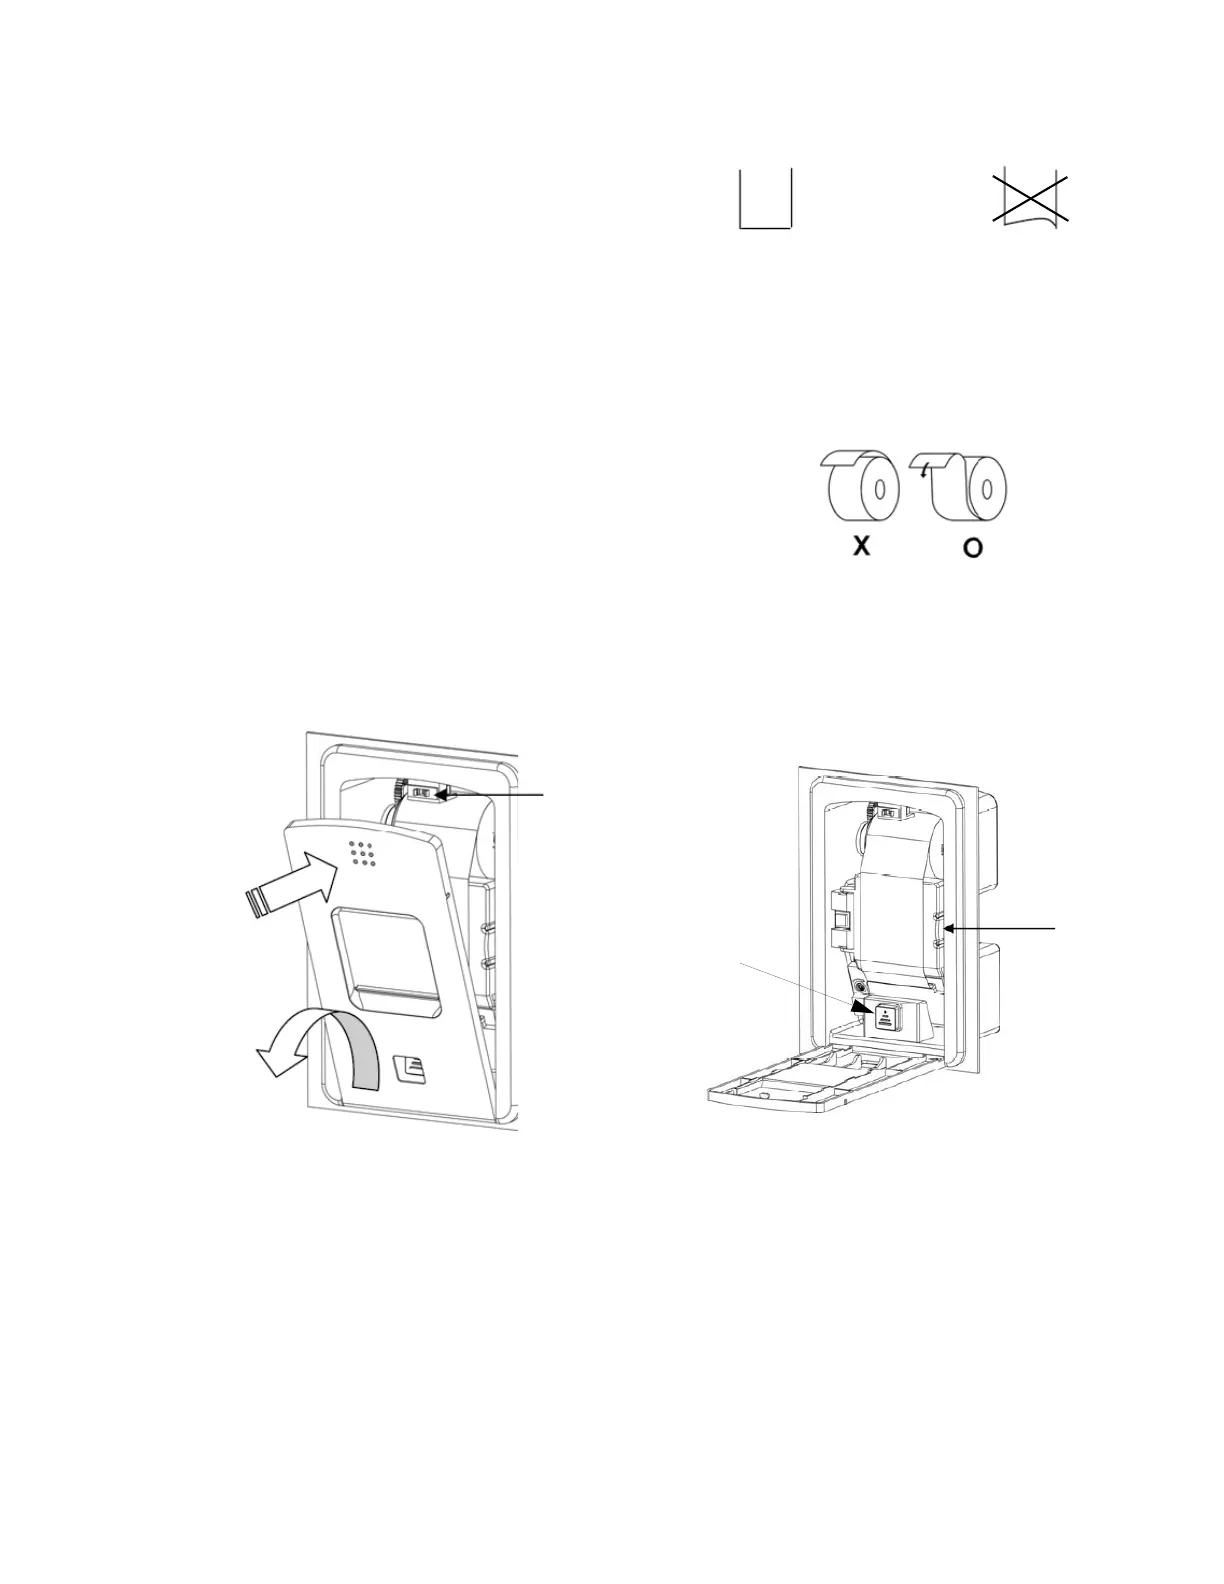
Latch
Figure 4-7. Open Printer Cover
Figure 4-8. Cut Paper Edge
YES
NO
Figure 4-9. Install Paper Roll
Paper Cover
Release
Figure 4-10. Paper Cover Compartment
Paper
Feed
Button