4-4
920509-645 Operator Manual Operating Instructions
3. Open chamber door and push loaded wash cart(s) into wash
chamber.
a. Ensure all cages, racks, etc. are correctly positioned on
wash cart(s).
b. Position cart(s) in center of wash chamber. Verify clearance
space on both sides of cart permits unobstructed movement
of oscillating jet system.
4. Close and latch chamber doors securely.
NOTE: Door safety switch prevents cycle operation unless
door(s) is closed.
5. Start desired cycle.
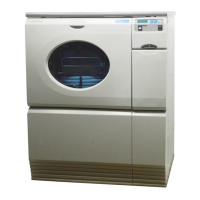
4.3 Cycle Operation Washer is equipped with a PLC control capable of storing parame-
ters for twelve distinct cycles. Authorized operators have capability
of customizing/programming all cycles to meet specific washing
needs. For instructions on cycle programming or changing cycle
parameters, refer to S
ECTION 5, CYCLE AND CONTROL VALUE PROGRAM-
MING.
On initial receipt of washer, each cycle is set with a basic demon-
stration cycle consisting of six sequential phases – Pre-wash, Wash,
Rinse 1, Rinse 2, Final Rinse and Exhaust. Refer to Cycle Descrip-
tion Chart in Section 5, for phase values.
To begin cycle operation:
1. LOCK/UNLOCK/INIT key switch must remain to UNLOCK
position at all times except when entering wash chamber.
Display shows Mode Selection screen.
2. On Mode Selection screen press AUTOMATIC touch pad. Unit
name temporarily appears on screen, then screen displays first
cycle selection menu.
3. Press ARROW touch pads to select other cycle selection
screens.
4. When desired cycle name is displayed, press CYCLE touch pad.
5. Then, press START touch pad.
6. Washer automatically processes selected cycle as follows:
NOTE: For cycle operation, take note of the following:
1) Time displayed on screen counts down time remaining for cycle.
2) Cycle operation may be halted at any time by pressing STOP
touch pad. To resume cycle operation at beginning of interrupted
phase function (i.e., fill, recirculate, drain), press RESUME touch
pad. To abort cycle operation, press ABORT touch pad.
• PRE-WASH PHASE
Hot water, from building supply, fills sump until required water
level is attained.
NOTE: Sump may contain rinse water retained from previous
cycle.
WARNING – SLIPPING HAZ-
ARD: To prevent slips, keep
floor dry. Promptly clean up
any spills or condensation. If
spilled liquids are detergents
or other chemicals, follow
safety precautions and han-
dling procedures set forth on
detergent or chemical label
and/or Material Safety Data
Sheet (MSDS).
WARNING – PERSONAL
INJURY HAZARD: Keep fin-
gers away from door hinges
to prevent pinching.
CAUTION – POSSIBLE
EQUIPMENT DAMAGE: Avoid
product damage. Always
select a cycle appropriate for
items being processed.