www.stryker.com 72-1048E MM FL23SE REV A 31
Return To Table of Contents
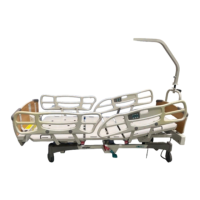
FULL-LENGTH SIDERAIL LOCKING HOOK REPLACEMENT
Tools Required:
No. 2 Phillips Screwdriver•
Bungee Cord•
Two 1/2” Combination Wrenches•
Procedure:
Note
Unless otherwise indicated, refer to Figure 4.1 B on pg. 26 for the following replacement procedure.
Completely raise the bed and raise the siderail needing repair.1.
Unplug the bed power cord from the wall outlet. 2.
If the hook is at the head end of the bed, follow steps 3 to 6, then go to step 8.
If the hook is at the foot end of the bed, go directly to step 7.
Head End
Remove the head board.3.
Raise the defective siderail.4.
Using the two 1/2” combination wrenches, remove the two locknuts and bolts (K, Figure 4.3 C, 5. pg. 43) holding the
bumpers to their support.
Using the No. 2 Phillips screwdriver, remove the seven screws (Q, Figure 4.3 C, 6. pg. 43) holding the cover of the head
box. Remove cables connected to power connector taking note of their position then remove cover.
Foot End
Using the No. 2 Phillips screwdriver, remove the 10 screws (A, Figure 4.2 A, 7. pg. 32) holding the cover as well as
the two I.V. poles to the foot box. Raise and remove the cover taking care to disconnect the electronic board first,
the cable (B, Figure 4.2 A, pg. 32) of the control panel and, if applicable, the cable (C, Figure 4.2 A, pg. 32) of the
connector from the foot box (optional).
Using the No. 2 Phillips screwdriver, remove the four screws (D) holding the two parts of the plastic cover over the 8.
siderail mechanism. Remove cover.
Using the two 1/2” combination wrenches, remove locknut, shoulder spacer and bolt (J) holding the locking hook 9.
to the plate. Remove hook.
Reverse the preceding steps to install the new hook.10.
Verify siderail for proper operation before returning the bed to service.11.
Service Information