www.stryker.com 72-1048E MM FL23SE REV A 39
Return To Table of Contents
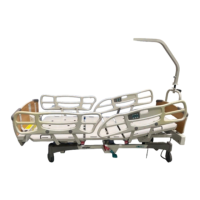
THIGH SECTION REPLACEMENT
Tools Required:
Needle Nose Pliers •
1/2” Combination Wrench •
Bungee Cords •
Procedure:
Note
Unless otherwise indicated, refer to Figure 4.3 A on pg. 37 for the following replacement procedure.
Completely raise the bed and apply the brakes. Flatten all sections of the mattress support. 1.
Unplug the bed power cord from the wall outlet. 2.
Lower the siderails. 3.
Lift and fold back the foot section toward the head end of the bed. Secure the section to the bed using a bungee 4.
cord.
Using needle nose pliers, remove the rue ring cotter, washers and clevis pin (D, Figure 4.3 C, 5. pg. 43) linking the thigh
section lever arms to the thigh actuator tube.
Note
Before linking back the thigh actuator tube to the thigh section lever arms, verify that the actuator course was preserved.
To do so, refer to the caution that follows step 16 of the “Knee Gatch Actuator Replacement Procedure” on pg. 45 and
proceed with step 17 of the procedure.
Remove the bungee cord and bring the foot section back to flat position. 6.
Using the 1/2” combination wrench, remove the four locknuts, washers, shoulder spacers and bolts (D, E) linking the 7.
thigh section to the foot and seat sections and remove the thigh section.
Reverse the above steps to install the replacement thigh section.8.
Service Information