LUCAS
®
3 Chest Compression System – Service Manual
3328798-002, ©2017 Physio-Control, Inc.
Page 72 of 91
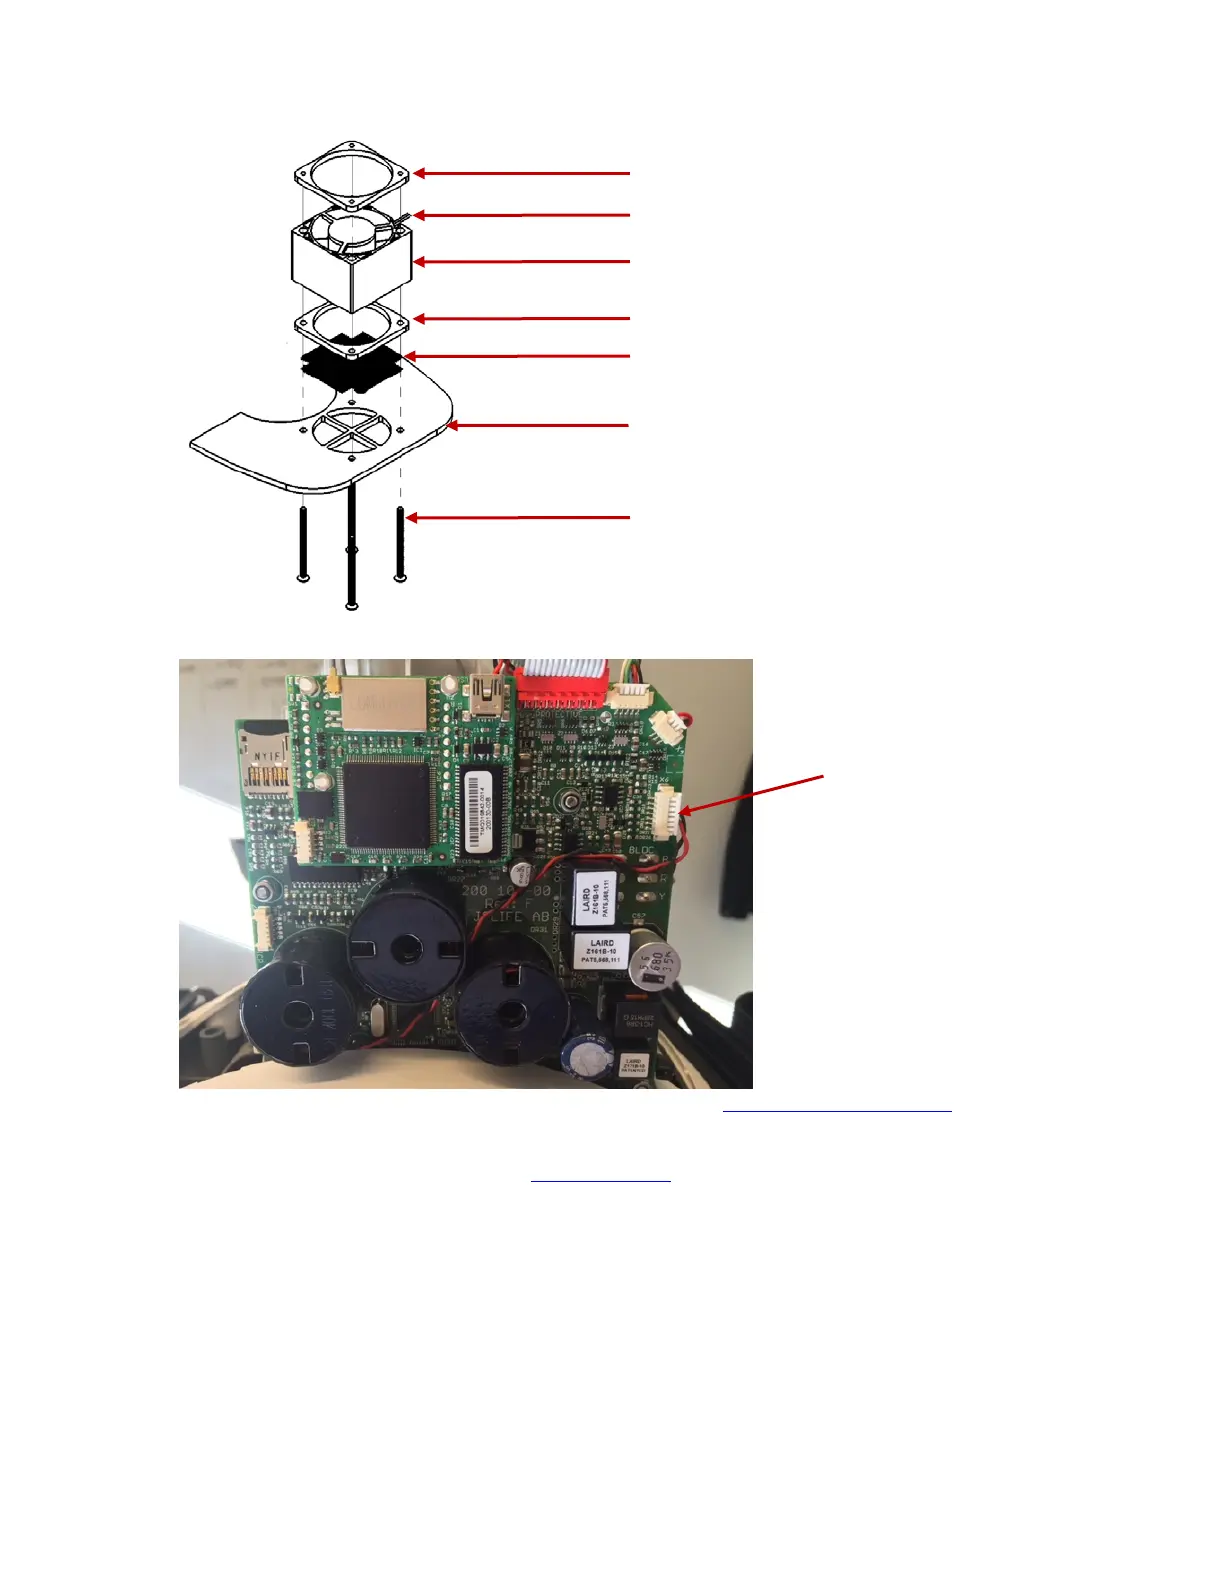
• Make sure all parts are assembled as picture below. The screws shall be locked with thread lock fluid and
tightened to 9 in-lbs / 1.0 Nm with a Torque Screwdriver Flat 5.5x0.8 mm (5.5).
• Connect the Fan Cable to the “Optional” connector on the Control PCB. Place the cable between the coils
according to the picture below.
• Put back the Hood according to Reassembling instruction in How to Replace the Hood.
3. Test
• Perform a Function Check according to Function Check
.
• When the device is in active mode let it run, after approximately 10 minutes the fan should start. Now set
the device in adjust mode, the fan should continue running. Check that there is no unusual sound from the
fan. When the temperature inside the hood has decreased to 30°C (86°F) the fan should stop. Continue
with the Function Check.
Cable outlet
Fan
Fan washer
Mesh
Bracket
Screw X4
 Loading...


