Chapter 4: Removal and Reinstallation Procedures
4 –41
Procedure 24 – Lower Tractor Assembly
Before beginning this procedure, turn the printer off and disconnect the power cable.
Removing
STEP 1. Remove Right End Cover (see Procedure 3).
STEP 2. Remove Left End Cover (see Procedure 8).
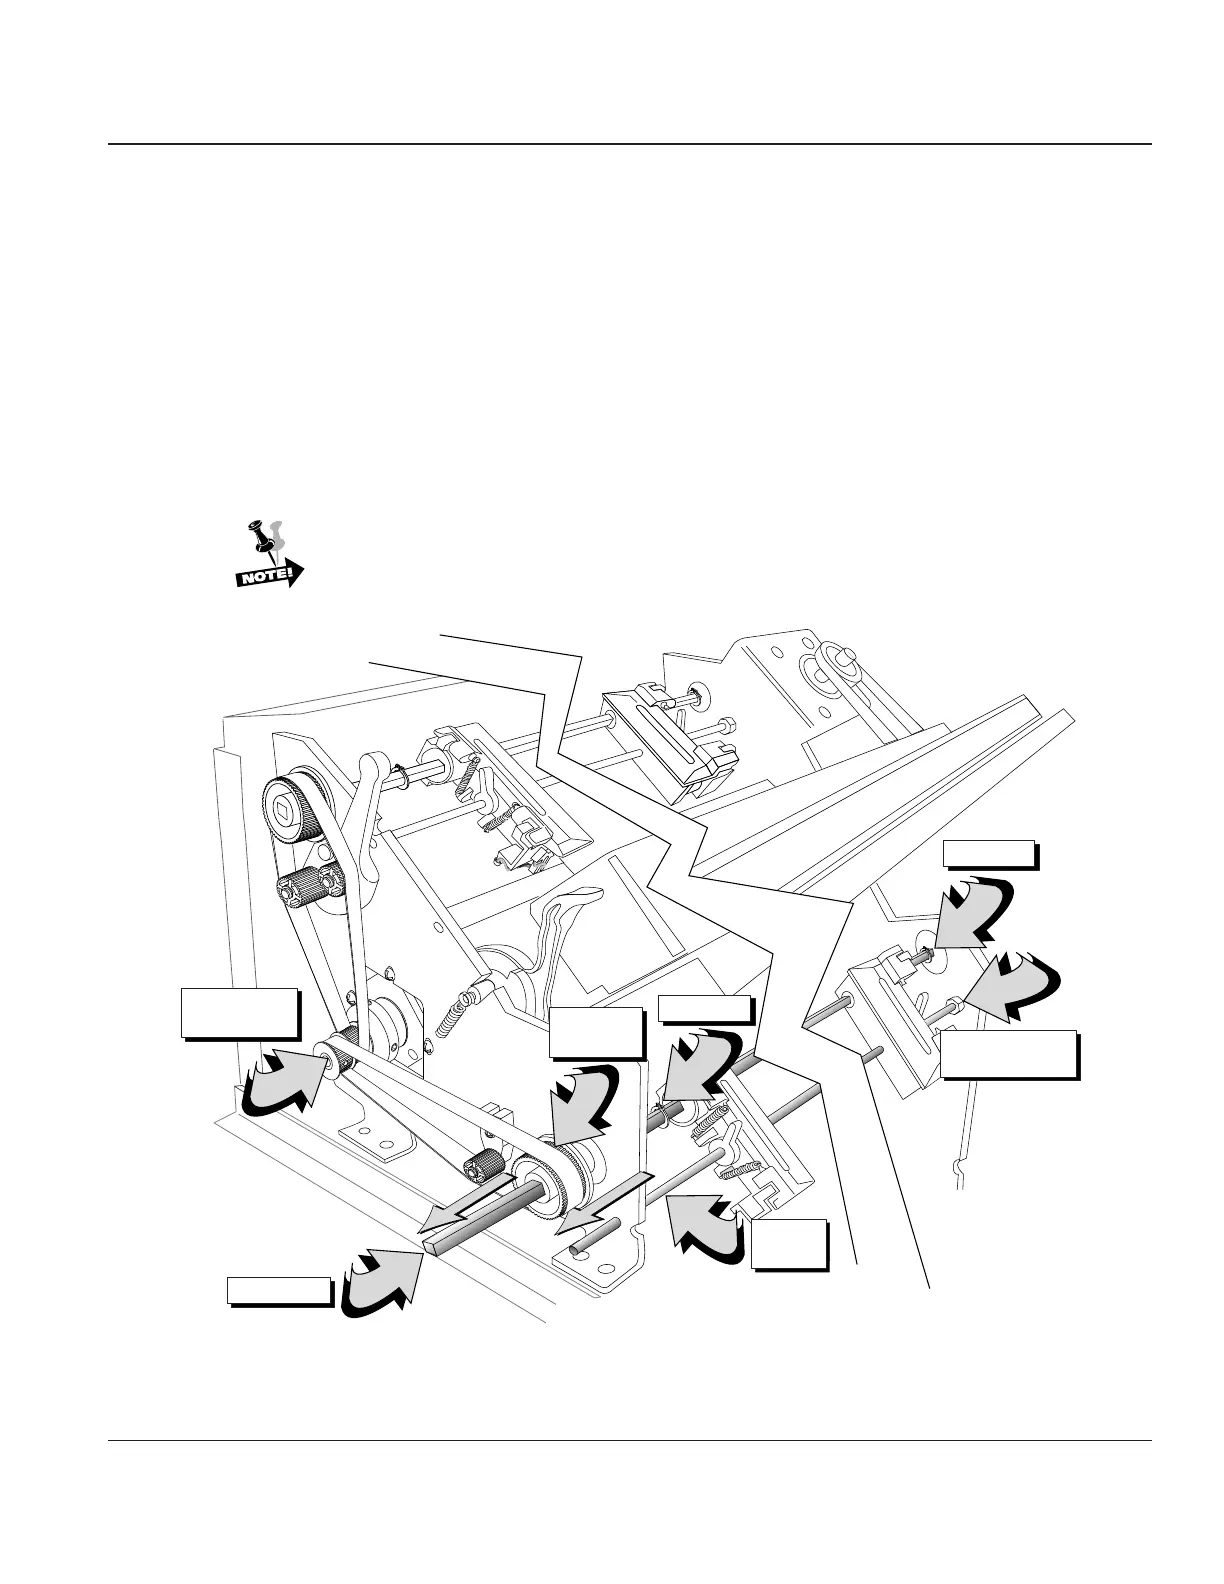
STEP 3. Remove the snap rings from both ends of the square shaft using the snap ring removal tool in
tool kit (#081147). Leave the snap rings so they are sitting loosely on the shaft.
STEP 4. Slide the square drive shaft to the left through upper tractor pulley. Do not remove the pulley
or drive belt from the shaft.
If the pulley or drive belt are removed from the printer, you will need to rephase the
upper and lower tractor sets.
Support
Shaft Nuts, 2x
Drive Shaft
Support
Shaft
Drive Belt
Pulley
Tractor Drive
Shaft Pulley
Snap Ring
Snap Ring
Figure 4–38. Removing Lower Tractor Assembly