T6090 Maintenance Manual
4–24
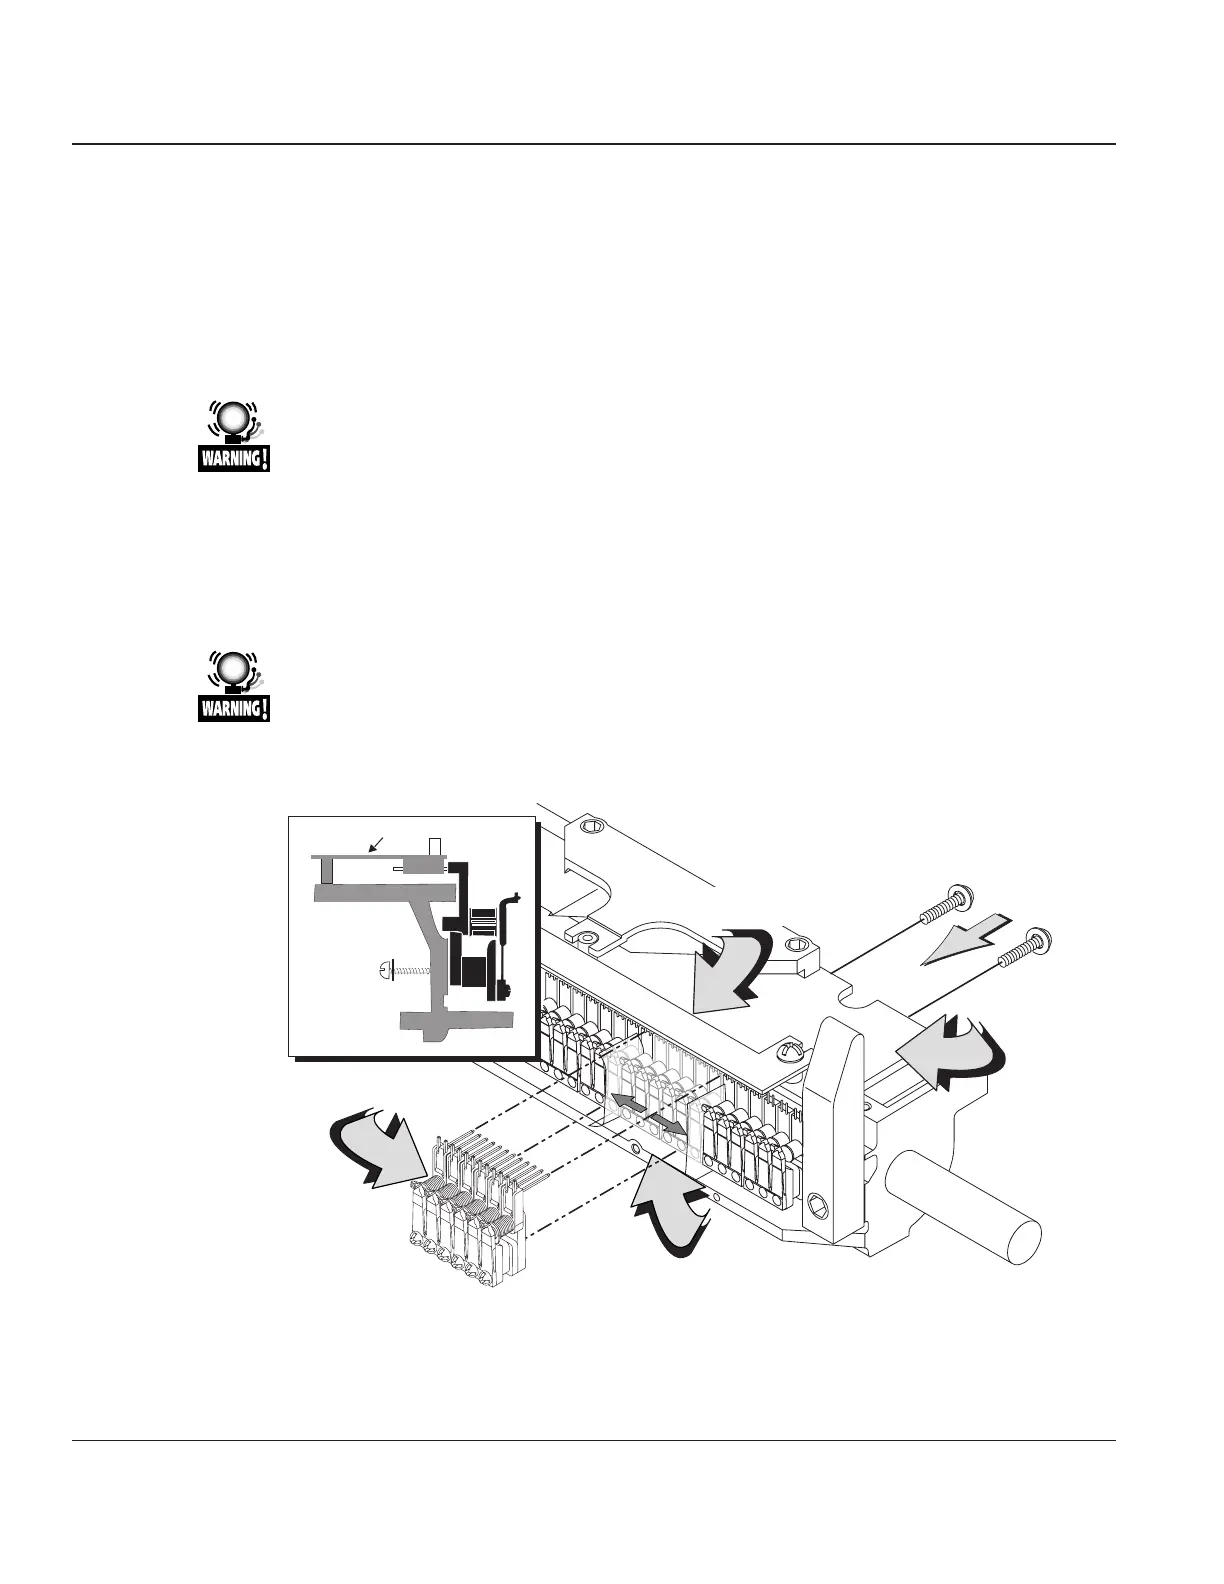
Procedure 14 – Hammer Module
Before beginning this procedure, turn the printer off and disconnect the power cable.
Removing
STEP 1. Remove the Hammer Bank from the printer (see Procedure 11).
STEP 2. Remove the Ribbon Shield from the Hammer Bank (see Procedure 12).
Be careful when handling the Ribbon Shield. It can be bent easily, which can
affect operation of the printer. It also has very sharp edges that can put a real
hurt on you if you aren’t careful how you handle it.
STEP 3. Remove the Air Duct and Cable Clamp from the Hammer Bank (see Procedure 13).
STEP 4. Each module has six hammers and is held in place on the carriage by two screws on the
backside of the Hammer Bank. Remove these screws and the individual module can be
removed.
Before removing a defective module, insert strips of tape between it and the
modules immediately adjacent to it. This will protect the coils on adjacent
modules during removal and reinstallation.
Hammer
Interconnect
CBA
Ribbon Shield
Alignment Plate
6-Pack Hammer
Module
Hammer Bank Carriage
Module Mounting
Screws (2)
Hammer Interconnect CBA
Fold Back Tape
Figure 4–21. Removing and Replacing the Hammer Module.