EasyManua.ls Logo

Technomark Multi4 V3 User Manual

Technomark Multi4 V3
85 pages
To Next Page IconTo Next Page
To Previous Page IconTo Previous Page
Page #24 background image
TRAÇABILITÉ CRÉATIVE
CREATIVE TRACEABILITY
TECHNOMARK
1 Allée du développement 24
42350 La Talaudière (France)
Tel : +33 (0) 4 77 22 25 91
Fax : + 33 (0) 4 77 22 38 93
E-mail : info@technomark-marking.com
V : SJ Le : 20/06/17 R : DD
www.technomark-marking.com
Brackets “[”, “]” and no ASCII characters aren’t allowed in the text. Use the UID codes to add others
characters.
Speed corresponds to the marking speed. Marking speed is different from the rest of the file marking
speed to obtain a quality suitable for code reading.
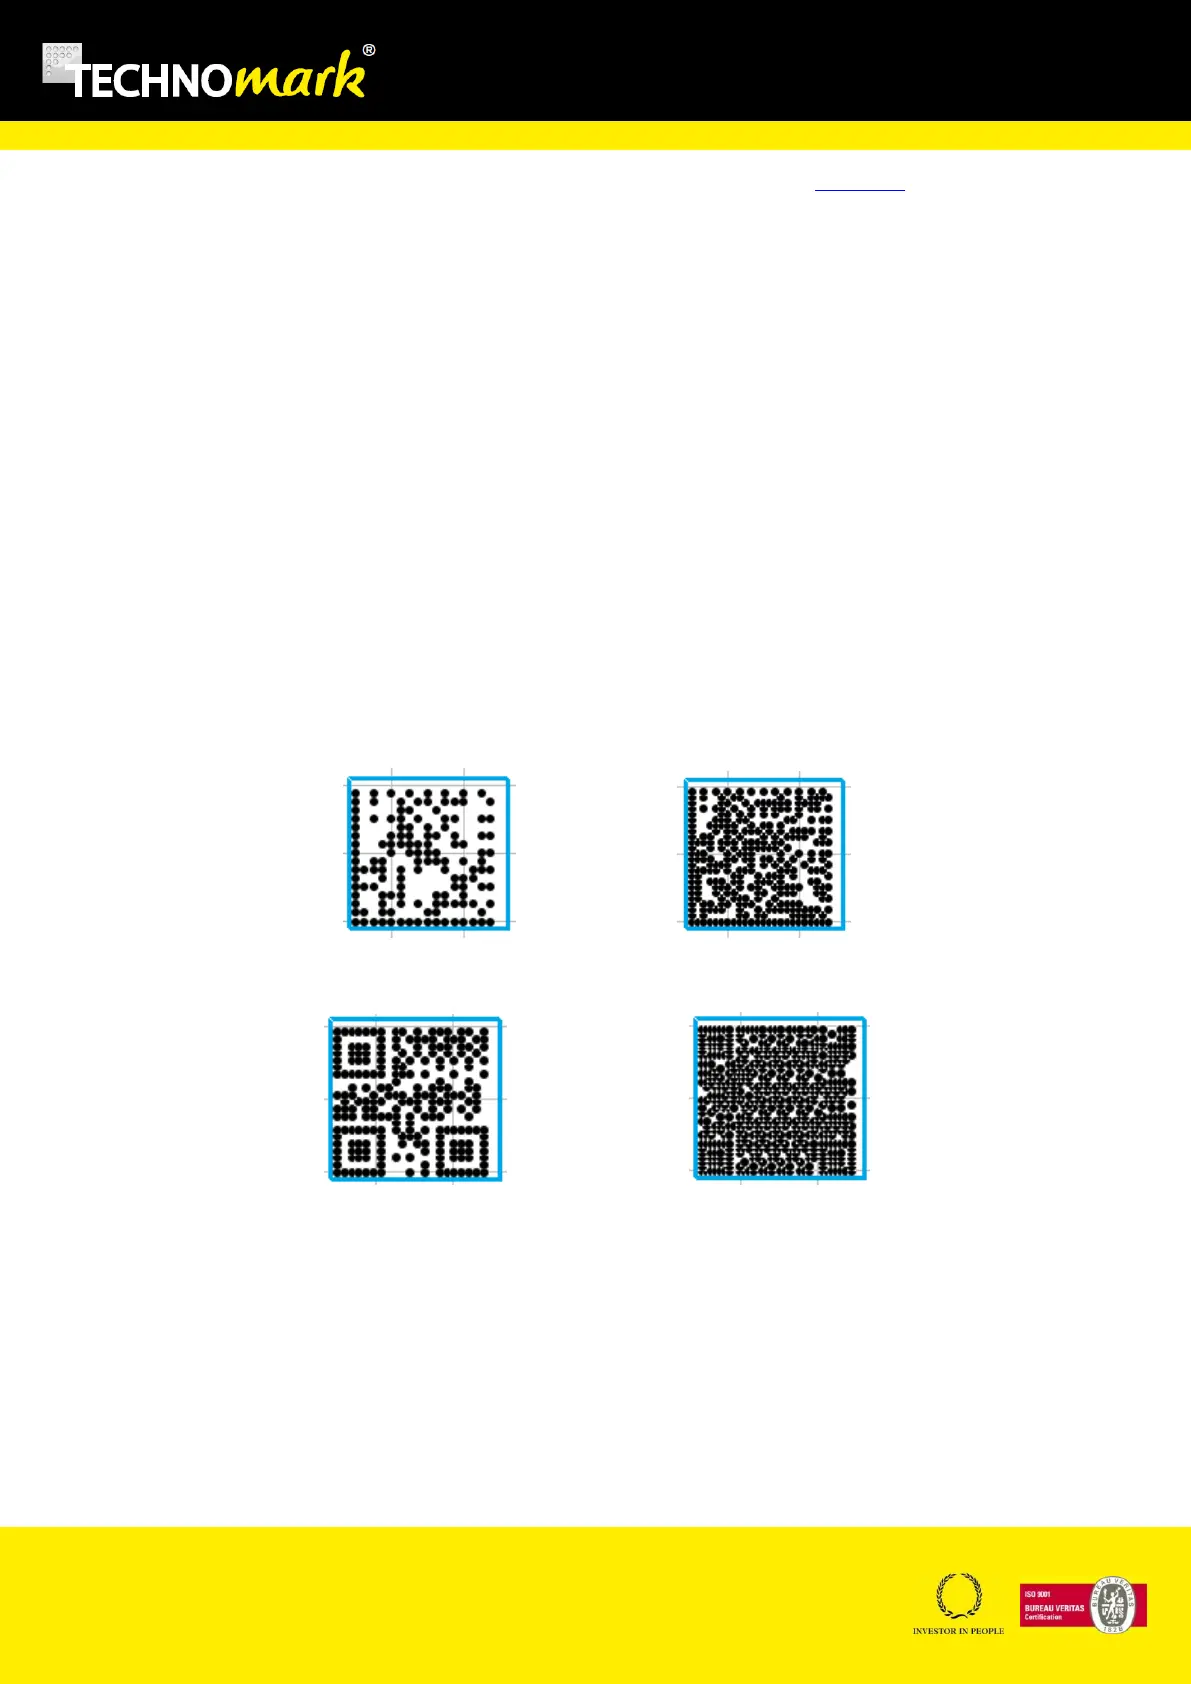
Code type corresponds to the two dimension code type to create: : Datamatrix STD (datamatrix
standard format), Datamatrix GS1 (datamatrix GS1 format) or QR.
Format corresponds to the code format and depends on the code type selected.
Datamatrix: The code can be automatic (rectangle or square) or at a fixed format selected in
the list.
QR: The code is always square. Its size is automatic or defined by one of the format of the
list.
Format defines the code size (number of elements) but as well the maximum number of characters
than can be encoded.
Datamatrix 16x16 Datamatrix 24x24
QR 21x21 QR 33x33
Bidirectional corresponds to marking head’s movement. If this parameter is activated, the marking
head will move in both directions on the X or Y axis.
Axis corresponds to the marking axis. By default it will be the X axis.
Auto cell size corresponds to the size of datamatrix cells. If this parameter is activated, the 2D code
size is the same as the line’s height. If this parameter is disabled, the field Value is available.

Table of Contents

Question and Answer IconNeed help?

Do you have a question about the Technomark Multi4 V3 and is the answer not in the manual?

Technomark Multi4 V3 Specifications

General IconGeneral
BrandTechnomark
ModelMulti4 V3
CategoryMeasuring Instruments
LanguageEnglish

Summary

Introduction and Safety

Safety Instructions

Essential safety information and warnings for operating the marking machine.

Before Using the Marking Equipment

Crucial instructions and precautions to follow before operating the marking machine.

Installing and Starting the Multi4 V3

Installation Procedure

Step-by-step guide for setting up the marking machine, including connections and environment.

Normal Operating Conditions

Specifies the required power supply, temperature, and humidity for the marking machine.

Front Panel Overview

Explanation of the functions and buttons on the machine's front control panel.

Main Screen and General Operation

Modes and Functions

Entering Text and Special Characters

How to input text and insert special characters for marking using the keyboard.

Home Mode: Editing and Inserting Lines

Managing marking lines, adding, editing, and using predefined functions like serial numbers and timestamps.

Position Mode - Force Settings

Configuring marking position, force, height, width, angle, and centering for lines.

Text Parameters Mode

Adjusting text aspect ratio, font type, italic inclination, and character spacing.

File Mode Operations

Managing marking files, including saving, opening, creating new files, and USB transfer.

Test Mode Functions

Performing various tests for marking lines and the entire file without actual marking.

System Mode Configuration

Configuring system parameters like date, time, users, licenses, and interface settings.

Optional Accessories

Rotary D Axis

Using the D Axis for circumference or generator mode marking on cylindrical parts.

Z Axis Sensors and Electric Axis

Configuration and use of Z Axis sensors and electric Z Axis for height positioning.

Battery and External Charger

Information on using the optional battery pack and external charger for autonomous operation.

Ethernet Card

Connecting the marking machine to a network or PC using an optional Ethernet card.

Inputs/Outputs and RS232 Communication

Maintenance and Everyday Care

Mechanical Component Identification

Identification of the main mechanical components of the marking machine.

General Maintenance Information

Recommended maintenance practices and frequency for optimal machine performance.

Stylus Cleaning and Lubrication

Detailed procedures for cleaning and lubricating the stylus assembly.

Stylus Sharpening and Return Spring

Guidance on sharpening the stylus and replacing the return spring for quality marking.

Electronic Controller Maintenance

Basic maintenance recommendations for the electronic panel-marking controller.

Error Codes and Troubleshooting

Guide to identifying and resolving common error codes and machine malfunctions.

Compliance Statement

Related product manuals