TRAÇABILITÉ CRÉATIVE
CREATIVE TRACEABILITY
TECHNOMARK
1 Allée du développement 30
42350 La Talaudière (France)
Tel : +33 (0) 4 77 22 25 91
Fax : + 33 (0) 4 77 22 38 93
E-mail : info@technomark-marking.com
V : SJ Le : 20/06/17 R : DD
www.technomark-marking.com
Use the Start and Stop keys to stop or cancel the marking in progress. (see Marking)
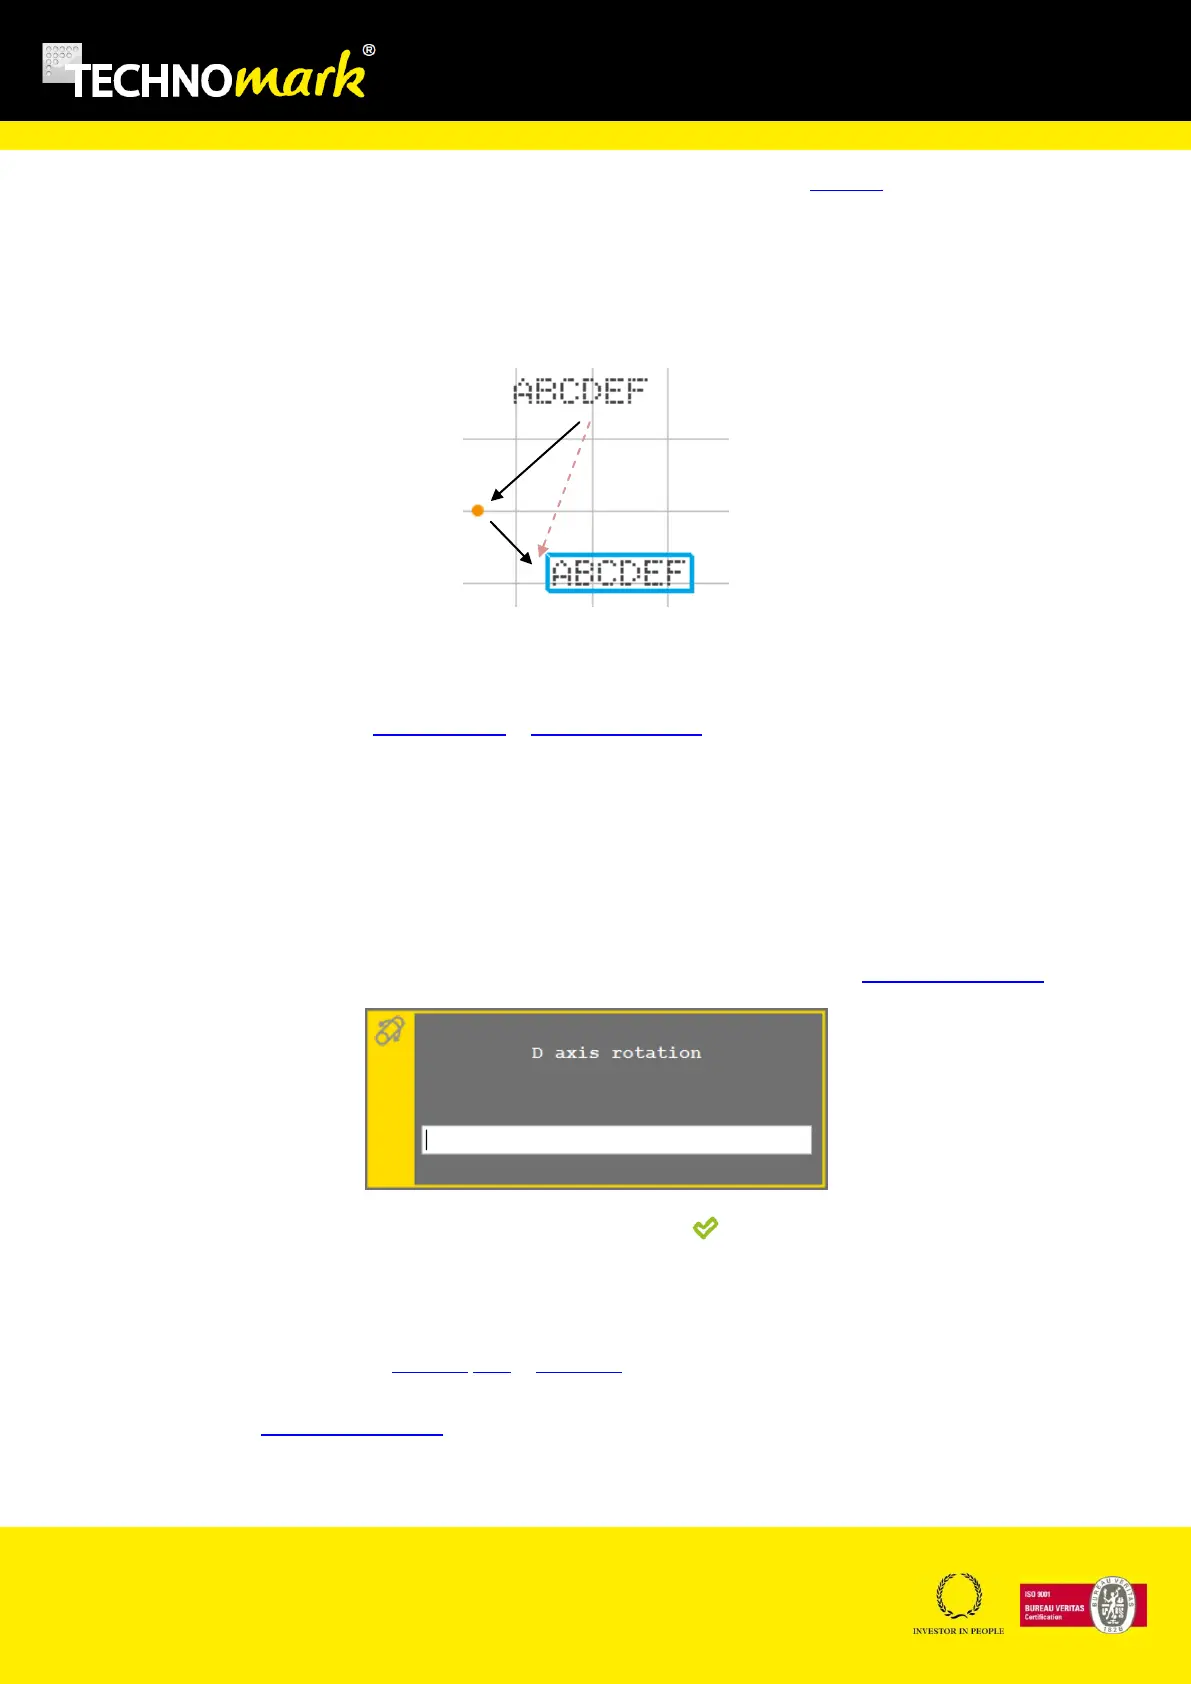
Crossing point – Command the head to move thru a point.
It is possible to force the head to move thru a defined point.
When a crossing point is defined, it is shown on the graphic view as an orange dot.
In the example shown above, the marking head will move following the black arrows between the
two lines to be marked, because we have inserted a crossing point( instead of using the direct red
way)
Use the line position (see position mode or modify parameters) to position correctly the crossing
point.
Using crossing points makes possible to define marking head position circuits sometimes useful for
parts with complex shapes.
Add a D axis rotation – Make the D axis turn of a given angle (depending on options)
If you have the D axis rotation option, you can force the axis to rotate during the marking. This
feature is available only is the rotation axis is configured in generator mode (see marking parameters
Enter the desired rotation angle in degrees and confirm with .
Add Z Sensor or Z Electric ascent.(depending on options)
If you have the option third Z Sensor axis or Z electric, you can force the axis to ascent during the
marking. This feature is available only if the marking file is configured to work with Z sensor axis or Z
electric. (See marking parameters)