Zone Setup Premier Elite 24,24-W, 48,48-W, 88, 168 & 640 Installation Manual
52 INS176-9
Attributes for Moment or Latch Keys
Select attributes by pressing keys 1 to 8 (a letter on the display
means the attribute is selected, a Dot on the display means the
attribute is not selected).
The following attributes are only available for ‘Moment Key’ or ‘Latch
Key’ zone types.
I - INSTANT ARM
When using a key switch, the area will arm instantly.
P - PART ARMING
When using a key switch, the area will ‘Part’ arm.
F – FULL ARM DISABLE
When using a key switch to ‘Full’ arm an area, the key switch is
disabled once the area is armed.
D - DISARM ONLY
The key switch cannot be used for ‘Arming’ (it can only be used for
‘Disarming’).
F - SILENTARMING
When arming using a key switch, the selected areas will arm silently.
T - TIME ARM DISABLE
Activation of the key switch will override the ‘Time Arming’ feature on
the control panel and prevent it from operating until the zone is
reinstated.
K - KEY TUBE
A key switch zone type with this attribute will log when the zone is
activated and also when the zone is restored.
Attributes for Custom Zones
Select attributes by pressing keys 1 to 8 (a letter on the display
means the attribute is selected, a Dot on the display means the
attribute is not selected).
The following attributes are only available for ‘Custom’ zone types.
I - INTERNAL
Activation of this zone (when armed) will cause the internal sounders
to activate.
B - BELL/STROBE
Activation of this zone (when armed) will cause the external
sounder/strobe to activate.
M - MONITOR 24Hr
The zone is armed at all times.
C - ENABLE COMS
Activation of this zone (when armed) will cause the area ‘Alarm’
output to activate.
Any Custom zone with this attribute will activate both the
internal and external sounders even if they are not enabled
above.
W - WARNING REQ.
If the zone remains Active for the duration of the ‘Warning Delay’
timer (see page 63
),
a warning tone will occur every 30 seconds for 3
minutes (or until a code is entered or
R
is pressed).
If MONITOR 24Hr is enabled, an internal alarm will occur after
the Warning Delay.
Zone Areas 24/48/88/168
The 24 can be divided into two separate areas of protection, the 48 can
be divided into four separate areas of protection, the 88 can be divided
into eight separate areas of protection, and the 168 can be divided into
sixteen separate areas of protection. This allows different parts of a
building to be armed and disarmed independently from each other. By
default all zones are assigned to area A, but if required, a zone can be
assigned to any number of areas.
If a zone is assigned to more than one area, it will only be
recognised by the system when all areas it is assigned to, are
armed.
Zone Areas 640
The 640 can be divided into sixty four separate areas of protection. This
allows different parts of a building to be armed and disarmed
independently from each other. By default all zones are assigned to area
A, but if required, a zone can be assigned to any number of areas.
If a zone is assigned to more than one area, it will only be
recognised by the system when all areas it is assigned to, are
armed.
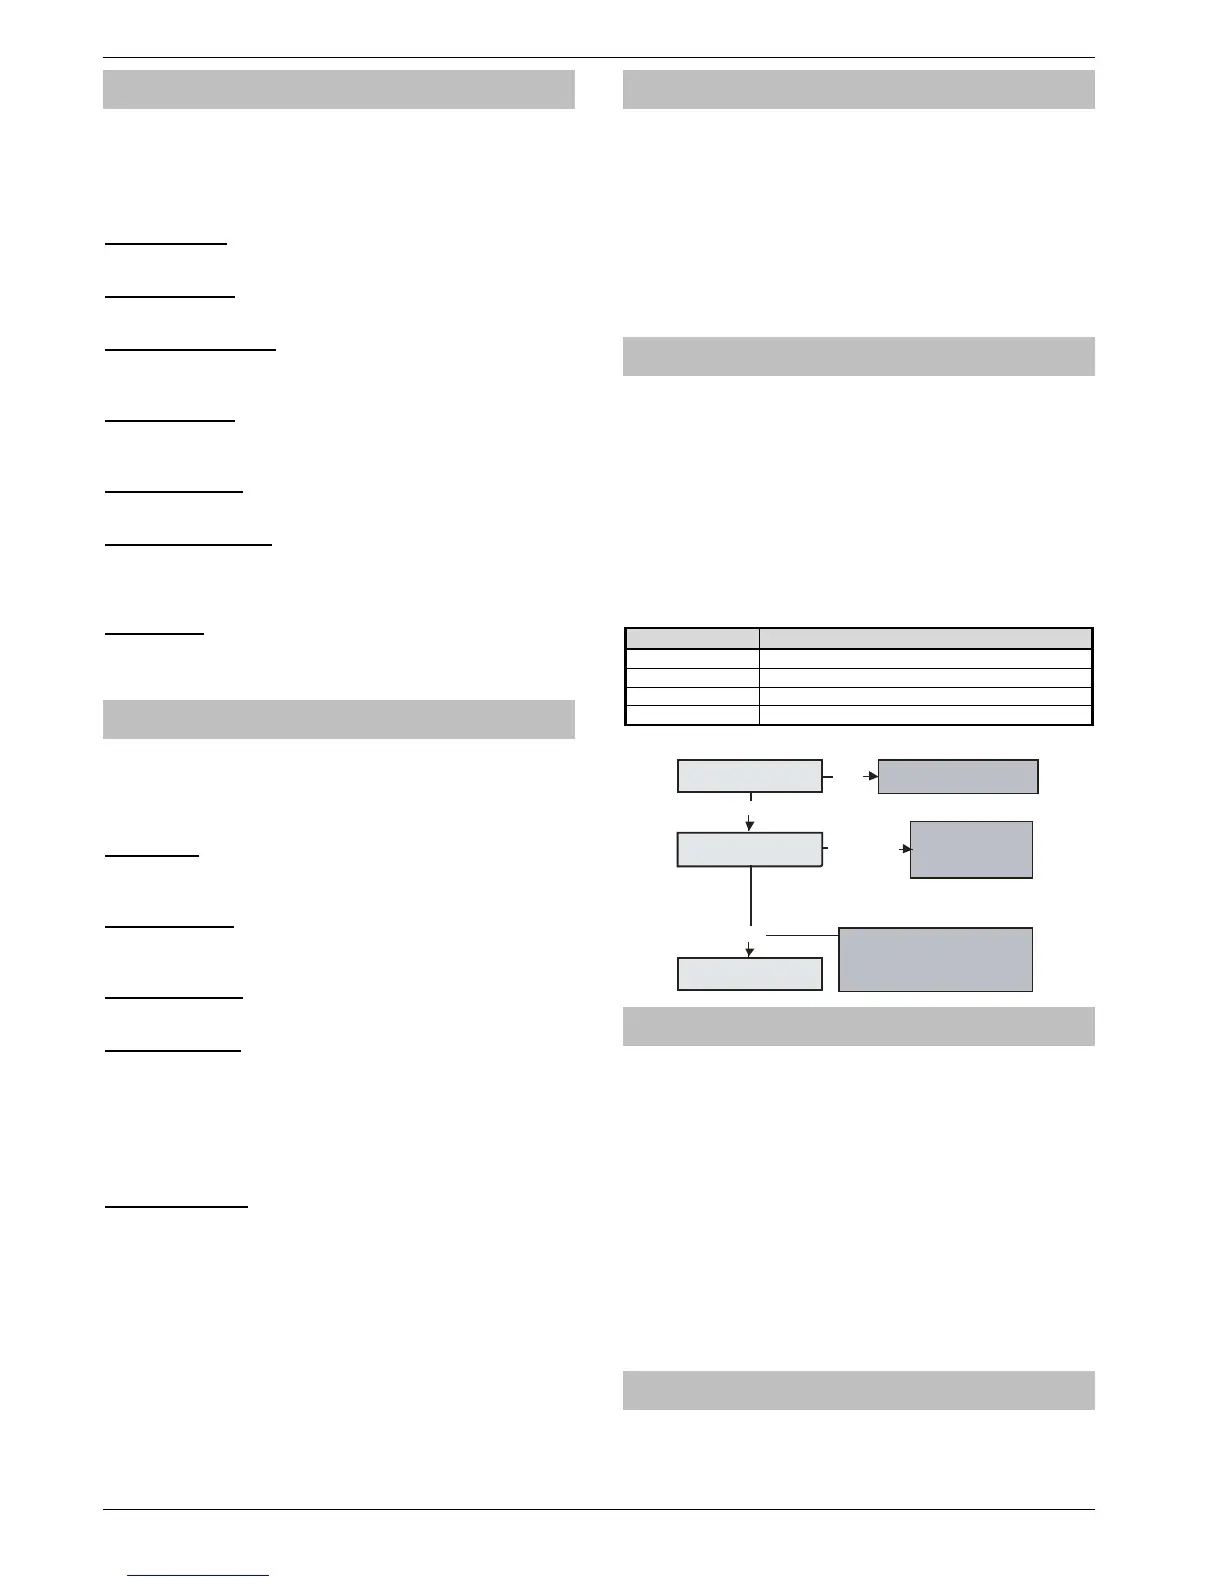
Programming of Zone Areas for the 640 has additional requirements.
Areas on the 640 are divided into 4 sets of 16 areas identified by the
table below.
Area Groups Area's
1 A,B,C,D,E,F,G,H,I,J,K,L,M,N,O,P,
2 A,B,C,D,E,F,G,H,I,J,K,L,M,N,O,P,
3 A,B,C,D,E,F,G,H,I,J,K,L,M,N,O,P,
4 A,B,C,D,E,F,G,H,I,J,K,L,M,N,O,P,

 Loading...


