43
BASIC OPERATIONS
PREPARATION FOR PHOTOGRAPHY
Applying the power supply
1 Carefully check the power cord connection.
For details about the connection, see "CONNECTING THE POWER CORD" on page 27.
2 Turn on any external connection device.
3 Turn ON ( ) the of the instrument.
4 Make sure that the title screen and the Monitor screen are displayed.
Right after the power is turned on, nothing is displayed for a few moments. This delay is
normal. Wait until the title screen appears.
Patient setting
1 Make sure the main Monitor screen is on.
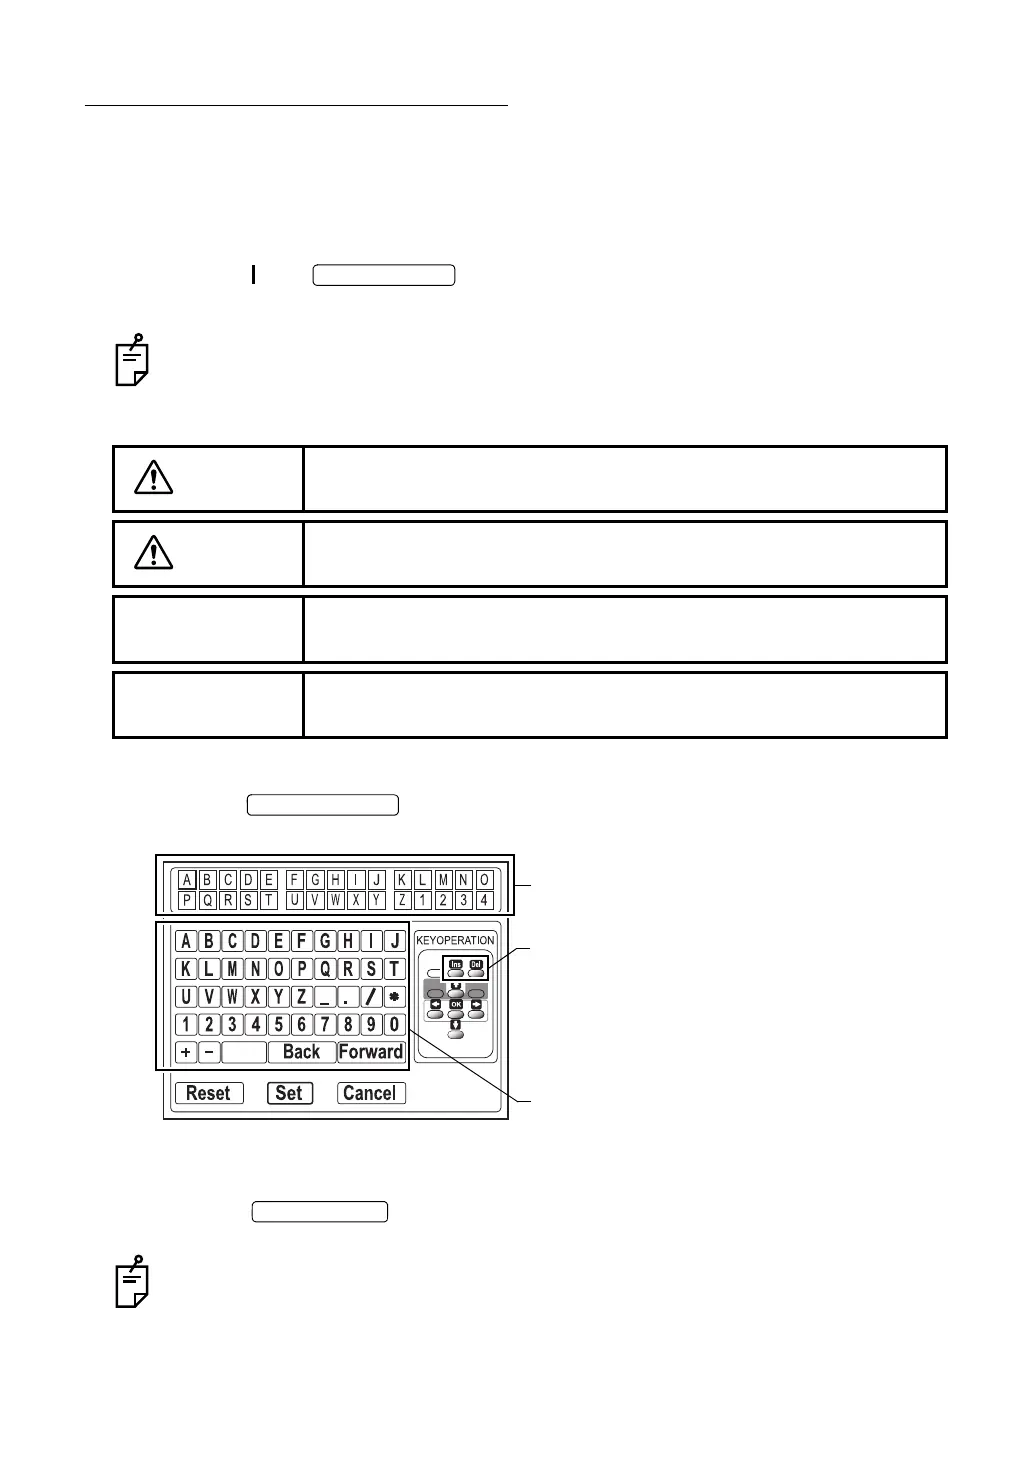
2 Press the , and the ID number input screen appears. (Only when TRC-
NW8F is used in the "STAND ALONE" setting.)
3 Use the cursor to move to the character to be input. (Only when TRC-NW8F is used in the
"STAND ALONE" setting.)
4 Press the of the instrument to select the character. (Only when TRC-
NW8F is used in the "STAND ALONE" setting.)
The cursor character in the ID number display unit is changed to the selected character.
Then, the cursor moves to the right. To move the cursor in the ID number display unit to
the left, select "Back" in the character selection unit. To move it right, select "Forward".
CAUTION
To avoid electric shock, do not touch the external connection terminal
and the patient at the same time.
CAUTION
To avoid injury to the patient's face and hands, be sure to operate the
chinrest for height adjustment while directly watching the patient.
NOTE
If the patient wears glasses or contact lenses, remove them first.
NOTE
To ensure correct imaging, adjust the table height so the patient has
his/her chin placed centrally on the chinrest.
ID number display unit
Character selection unit
Ins key: Each time you press this key, a space is
inserted into the selected place and the
characters after it are moved to the right.
Del key: Each time you press this key, the character
at the selected place is deleted and the
characters after it are moved to the left.