1.4. Mounting Instructions
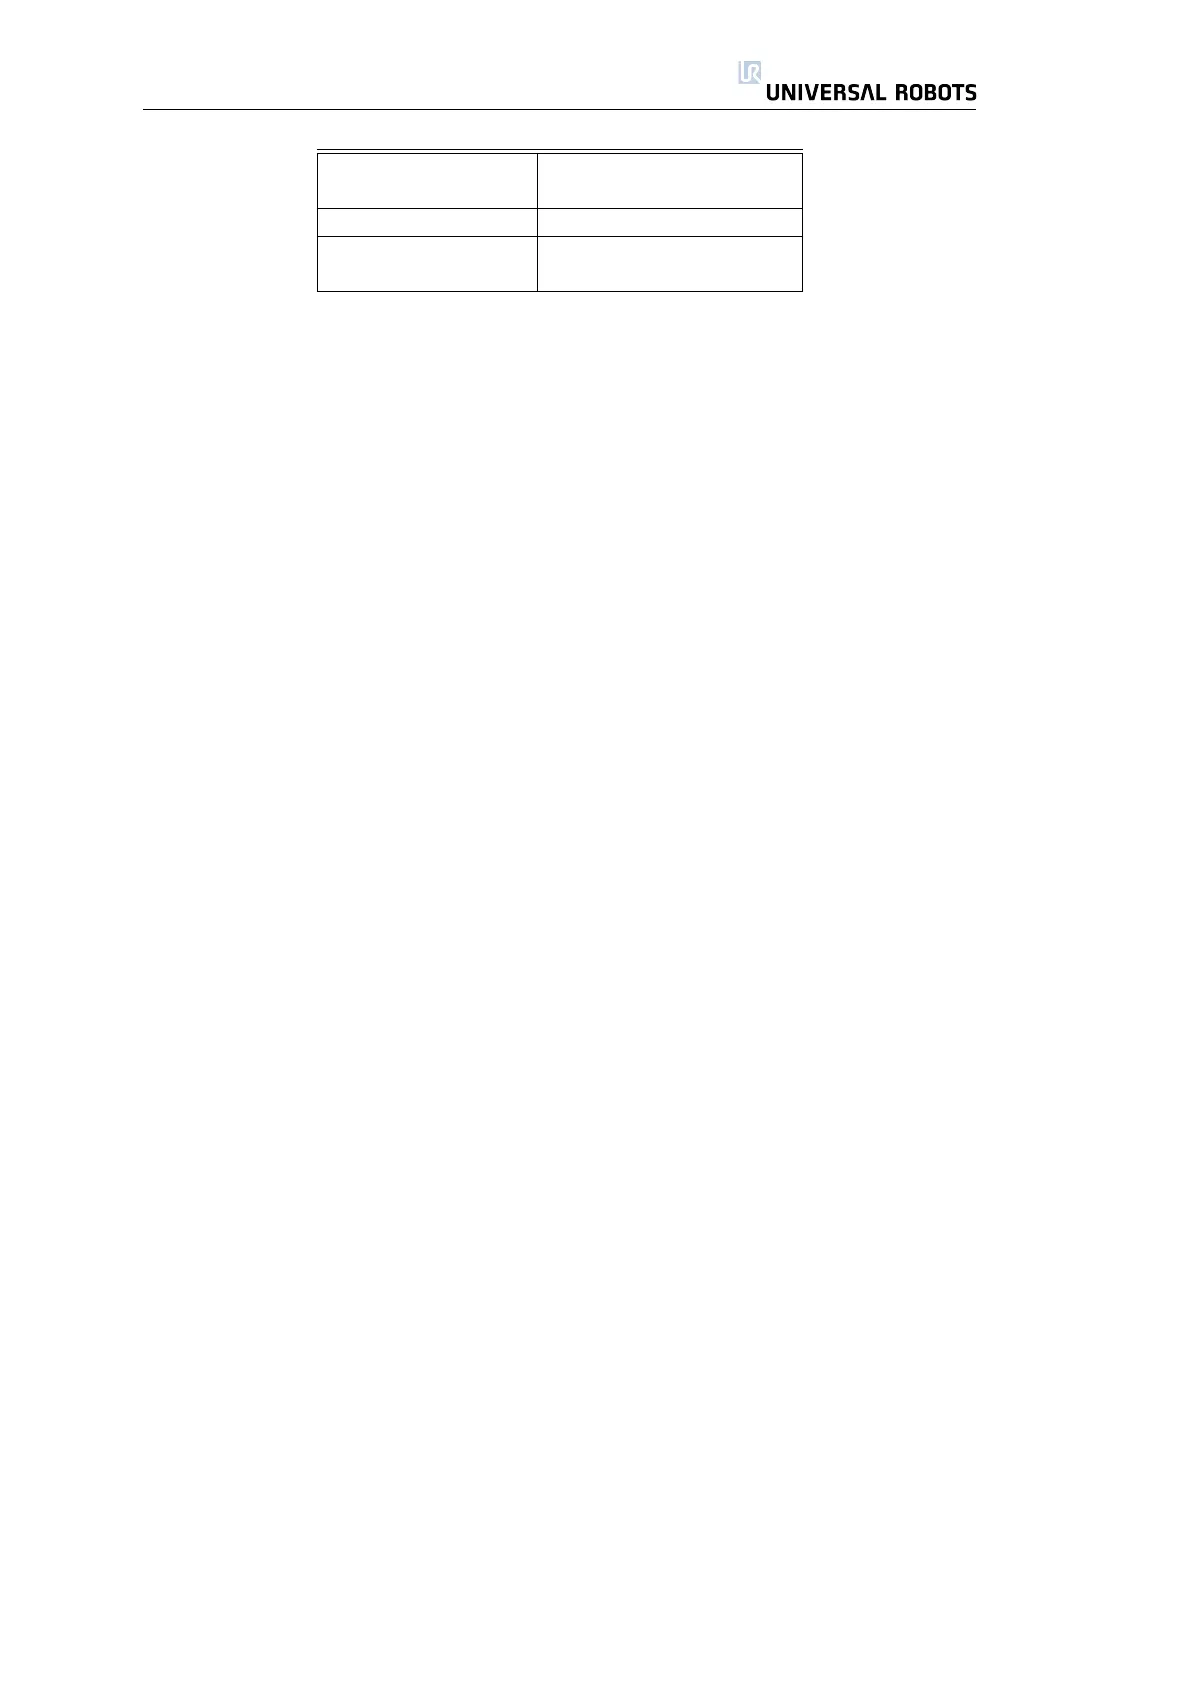
Input 100-120VAC Min. 16A current rating
Input 200-240VAC Min. 8A current rating
Frequency 50-60Hz
Stand-by Power 5W
Typical ’On’ Power 200W
Table 1.1: Specifications for mains connection
1.4.4 Mounting the Controller Box
The controller box can be mounted using the two holes on the back of the
controller box, or it can be placed on the ground.
1.4.5 Mounting the Touch Panel
The touch sensitive screen can be hung on a wall or on the controller box. Extra
fittings can be bought.
1.4.6 Connecting the Robot Cable
The cable from the robot must be plugged in to the connector at the button
of the controller box. Ensure that the connector is properly locked. Connecting
and disconnecting the robot cable may only be done when the robot power
is turned off, which is easily ensured by pushing the emergency stop button on
the front side of the controller box.
1.4.7 Connecting the Mains Cable
The mains cable from the controller box has a standard IEC plug in the end.
Connect a country specific mains plug or cable to the IEC plug. Remember
to use a cable with specifications as shown with the mains specifications in ta-
ble 1.1.
The controller box should be connected to earth by the mains cable. If other
earth connections are needed for external equipment, please use the M8 screw
at the bottom right corner of the controller box, as shown below.
15 UR-6-85-5-A

 Loading...


