3.3. Robot Control
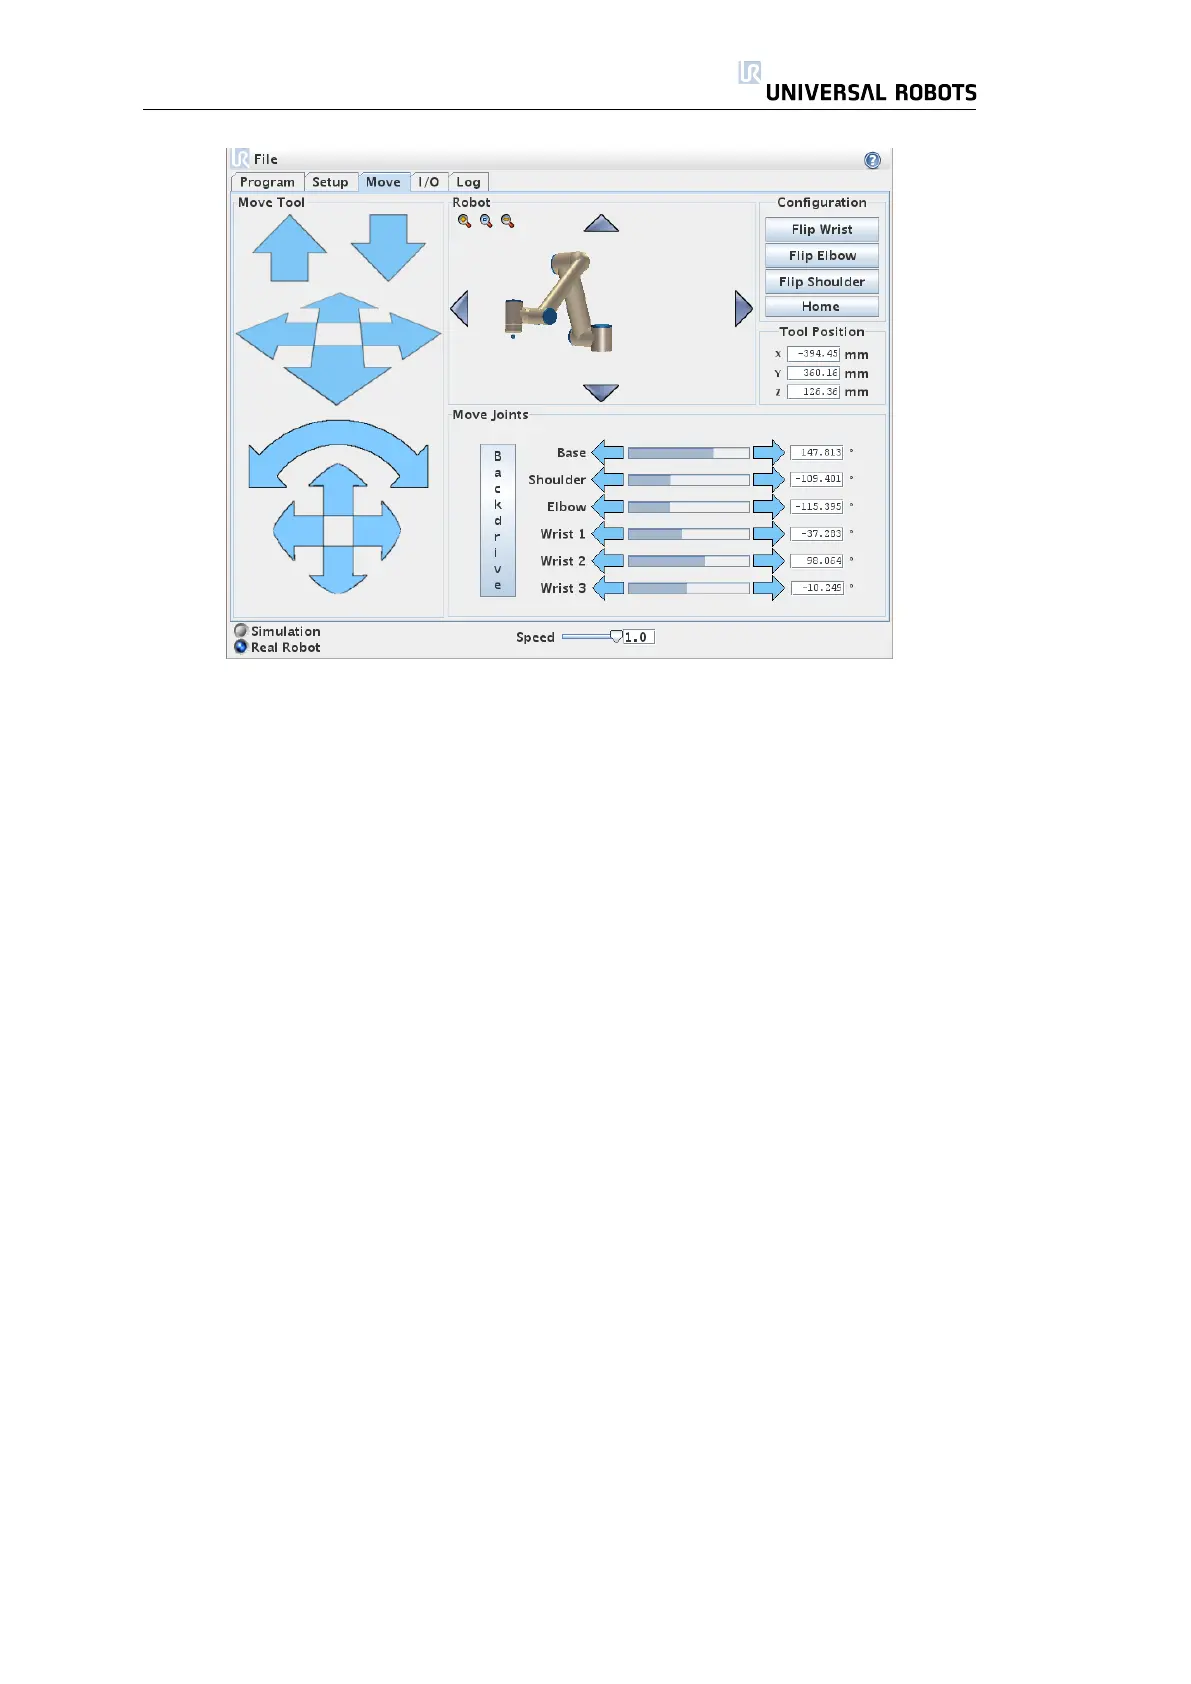
Robot
The current position of the robot is shown. Push the magnifying glass icons to
zoom in/out and the arrow icons to translate or rotate the view. The viewing
angle of the 3D drawing should match your view of the real robot.
Move Tool
• Holding down a translate arrow (top) will move the tool-tip of the robot
in the direction indicated.
• Holding down a rotate arrow (button) will change the orientation of the
robot tool in the indicated direction. The point of rotation is the TCP, drawn
as a small green ball.
Note: Release the button to stop the motion at any time!
Move Joints
Allows the individual joints to be controlled directly. Each joint can move from
−360
◦
to +360
◦
, which are the joint limits illustrated by the horizontal bar for each
joint. If a joint reaches its joint limit, it cannot be driven any further away from 0
◦
.
Backdrive
While the ’Backdrive’ button is held down, it is possible to physically grab the
robot and pull it to where you want it to be. If the gravity setting (see 3.3.4) in
the Setup tab is wrong, or the robot carries a heavy load, the robot might start
moving (falling) when the ’Backdrive’ button is pressed. In that case, just release
the ’Backdrive’ button again.
39 UR-6-85-5-A

 Loading...


