VideoIQ User Guide65
Configuring HD Video Settings
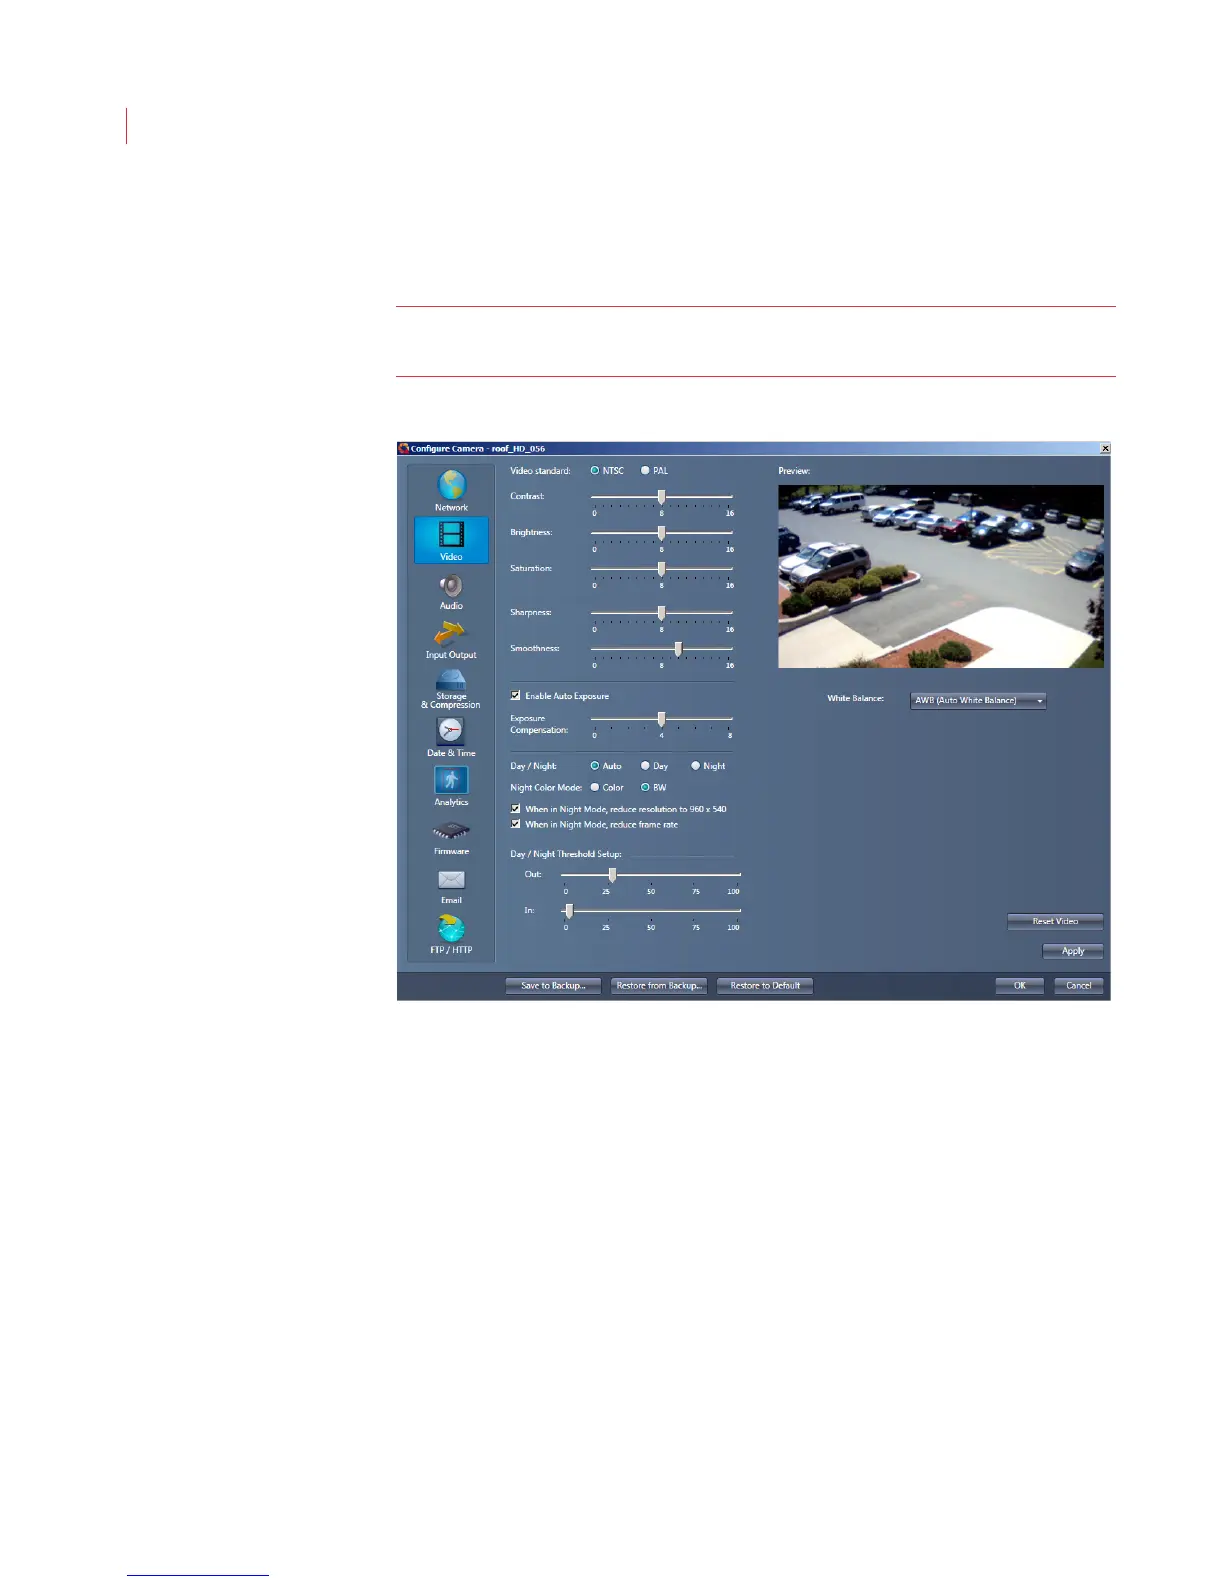
1. When the Configure Camera window opens, click Video.
Note: If you’re using an Encoder you will not see this button. If you’re
configuring a D1 camera see Configuring D1 Basic Video Settings below.
2. Determine the video output by selecting NTSC or PAL.
3. Use the sliders to set image Contrast, Brightness, Saturation, Sharpness
and Smoothness.
4. Select the Enable Auto Exposure checkbox to enable automatic exposure
on the camera. Use the Enhance Compensation selector to enhance bright
or dark areas of the scene.
5. The Day/Night settings activate an IR cut filter that is in front of the sensor to
remove the IR during daytime operation for correct colorimetry.
Auto: The IR cut filter is automatically enabled - In during daytime and
Out at night for maximum sensitivity.
Day: The IR filter is always in the light path.
Night: The IR filter is always out of the light path.
6. When the camera is in Night Mode, the Color or BW settings determine if the
video picture is in color or black and white.