4-10 Configuring the NanoLockSpray source
2. Carefully remove the capillary from its case by lifting it vertically while
pressing down on the foam with two fingers.
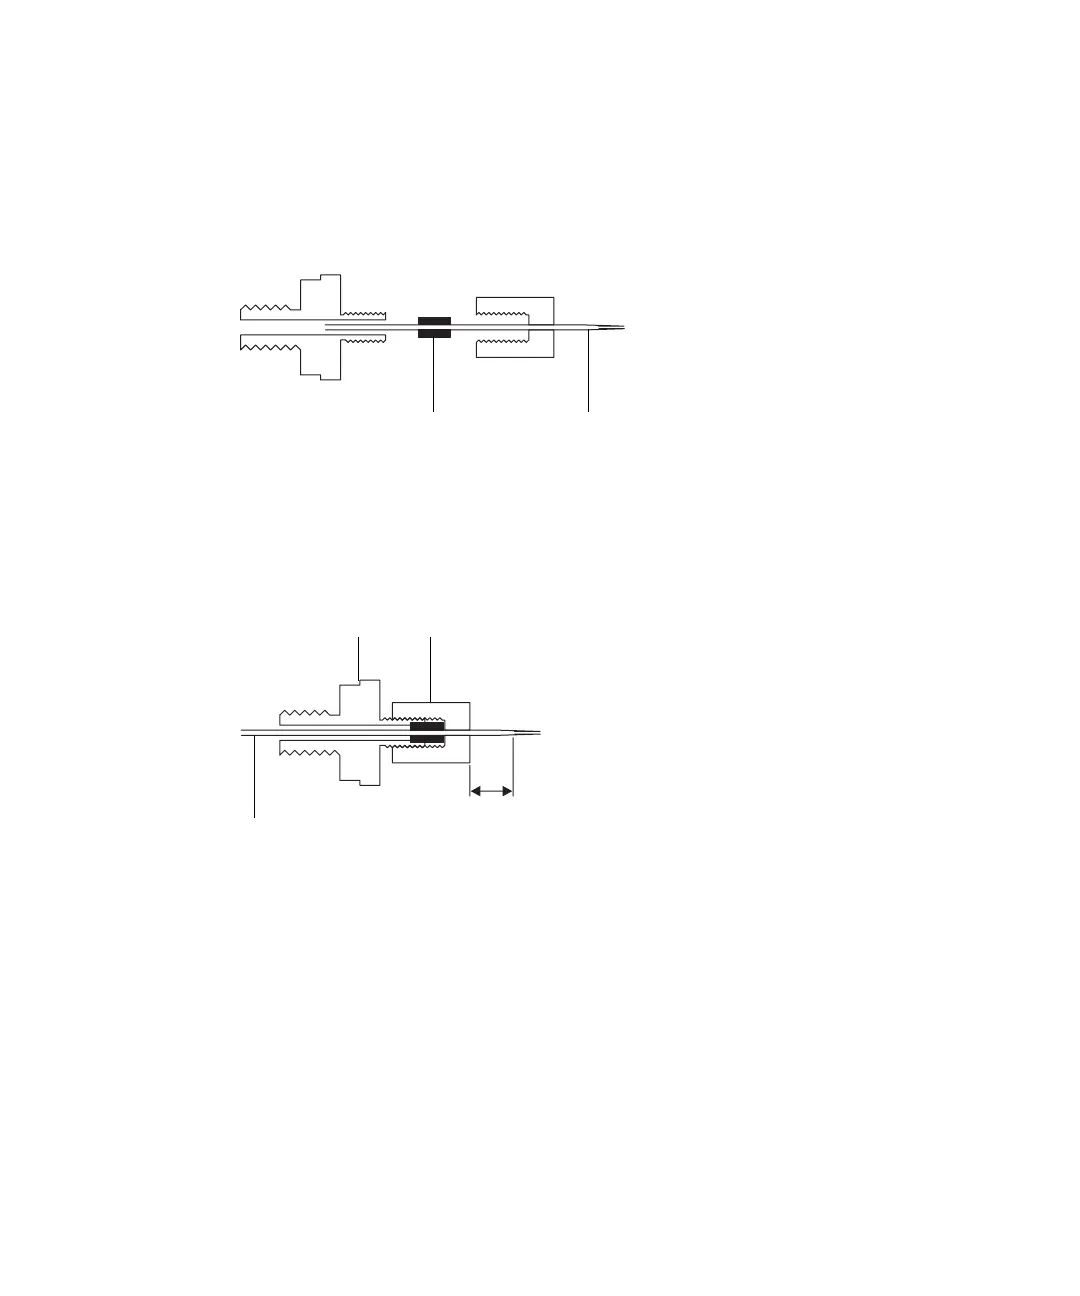
3. Over the square-cut end of the capillary, pass first the knurled nut, then
approximately 5 mm of conductive elastomer, and finally the union.
4. Finger tighten the nut onto the union.
5. Ensure that the tip of the glass capillary protrudes about 7 mm from the
front of the knurled nut, as measured from the end of the nut to the
shoulder of the glass capillary, and then full tighten the nut onto the
union.
6. Load sample into the capillary using either a fused silica syringe needle
or a GELoader tip.
Tip: Shake the loaded capillary to move the liquid to the tip of the
sprayer.
7. With the sprayer mounted on the adjuster platform, screw the union
back into the assembly; finger-tight is sufficient.
8. In the MassLynx Tune window ensure the Capillary parameter is set to
0V.
9. Push the sprayer platform into the source (see page 4-5).
Union
Knurled nut
Glass capillary
Elastomer
Union Knurled nut
Glass capillary
7 mm