PergoTex II/ PergoTex II LED
Instructions for assembly
We reserve the right to make technical changes
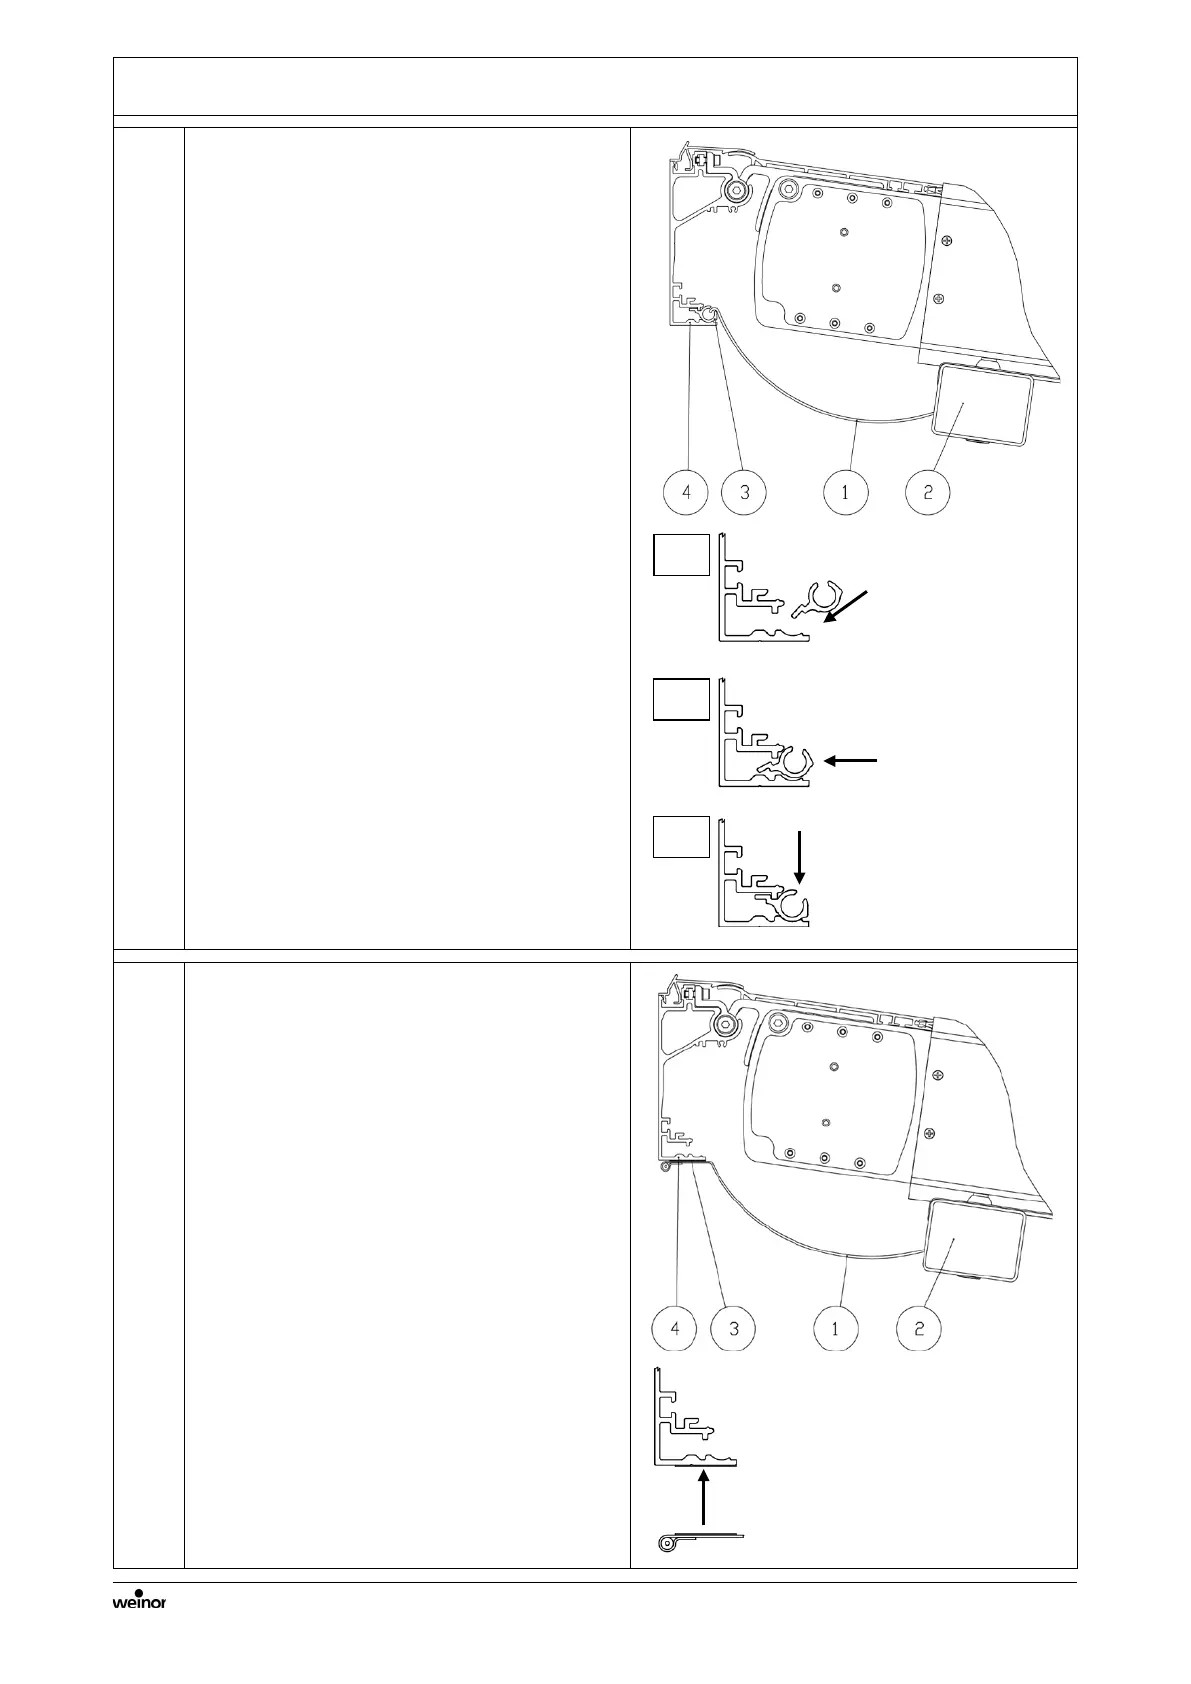
5.12 Installation of wall sealing gap fabric
Connecting the wall connection fabric to
the wall gap sealing profile:
with standard and basic up to 18°
Note:
The wall gap sealing fabric (1) has already
been welted at the first transom (2) in the
factory. The "wall gap sealing beaded
profile" (3) is situated at the free end of the
fabric.
1. Turn the "wall bracket beaded profile"
(3) slightly until the lug is pointing
downwards angled.
2. Insert into the u-shape opening on the
wall gap sealing profile (4).
3. Press from above against the "wall
connection beaded profile" (3) until it
anchors.
Note:
If the wall connection fabric is slightly
creased after the installation, check the two
clamping plate screws 6x50 at the front of
the beaded profile. These should be
adequately tensioned. If not, dismount the
beaded profile and tighten the chipboard
screws 6x50 (not too tight otherwise the
beaded profile could bend).
Connecting the wall connection fabric to
the wall gap sealing profile:
with standard and a pitch of 18° or more
Note:
The wall gap sealing fabric (1) has already
been welted at the first transom (2) in the
factory. Part of the Velcro connection (3) is
located at the other end of the fabric.
• Mount the wall connection fabric with a
part of the Velcro fastener connection
(3) to the wall gap sealing profile (4)
and secure with the other part of the
Velcro fastener connection.

 Loading...