PergoTex II/ PergoTex II LED
Instructions for assembly
We reserve the right to make technical changes
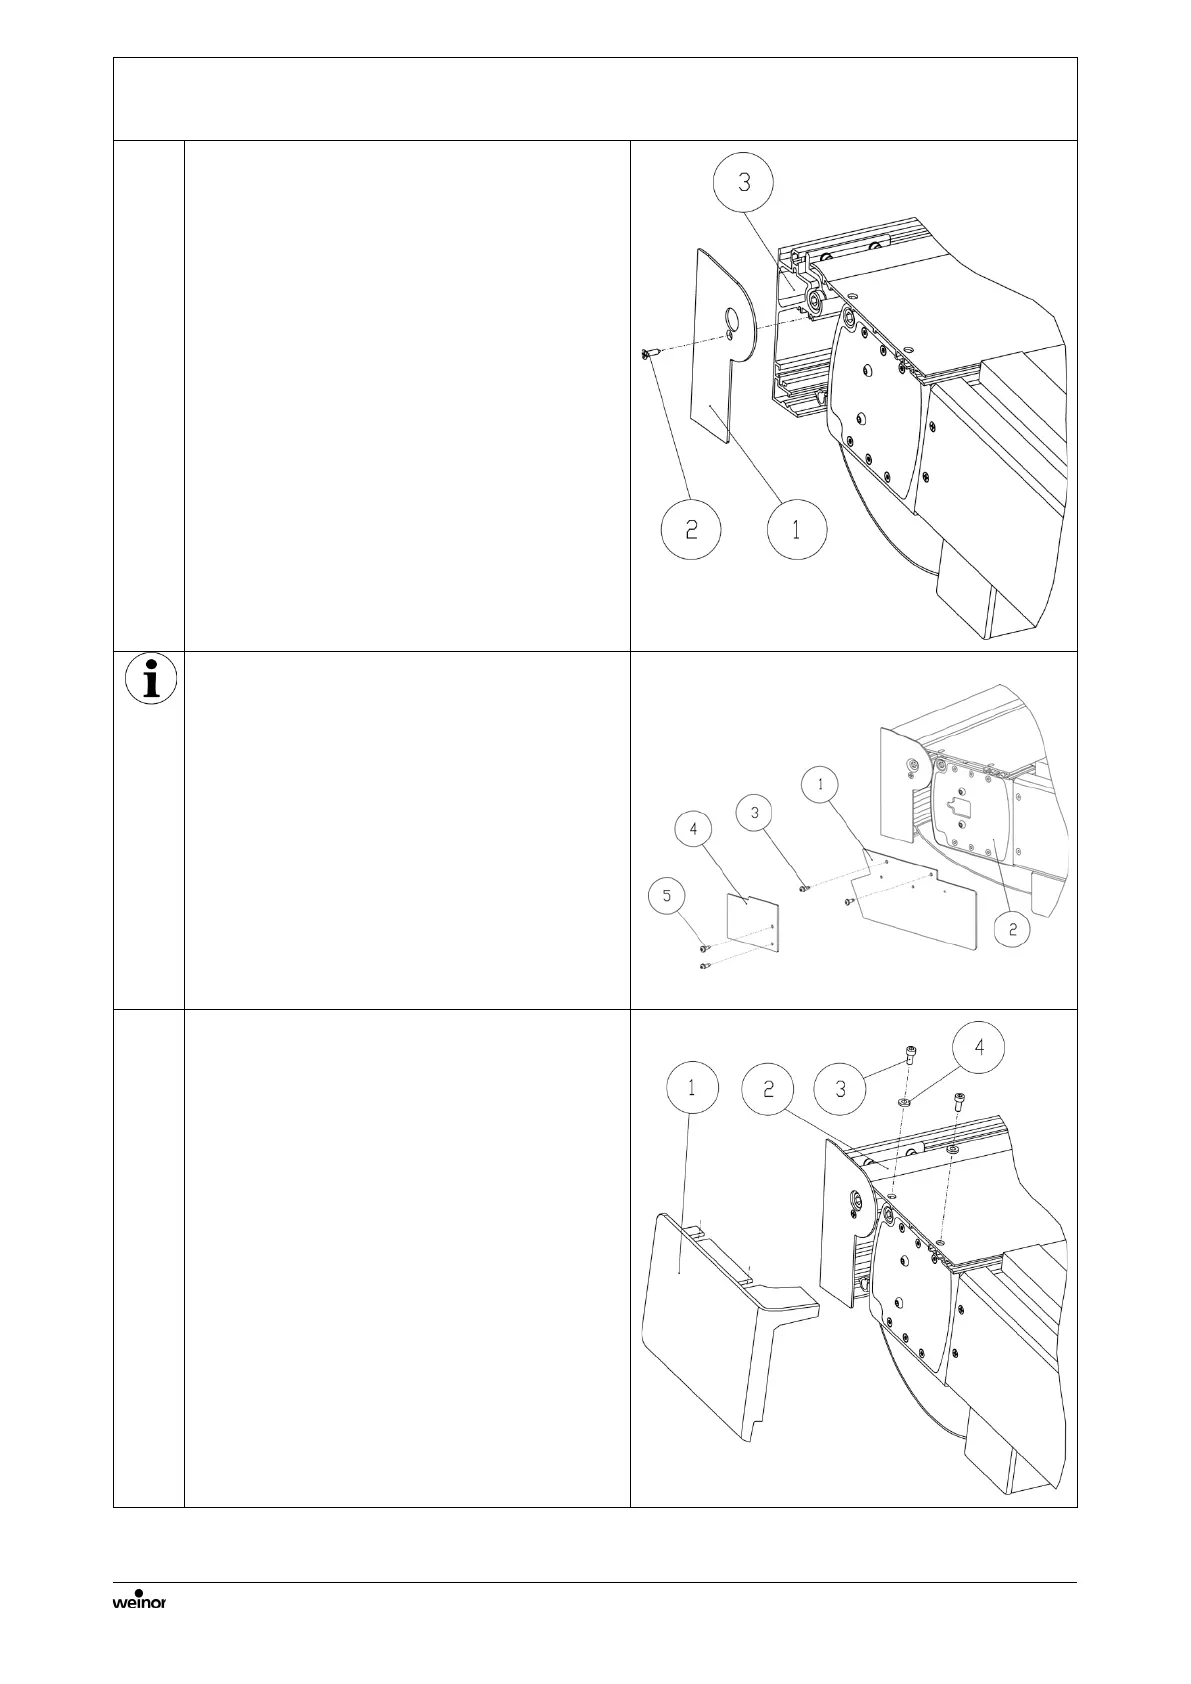
5.18 Installation of the "wall cap sealing profile cover plate" and " wall gap sealingprofile
cover cap"
Installation of the "wall gap sealing
profile cover plate"
1. Bolt the "wall gap sealing profile cover
plate"“ (1) to the wall gap sealing profile
(3) with a countersunk self-tapping
screw 4.2x9.5 (2).
Note:
If the power supply runs sideways into the
wall gap sealing profile, a "wall gap sealing
profile cover plate" with the corresponding
recess will be included in the delivery.
Fitting the optional "rain guard"
1. Hold the "rain guard" (1) up against the
end caps cover (2) and screw on using
4.2 x 13 drilling screws (3).
2. Hold the wall rain guard (4) up against
the rain guard (1) and mount using
4.2 x 13 drilling screws (5)
Note:
The rain guard is installed to protect
against sideways water ingress and can be
ordered as an option. Please note the
enclosed supplement on fitting the "rain
guard".
Installation of the "wall gap sealing
profile cover cap"
1. Plug the "wall gap sealing profile cover
cap" (1) with its stud into the groove of
the "safety shield retaining profile" (2)
and bolt from above with 2 socket head
cap screws M5x10 (3) and 2 washers
5.3 (4).

 Loading...