PROCEDURE
1 Make sure that the threads of the elastic stud (008, Figure 4-3) and of the pre-tensioner
are smooth and clean.
2 Put the applicable pre-tensioner on the elastic stud (008).
2.1 If the piston (002) is attached directly on to the elastic stud (008) (version 1), do
the steps that follow:
2.1.1 Turn the pre-tensioner on the elastic stud (008) until the cylinder (003)
touches the plate (007).
2.1.2 Make sure that there is no clearance at X.
2.1.3 Turn back the pre-tensioner with the related number of turns (refer to the
name plate on the pre-tensioner) to get a clearance at Y.
NOTE: This prevents problems when you remove the pre-tensioner.
2.2 If the piston (002) is attached with the nut (010) to the elastic stud (008) (version
2), do the steps that follow:
2.2.1 Put the pre-tensioner on the elastic stud (008) until the cylinder (003)
touches the plate (007).
2.2.2 Turn the nut (010) on the elastic stud (008) down to the piston (002).
2.2.3 Make sure that there is no clearance at X.
2.2.4 Turn back the nut (010) with the related number of turns (refer to the
name plate on the pre-tensioner) to get a clearance at Y.
NOTE: This prevents problems when you remove the pre-tensioner.
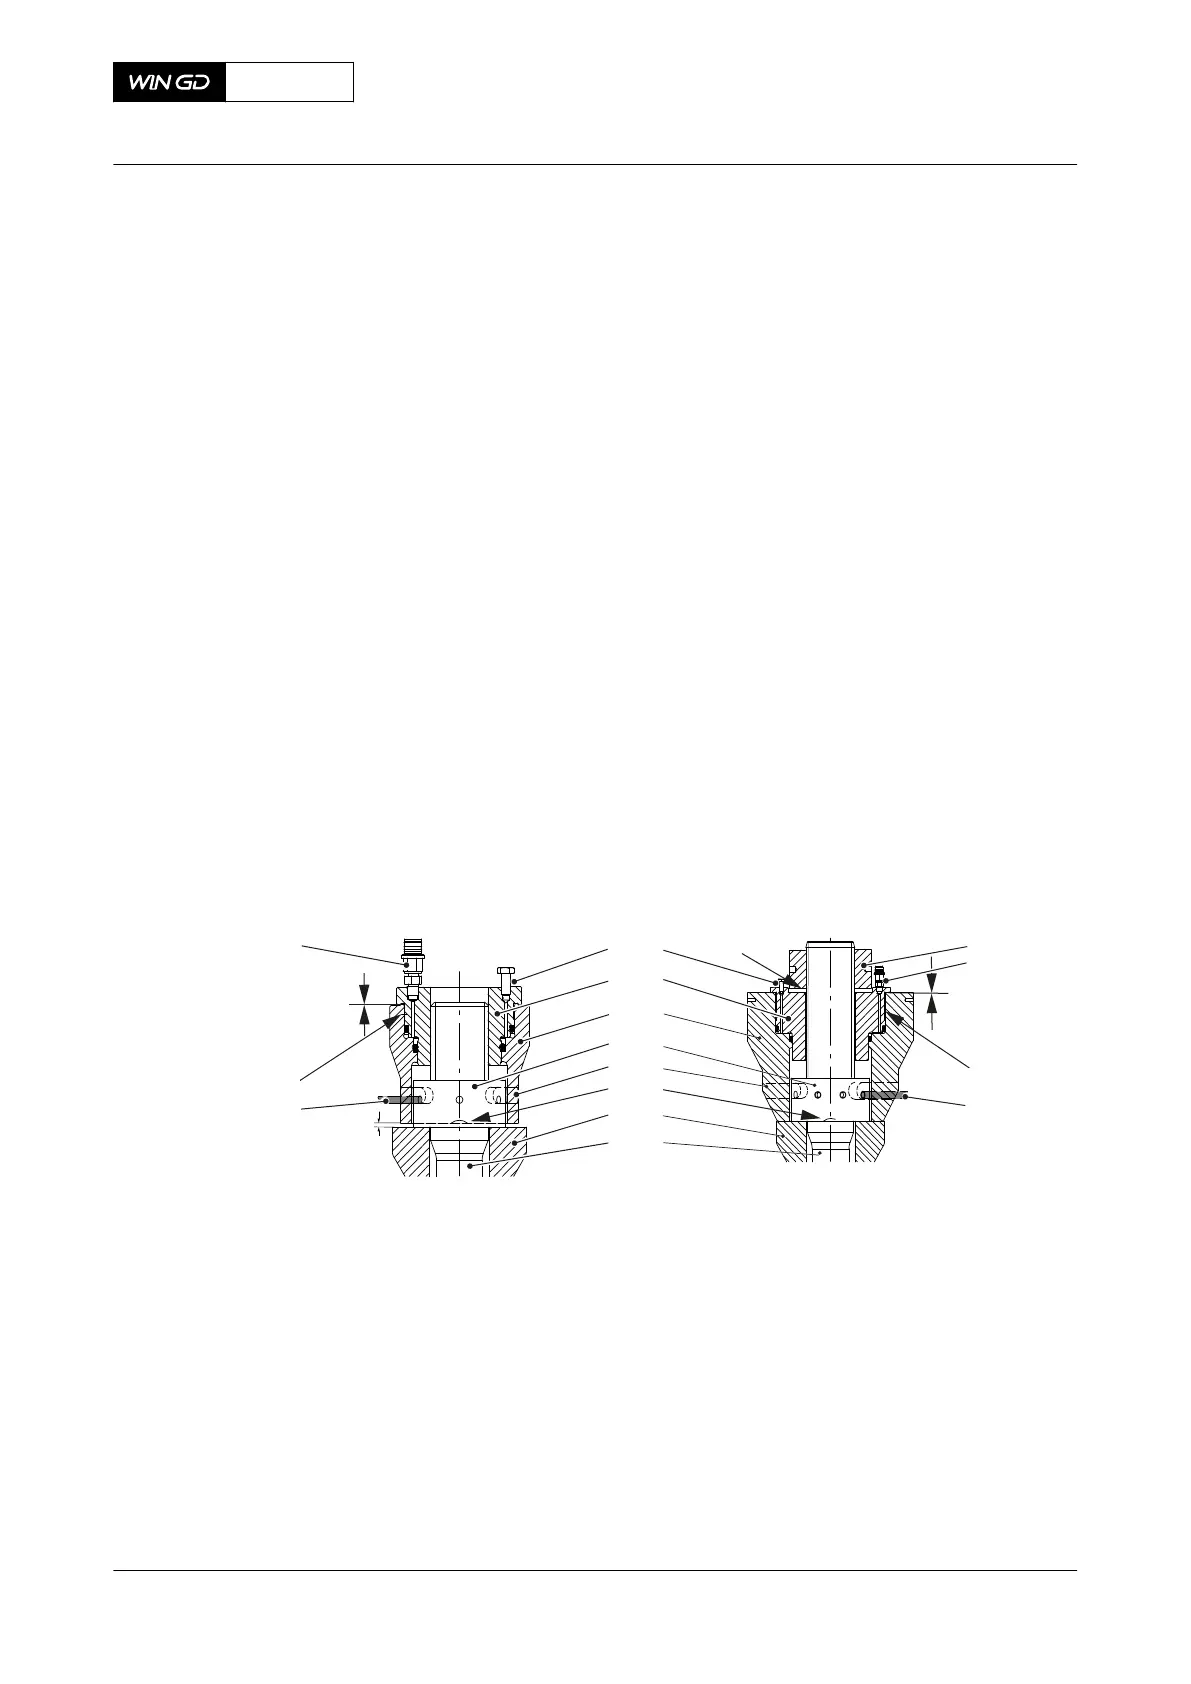
Fig 4-3 Do a check of the pre-tension (examples)
X
Y
X
001 Y
002
003
004
005
006
007
008
010
009
011
012
009
011
012
Version 1 Version 2
00539
3 If necessary, turn back the cylinder (003) a small distance to get good access to the
applicable slot (005) of the pre-tensioner.
4 Connect the pre-tensioner to the HP oil pump or to the hydraulic unit at the connection
(009).
5 Fill the pre-tensioner with oil.
5.1 Open the vent screw (001) on the pre-tensioner.
5.2 Operate the HP oil pump or the hydraulic unit until oil that has no air flows out at
the vent screw (001).
5.3 Stop the HP oil pump or the hydraulic unit to prevent injury.
5.4 Carefully close the vent screw (001) on the pre-tensioner.
6 Slowly increase the pressure to get the related tightening value (refer to the name plate
on the pre-tensioner).
X72DF
AA00-0000-00AAA-360A-A
Maintenance Manual Do a check of the pre-tension
Winterthur Gas & Diesel Ltd.
- 97 - Issue 002 2020-10