Using the Embedded Web Server
1. Open a web browser, and then type the printer IP address in the address field.
• View the printer IP address on the printer home screen. The IP address appears as four sets of numbers
separated by periods, such as 123.123.123.123.
• If you are using a proxy server, then temporarily disable it to load the web page correctly.
2. Click SSeettttiinnggss >> EE--mmaaiill.
3. From the E-mail Setup section, configure the settings.
• For more information on the password, see the list of Email Service Providers.
• For e-mail service providers that are not on the list, contact your provider and ask for the settings.
4. Click SSaavvee.
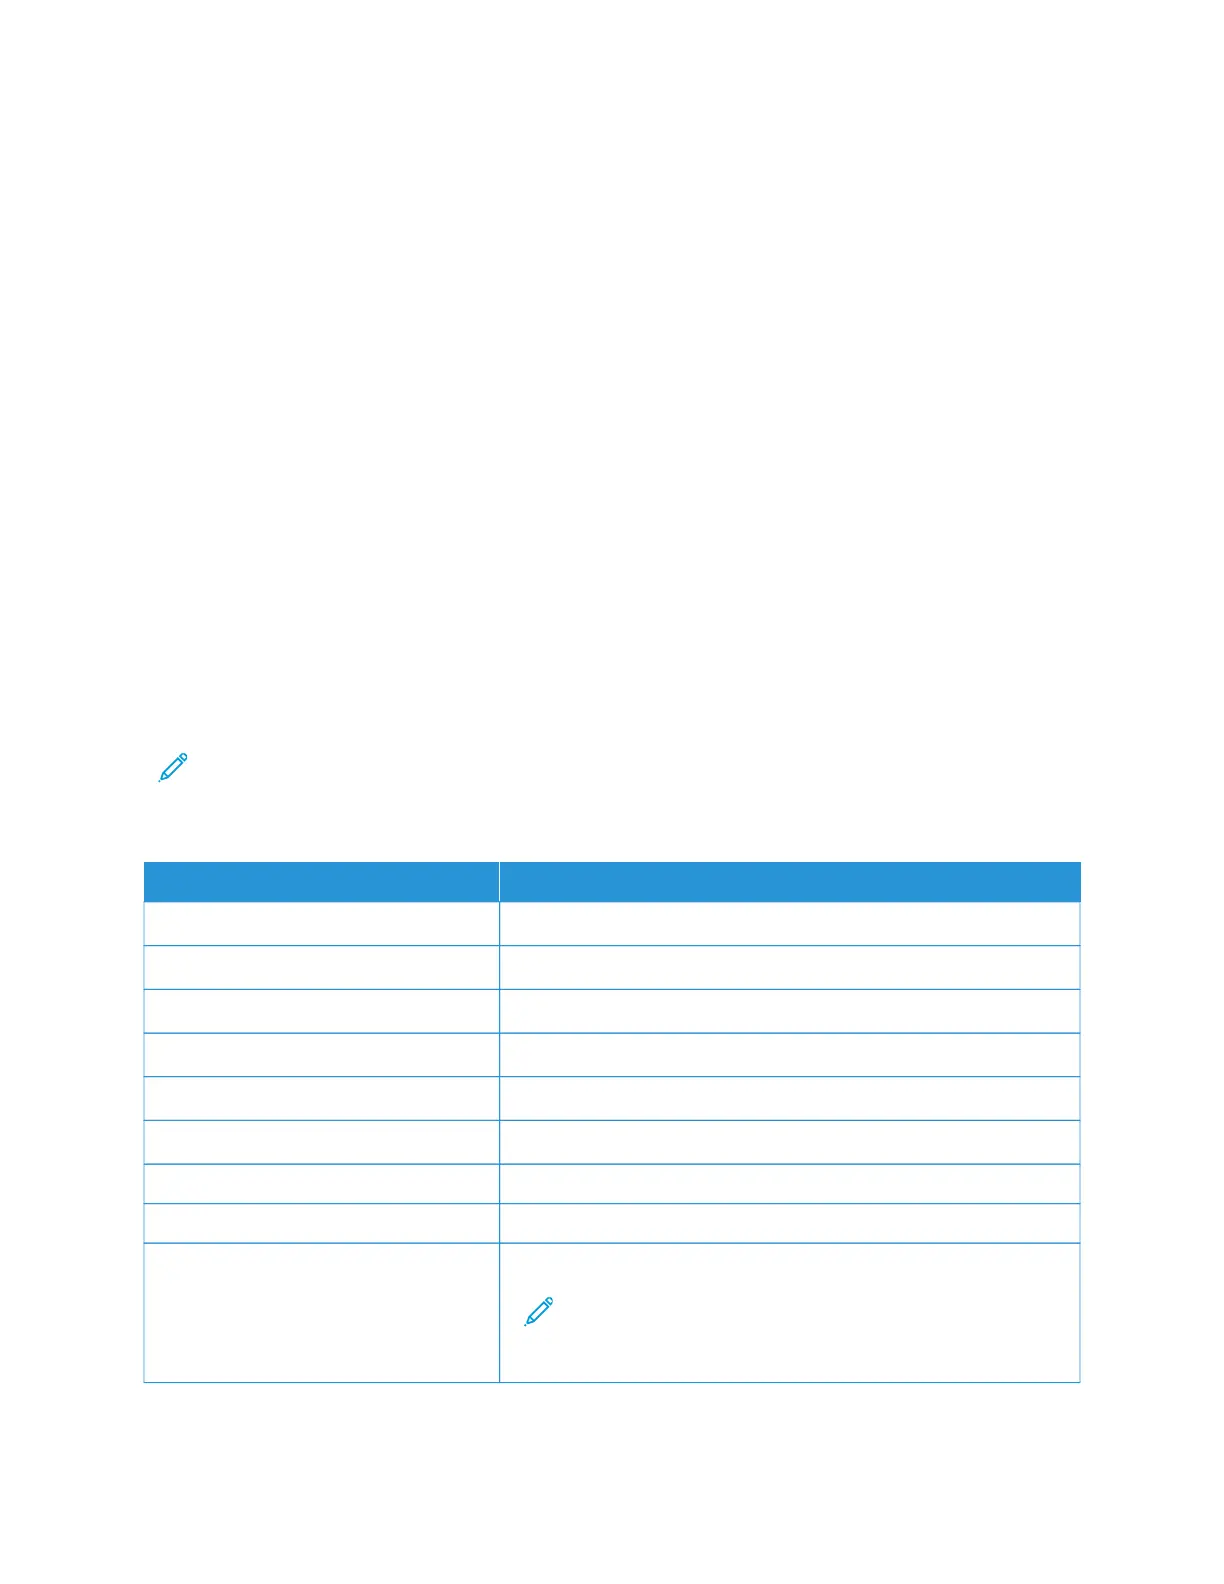
Use the following table to determine the SMTP settings of your e-mail service provider.
EMAIL SERVICE PROVIDERS
To determine the SMTP settings of your email service provider, use the following tables.
Gmail
™
Note: Make sure that two-step verification is enabled on your Google account.
To enable two-step verification, go to the Google Account Security page, log in to your account, then from the
Signing in to Google section, click 22--SStteepp VVeerriiffiiccaattiioonn.
SSEETTTTIINNGG VVAALLUUEE
Primary SMTP Gateway smtp.gmail.com
Primary SMTP Gateway Port 587
Use SSL/TLS Required
Require Trusted Certificate Disabled
Reply Address Your email address
SMTP Server Authentication Login/Plain
Device-Initiated E-mail Use Device SMTP Credentials
Device UserID Your email address
Device Password App password
Note: To create an app password, go to the Google Account
Security page, log in to your account, and from the Signing in
to Google section, click AApppp ppaasssswwoorrddss.
Xerox
®
B305/B315 Multifunction Printer User Guide 55
Set up, Install, and Configure
 Loading...


