7/98
Repair Procedures 4-16 Xerox DocuPrint P8e Service Manual
REP 4.4 Fuser
REP 4.4.1 Fuser Assembly
Removal
1 Switch the printer power off and disconnect the AC power cord.
2 Remove the Print Cartridge (REP 4.5.1).
3 Remove the Face Up Cover (REP 4.1.1).
4 Remove the Front Cover (REP 4.1.2).
5 Remove the Rear Cover (REP 4.1.3).
6 Remove the Top Cover (REP 4.1.4).
7 Remove the Right Side Cover (REP 4.1.5).
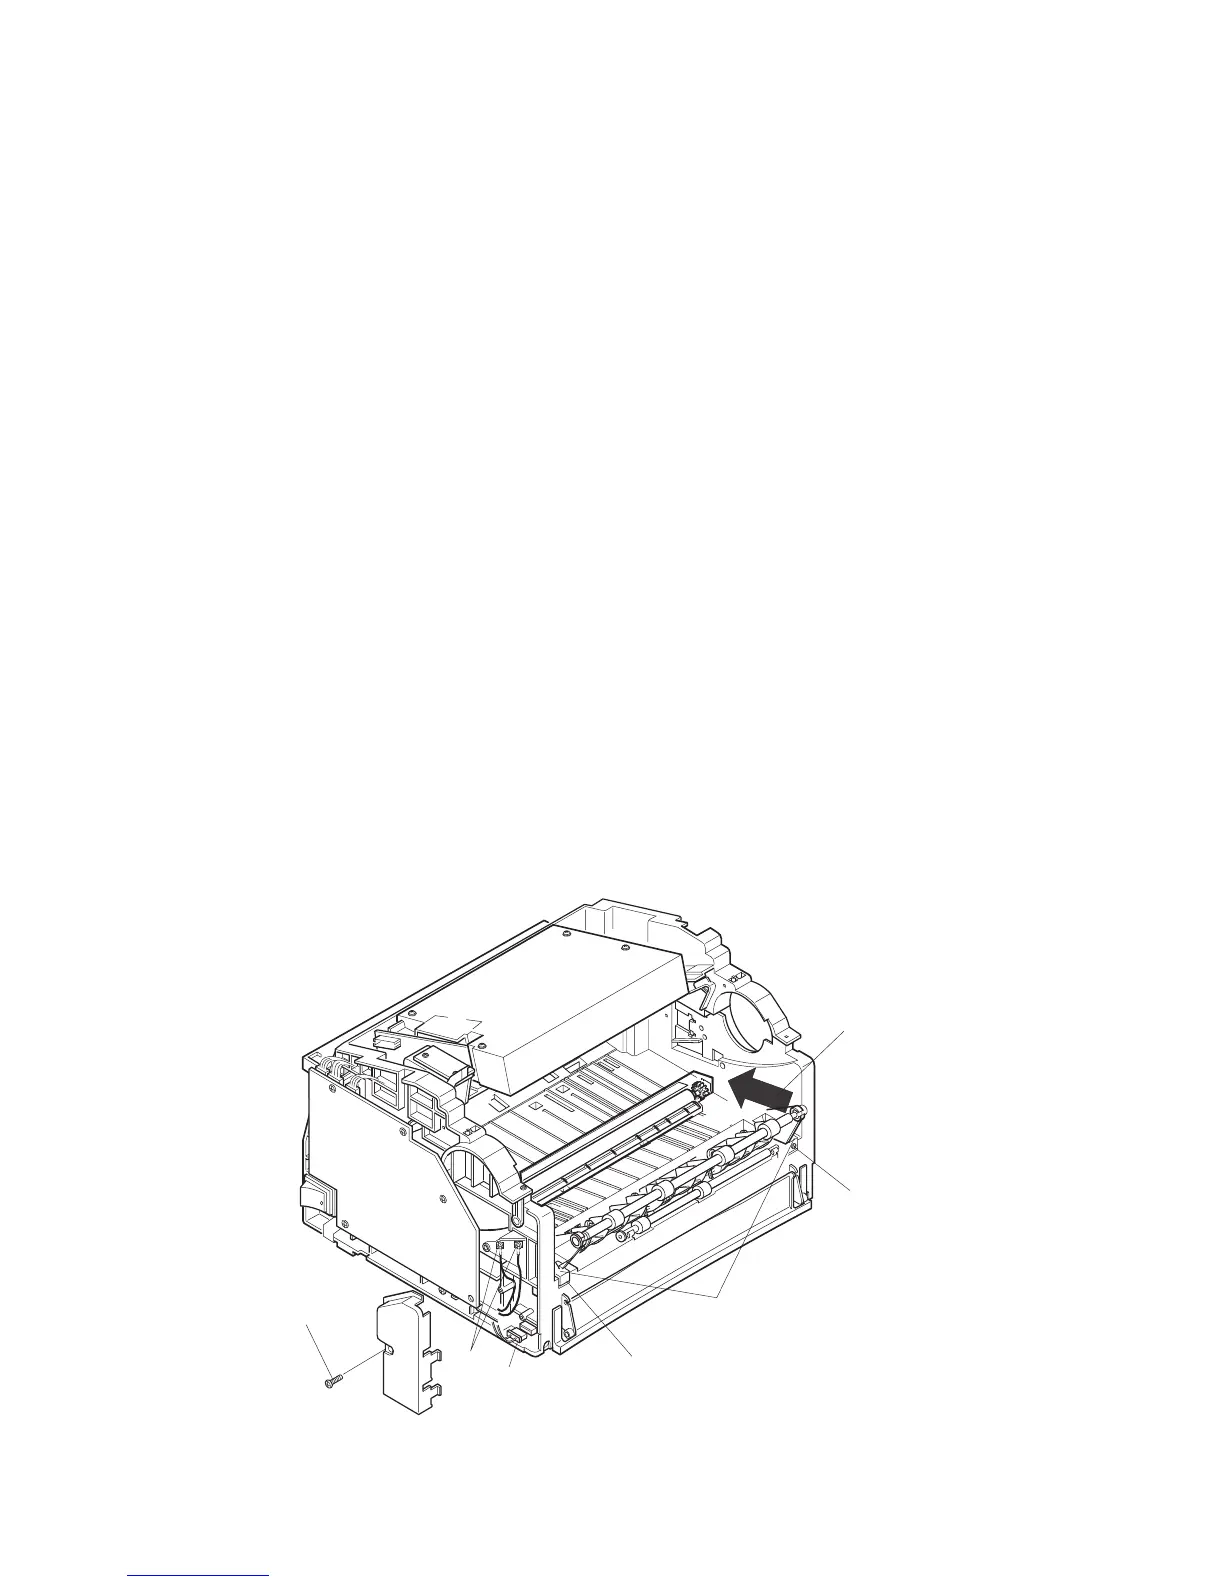
8 Remove the screw that secures the Wire Cap (Figure 4.4.1a). Remove the Wire Cap.
9 Disconnect the Fuser Harness from CN1 on the Engine Controller PWB (Figure 4.4.1a).
10 Remove the two screws that secure the AC power wires to the Fuser Assembly (Figure 4.4.1a).
11 Remove the two screws that secure the Fuser Assembly to the printer frame (Figure 4.4.1a).
12 Use a small screwdriver to carefully release the two locking tabs on the front of the Fuser
Assembly (Figure 4.4.1a).
13 Move the Fuser Assembly to the left until right hinge pin is free of the printer frame.
14 Lift the right end of the Fuser Assembly up approximately 25mm (1in.), and move the right end
toward the rear of the printer. (Figure 4.4.1a)
15 Continue to move the right end toward the rear of the printer until the left end is free of the printer
frame. Remove the Fuser Assembly.
Figure 4.4.1a. Fuser Assembly Removal.
9
8
10
11
12
12
14
P8e_225

 Loading...


