7/98
Repair Procedures 4-30 Xerox DocuPrint P8e Service Manual
REP 4.6.4 LSU (Laser) Assembly
Removal
1 Switch the printer power off and disconnect the AC power cord.
2 Remove the Face Up Cover (REP 4.1.1).
3 Remove the Print Cartridge (REP 4.5.1).
4 Remove the Front Cover (REP 4.1.2).
5 Remove the Rear Cover (REP 4.1.3).
6 Remove the Top Cover (REP 4.1.4).
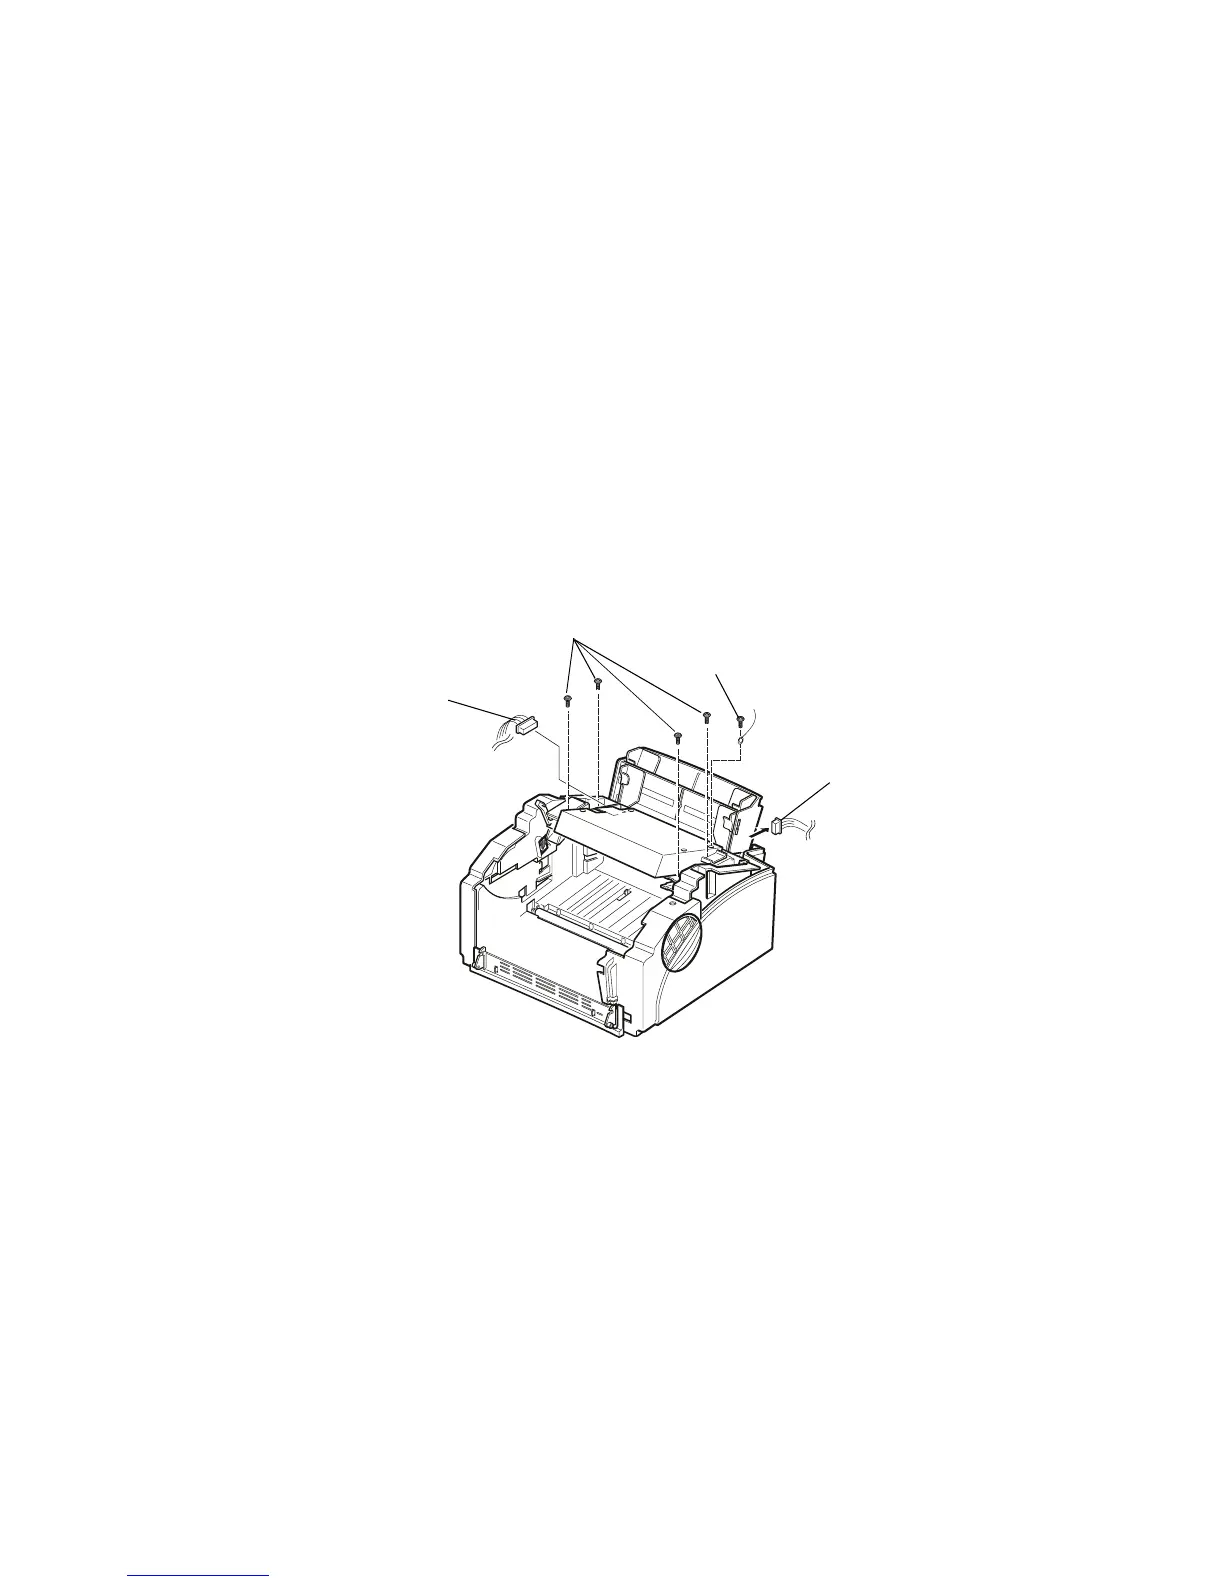
7 Disconnect the harness connected to the left side of the Laser Assembly (Figure 4.6.4a).
8 Remove the screw that secures the ground wire to the Laser (Figure 4.6.4a).
9 Remove the four mounting screws that secure the Laser to the printer frame (Figure 4.6.4a).
10 Turn the Laser up side down and disconnect the harness connected to the right side of the Laser
(Figure 4.6.4a).
Figure 4.6.4a. Laser Assembly Removal.
Replacement
1 Clean the Laser window.
1 Assemble in reverse order.
2 Verify proper operation.
P8e_231a
8
9
7
10

 Loading...


