7/98
Xerox DocuPrint P8e Service Manual 4-31 Repair Procedures
REP 4.6.5 HVPS (High Voltage Power Supply) PWB
Removal
1 Switch the printer power off and disconnect the AC power cord.
2 Remove the Face Up Cover (REP 4.1.1).
3 Remove the Print Cartridge (REP 4.5.1).
4 Remove the Front Cover (REP 4.1.2).
5 Remove the Rear Cover (REP 4.1.3).
6 Remove the Top Cover (REP 4.1.4).
7 Remove the Left Side Cover (REP 4.1.5).
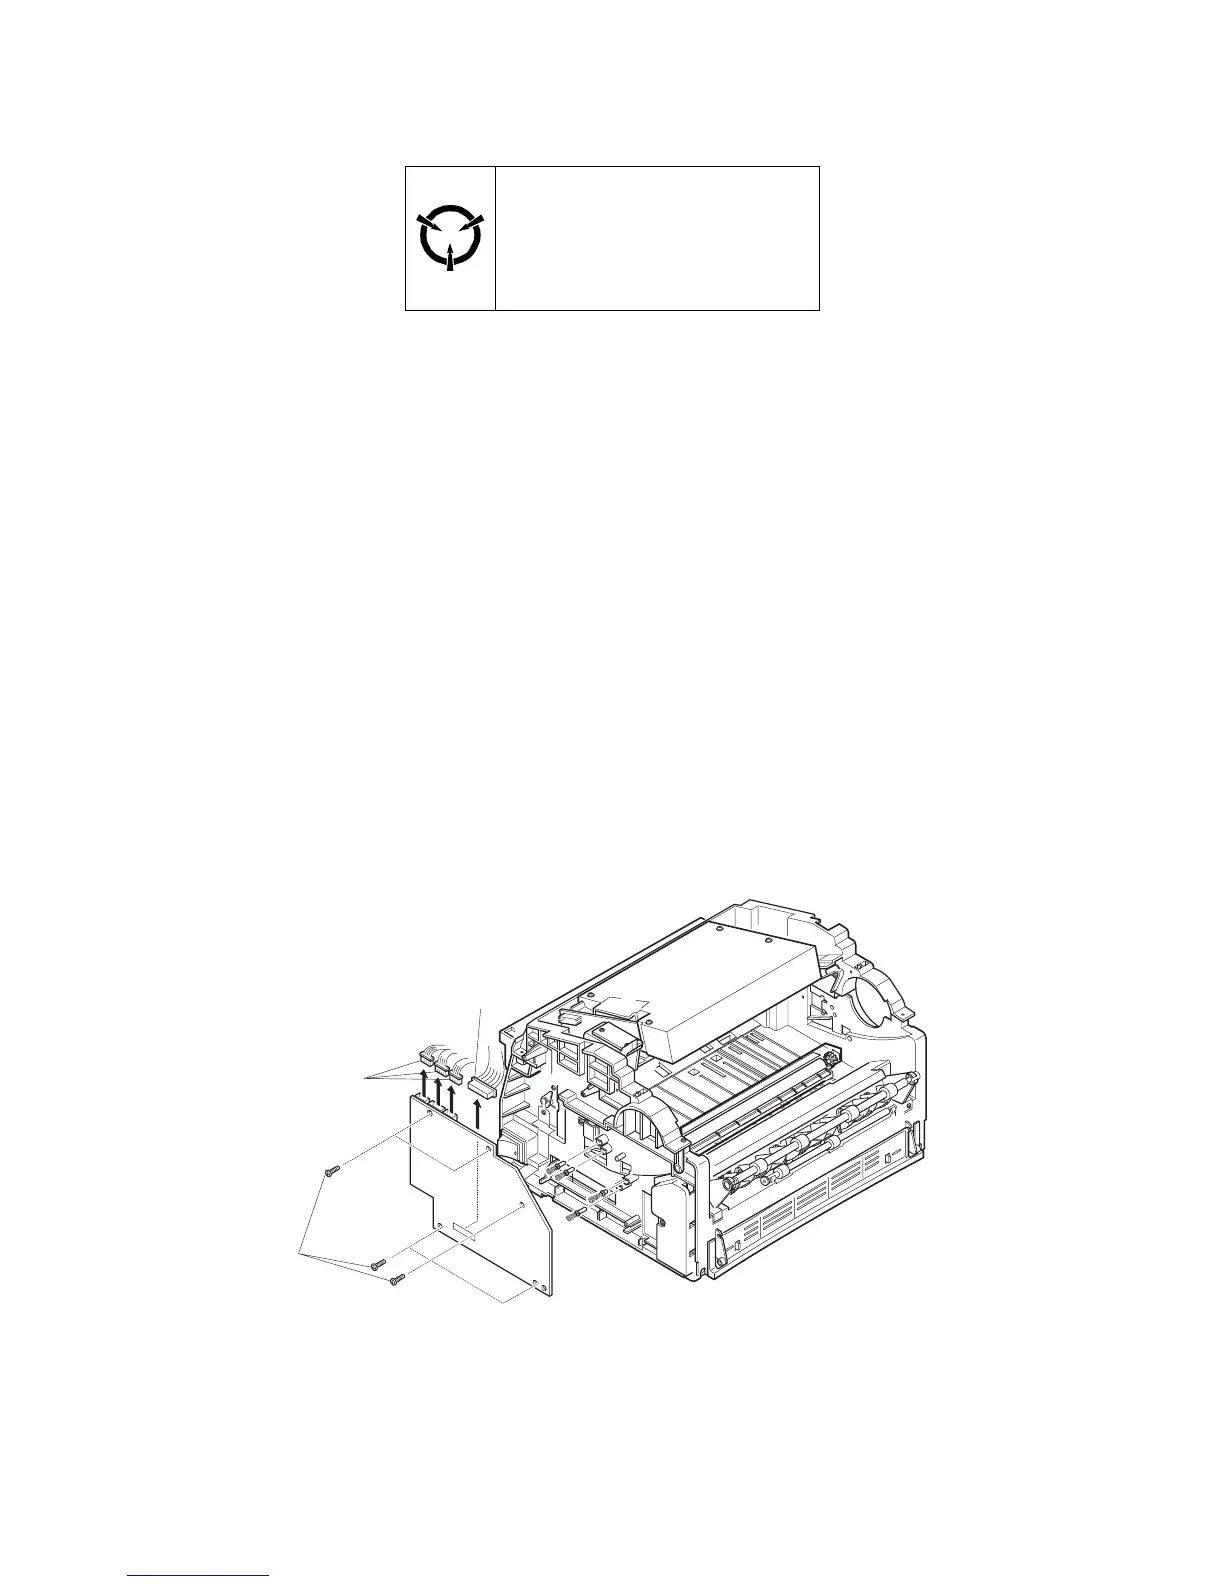
8 Disconnect the following from the top of the HVPS PWB, CN2, CN3, and CN4 (Figure 4.6.5a).
9 Remove the five screws that secure the HVPS to the printer frame (Figure 4.6.5a).
10 Lower the HVPS PWB to access connector CN1. Disconnect CN1 from the HVPS PWB (Figure
4.6.5a).
NOTE: With the HVPS PWB removed, the four high voltage contacts can be removed. The three top
contacts are the same size. The bottom contact (transfer) is longer than the other three (Figure
4.6.5a).
Figure 4.6.5a. High Voltage Power Supply Removal.
Replacement
1 Assemble in reverse order.
2 Verify proper operation.
CAUTION
These components are susceptible
to electrostatic discharge. Observe
all ESD procedures to avoid
damage.
P8e_227
7
8
9

 Loading...


