SonTek/YSI
ADVField Software Manual (September 1, 2001) 12
2.5. Data Acquisition Mode
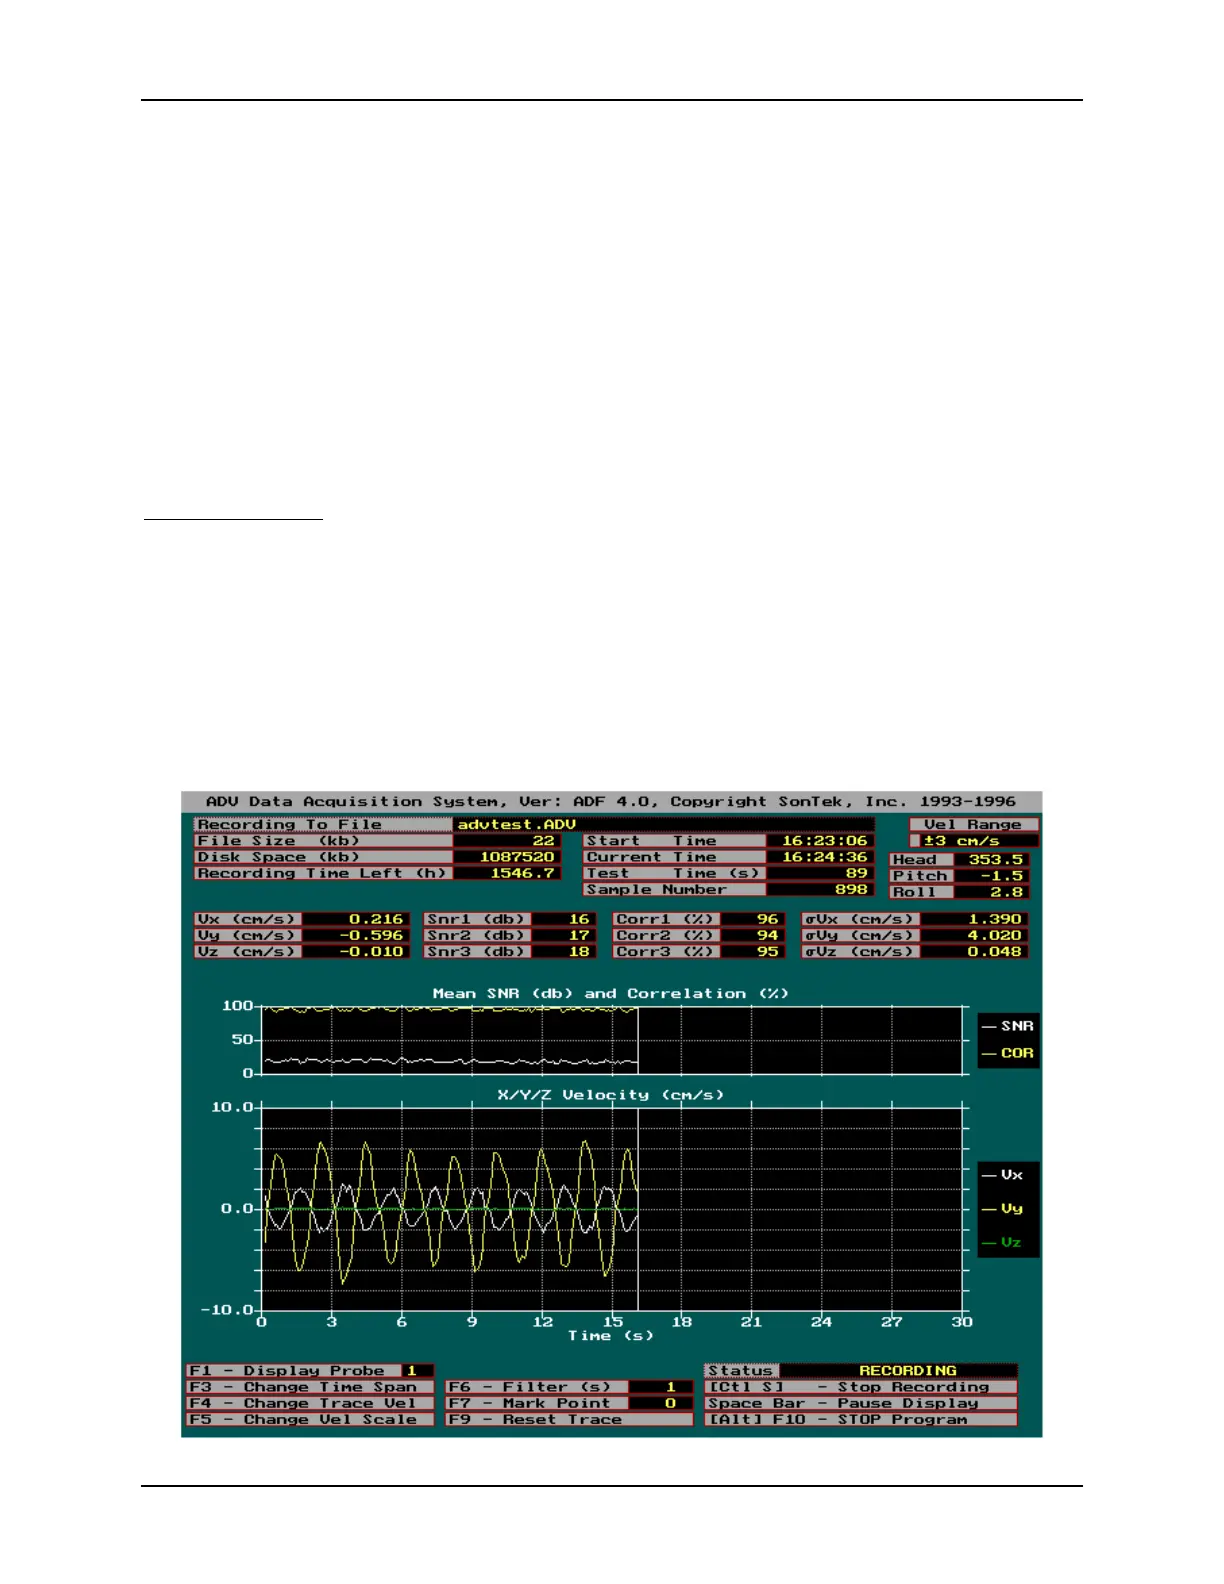
Figure 4 shows the data acquisition screen. After completing the boundary adjustment by press-
ing <F10>, the data acquisition software shows the real-time display screen. It then waits for you
to press <Enter> before starting data collection. The extra step of pressing <Enter> has been in-
cluded to provide precise timing for the first data sample, independent of computer speed. After
<Enter> is pressed, the ADV begins collecting the first data sample within a few milliseconds if
external synchronization is
DISABLED
. If external synchronization is
ENABLED
, the ADV will
wait for the first sync pulse before starting data collection.
The data acquisition screen is divided into four sections. The top displays information on the
status of data acquisition. Below this, the tabular data section displays values of velocity and di-
agnostic data. The middle presents real-time plots of SNR, correlation, and velocity data. The
bottom shows which keys are active during data acquisition and their functions.
Status Information
The status information is updated after each sample, but not more than once per second.
Recording To File
The file in which data are being recorded. If recording is disabled,
NOT RECORDING
is displayed.
File Size / Disk Space / Recording Time Left
These fields display information only if recording is enabled.
File Size
shows the current size of
the data file in KB.
Disk Space
displays the amount of space left on the disk on which the data
file resides.
Recording Time Left
tells you how many hours of data can be collected at the present
rate before the disk becomes full.
Fi
ure 4 - Data Ac
uisition Software “Data Ac
uisition Mode”
 Loading...