PUTTING THE INSTRUMENT INTO OPERATION
Carl Zeiss Mounting Standard Components Axio Vert.A1
50 431030-7044-001 05/2012
3.1.10 Attaching Transmitted Light
Illumination
At your option, you can use either the LED
illuminator or the HAL illuminator for transmitted
light illumination.
3.1.10.1 Attaching the HAL Illuminator
The HAL illuminator is equipped with a separately
exchangeable halogen lamp, which is supplied
individually packed and needs to be inserted into
the HAL illuminator when the illuminator is
attached to the microscope.
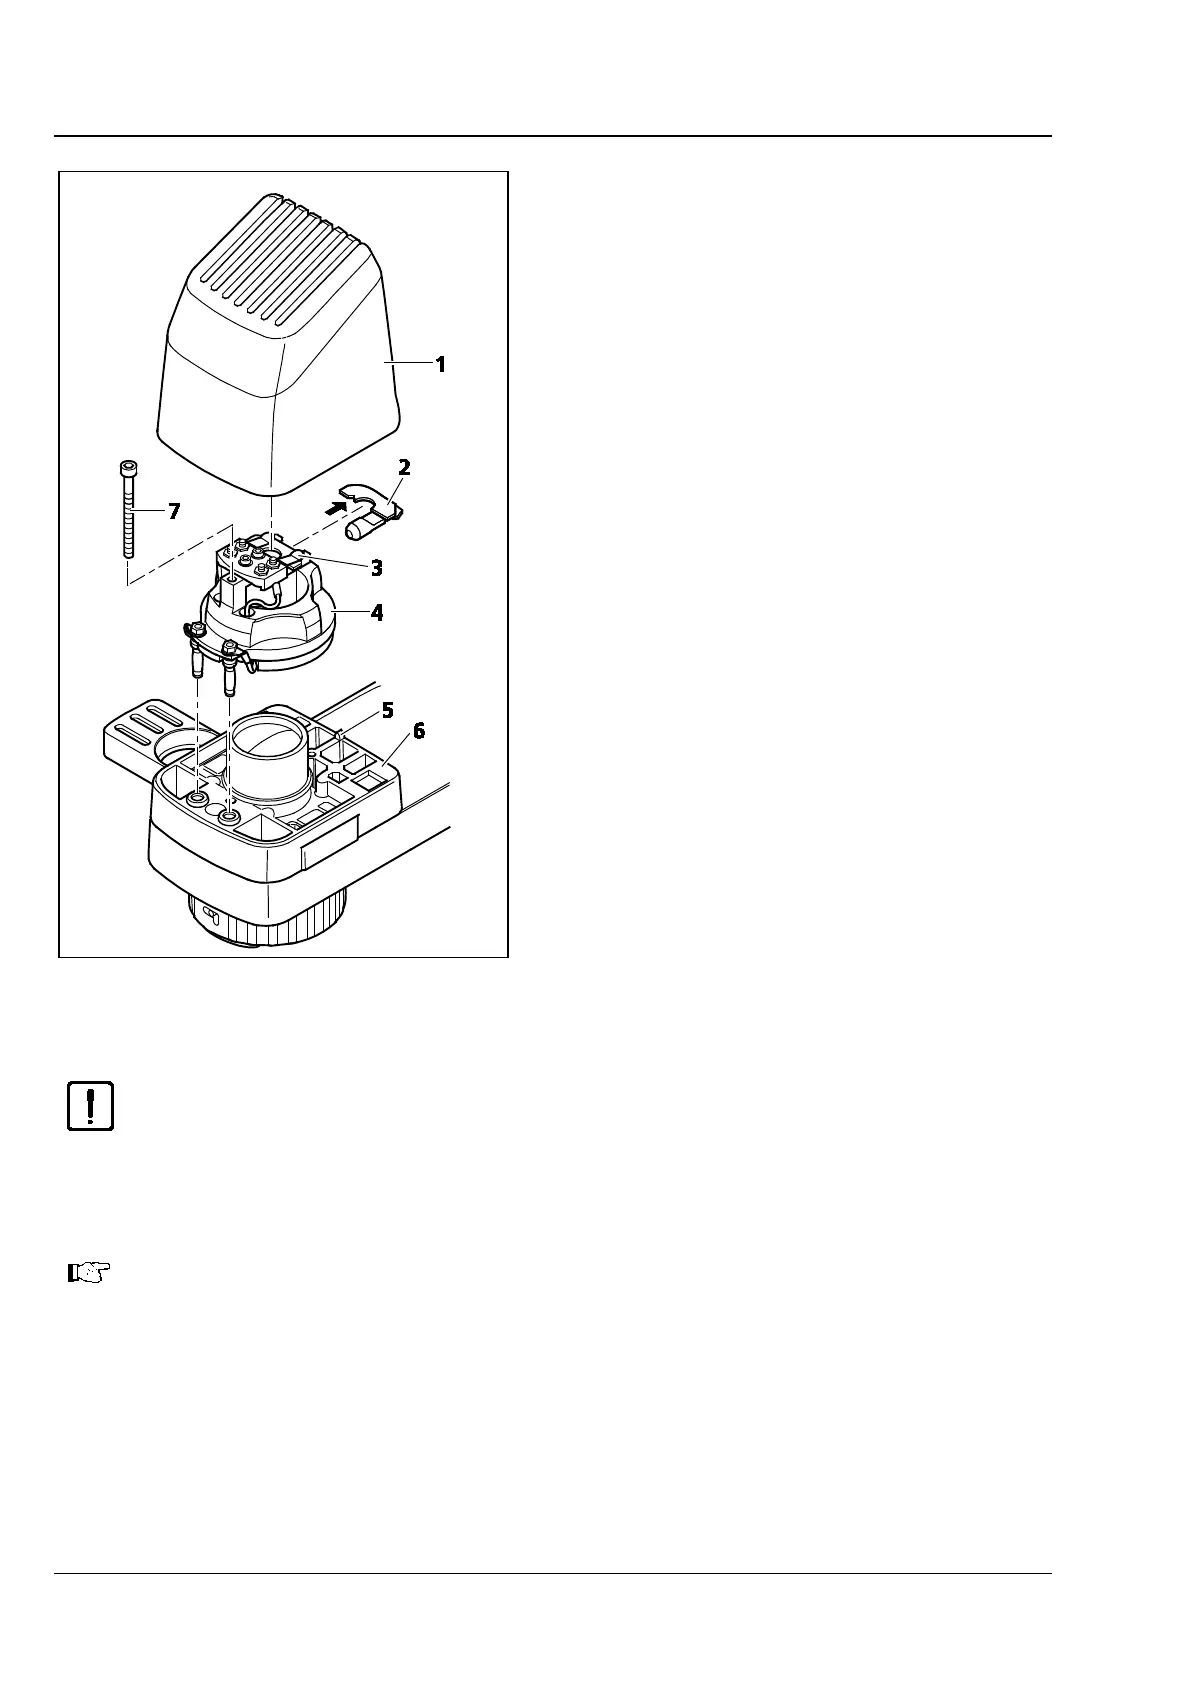
• Insert the illuminator base with its contact pins
into the slot (Fig. 3-13/6) of the carrier, as far as
it will go.
• Use the screw (Fig. 3-13/7) to fasten the
illuminator base in place.
• Take the halogen lamp (Fig. 3-13/2) out of the
packaging box and insert it into the mount
(Fig. 3-13/3). In so doing, make sure that the tip
of the mount engages in the centering notch of
the carrier plate (see arrow in Fig. 3-13) of the
halogen lamp.
CAUTION
Do not touch the bulb with your bare hands. If required, clean the bulb with pure alcohol
before you switch it on for the first time in order to prevent dirt from burning into the glass.
• Plug the illuminator cap (Fig. 3-13/1) onto the illuminator base (Fig. 3-13/4). For proper alignment,
slide the notch in the cap onto the alignment stud (Fig. 3-13/5).
Last Checking Step:
Insert the three-
pin plug of the transmitted light illuminator into the connector socket
located at the back of the stand (or into the jacks marked TL on the Axio Vert.A1 MAT) and
switch the halogen lamp on.
Fig. 3-13 Attaching the HAL Illuminator