PUTTING THE INSTRUMENT INTO OPERATION
Axio Vert.A1
Mounting Standard Components Carl Zeiss
05/2012 431030-7044-001 59
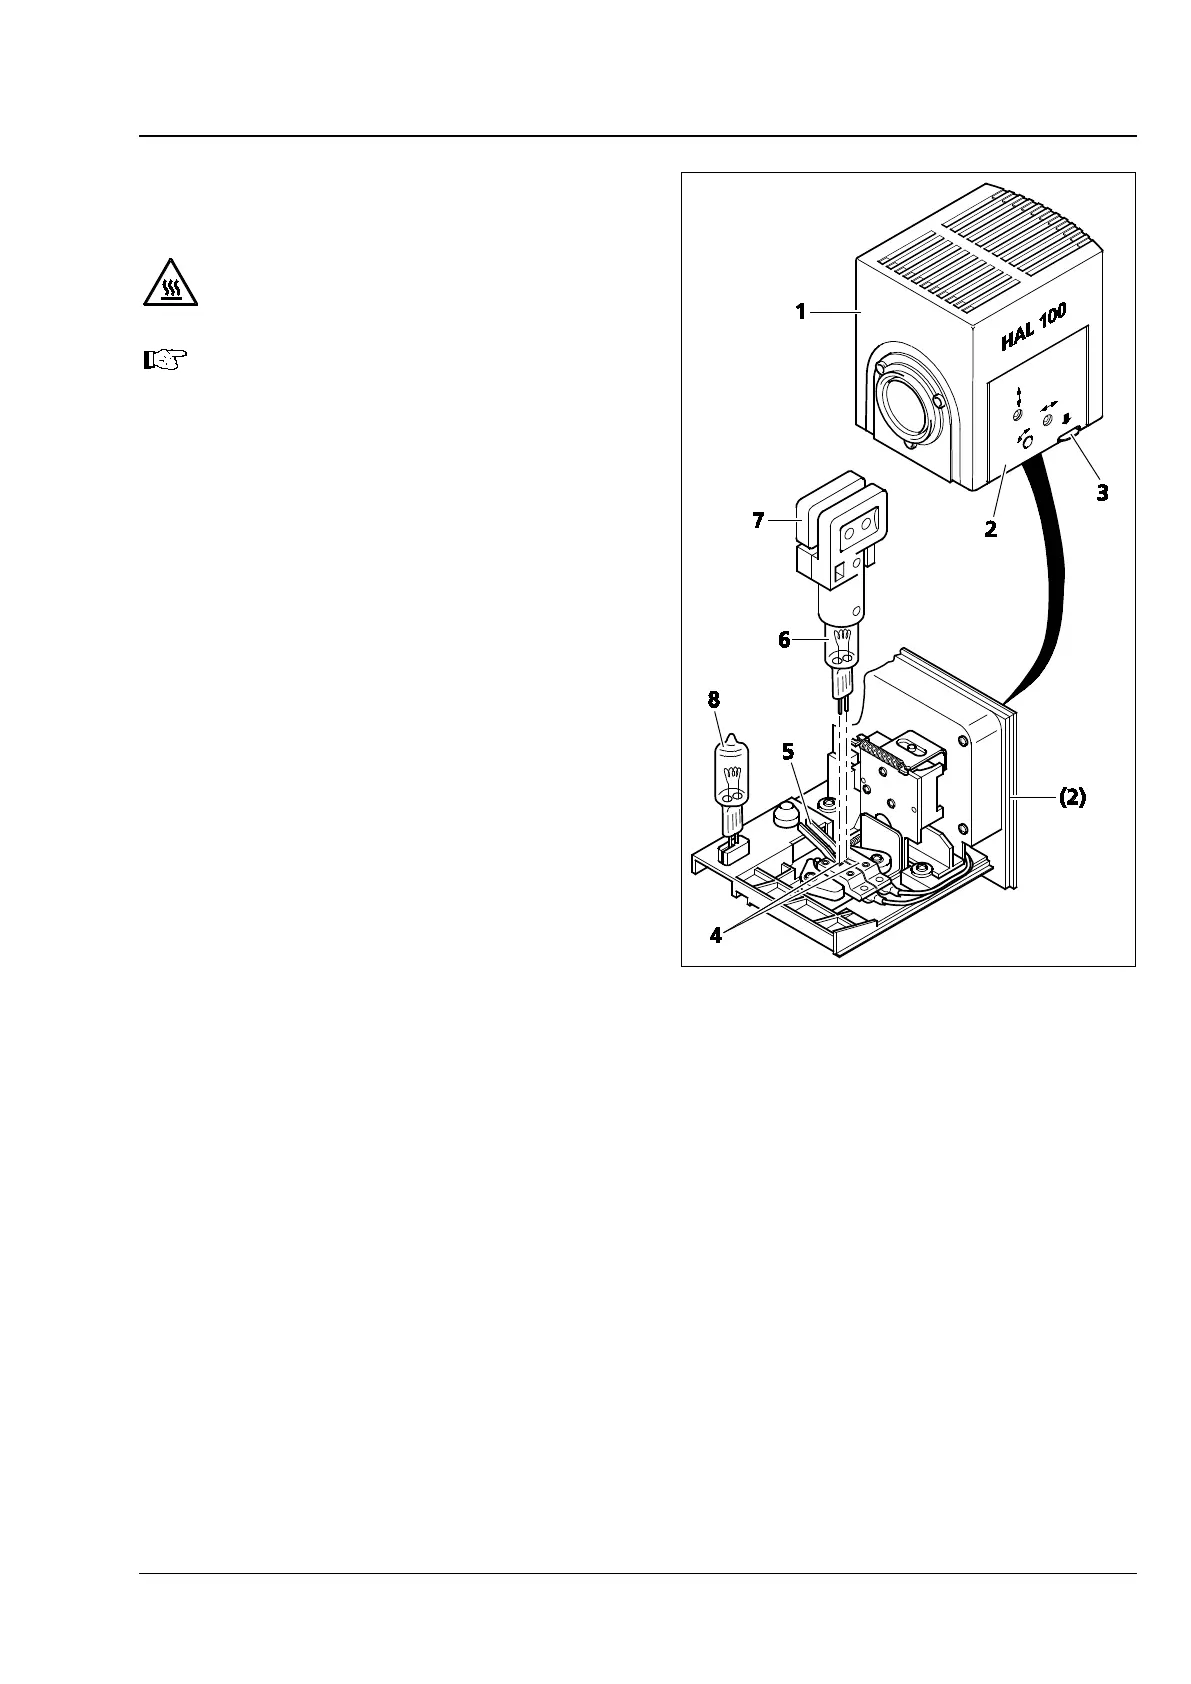
3.1.13 Changing the HAL 100 Halogen
Lamp
WARNING
Hot surface!
You need not remove the lamp housing
from the stand to change the halogen
lamp. Do not store the replacement tool
(Fig. 3-23/7)
lamp inside the lamp housing while the
lamp is in operation.
The replacement lamp (Fig. 3-23/8) may
remain inside the lamp housing in the
plugged-on position.
• Switch off the microscope, remove the plug
(Fig. 3-21/5) from the socket (reflected light),
and allow the lamp to cool off for
approximately 15 minutes.
• Press down the unlocking button (Fig. 3-23/3)
of the HAL 100 (Fig. 3-23/1) halogen
illuminator, pull out the illuminator drawer
completely (Fig. 3-23/2) and set it down
separately.
• Press down the two spring levers (Fig. 3-23/5)
and pull the old halogen lamp (Fig. 3-23/6) out
upward.
• Press down the two spring levers, insert the
new lamp into the lamp base (Fig. 3-23/4) and
release the spring levers. Be sure to always use
the replacement tool (Fig. 3-23/7) for holding /
touching the halogen lamp, as traces of grease
may impair the service life of the halogen lamp.
If required, clean the bulb with pure alcohol
before you switch the lamp on for the first time
in order to prevent dirt from burning into the
glass.
• Briefly press down the spring levers again to
center the lamp.
• Slide the illuminator drawer back in again until
it is locked into position.
• Switch the diffusion disk on again and insert
the filter.
Fig. 3-23 Changing the Halogen Lamp