PUTTING THE INSTRUMENT INTO OPERATION
Carl Zeiss Mounting Standard Components Axio Vert.A1
56 431030-7044-001 05/2012
3.1.11.4 Installing the VIS-LED Attachment
Lamp
WARNING
Avoid looking directly into the LED
light.
WARNING
Always make sure that the VIS-LED
attachment lamp is switched off when
mounting it onto
from the reflected light port.
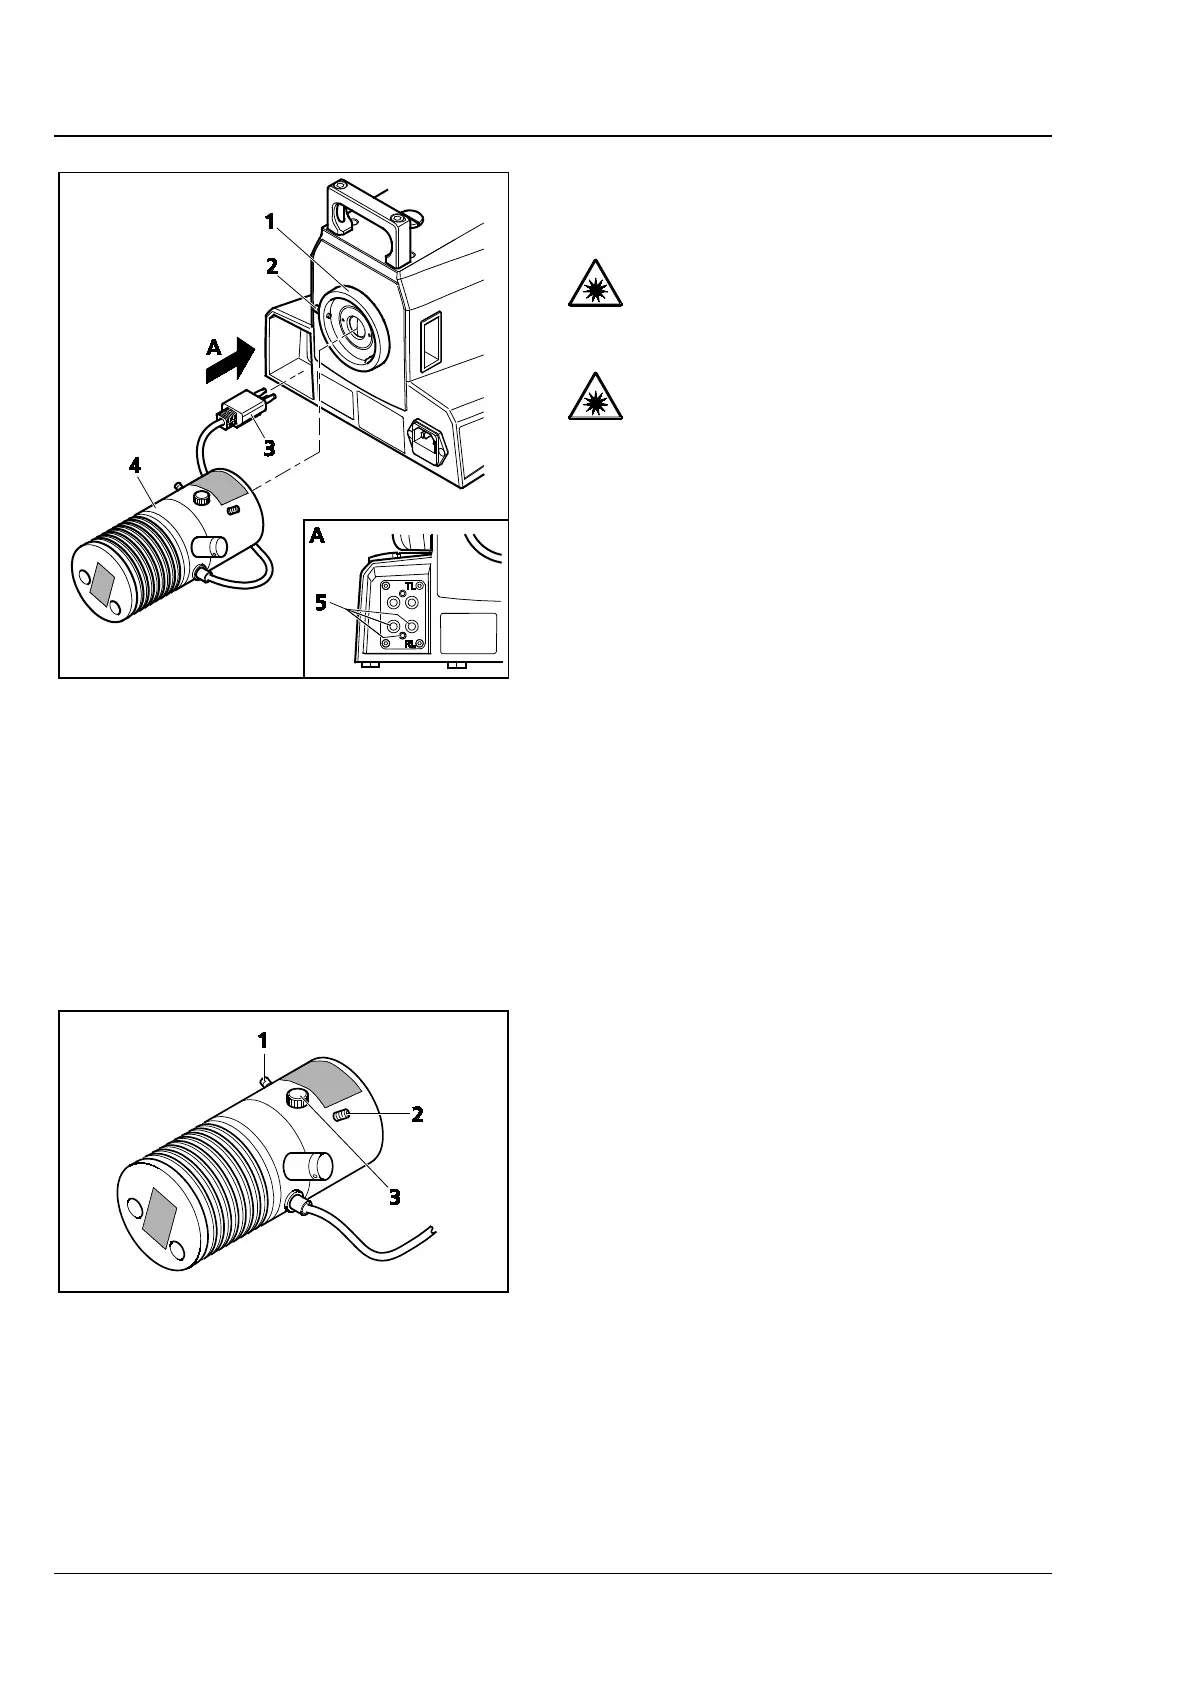
• Loosen the clamping screw (Fig. 3-19/2) on the
reflected light port (Fig. 3-19/1) and remove the
cap.
• Insert the attachment lamp (Fig. 3-19/4) with
the dovetail ring into the port (Fig. 3-19/1). Use
ball-headed screwdriver SW 3 and the locking
screw (Fig. 3-19/2) to lock the illuminator firmly
into position.
• Insert the three-pin illuminator plug
(Fig. 3-19/3) into the lower socket (Fig. 3-19/5)
for reflected light (RL) at the back of the
instrument.
• Put the TL/RL switch (Fig. 2-9/22) into the
position for reflected light (RL).
Adjusting the VIS-LED Attachment Illuminator
• Switch on the attachment lamp via the
operational microscope. (See Section 1.1.)
• Switch off the diffusion disk (Fig. 2-9/26) and
remove the filter from the light path.
• Use the ≤ 40x objective to focus on a free area
of the specimen.
• Remove the eyepiece. Use the adjusting screws
(Fig. 3-20/1 and 2) to center the image of the
illuminator in the pupil image.
• Use the focusing screw (Fig. 3-20/3) to ensure
an optimized, even illumination of the pupil
image.
• Switch the diffusion disk on again and insert
the filter.
Fig. 3-19 Attaching the VIS-LED Illuminator
Fig. 3-20 Adjusting the VIS-LED Attachment
Illuminator