PUTTING THE INSTRUMENT INTO OPERATION
Carl Zeiss Mounting Standard Components Axio Vert.A1
58 431030-7044-001 05/2012
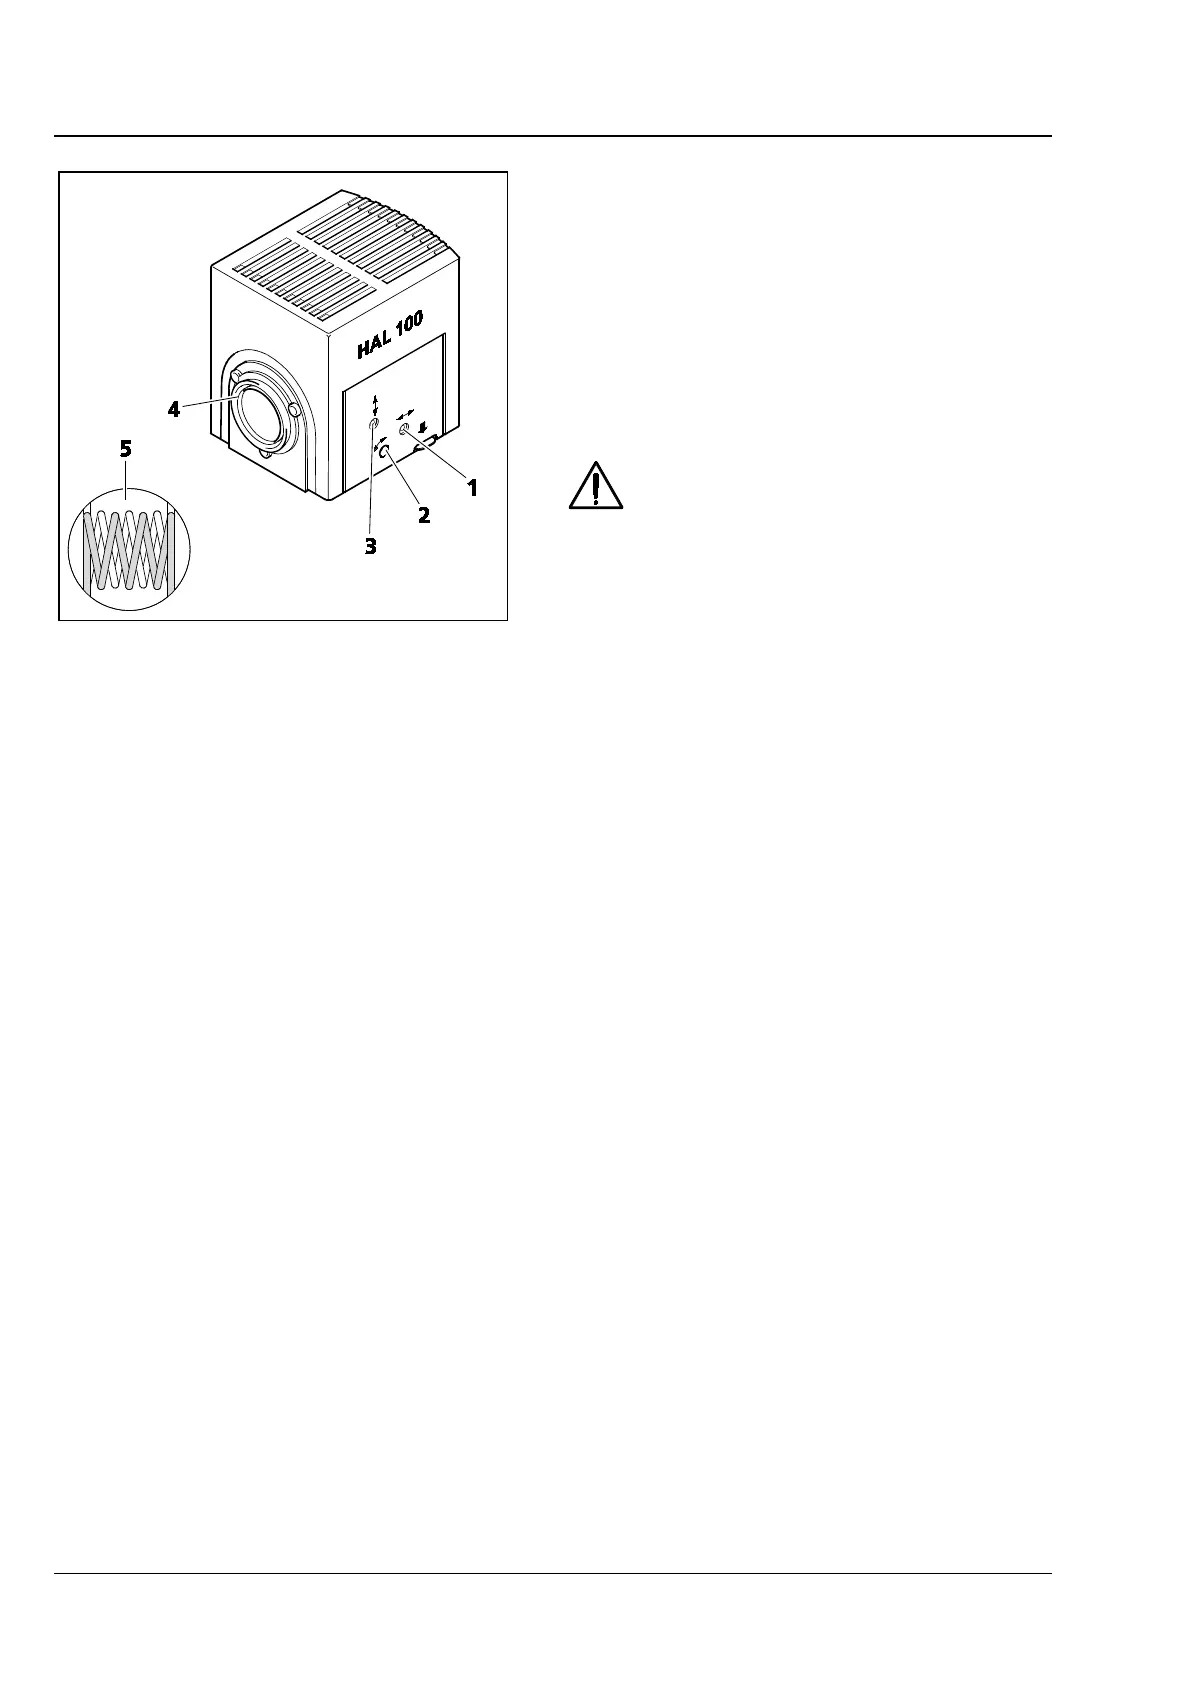
3.1.12 Adjusting the HAL 100 Illuminator
Coarse Adjustment
• Loosen the clamping screw (Fig. 3-21/2) and
then detach the operational halogen illuminator
(Fig. 3-22/4) from the microscope stand.
• Switch on the microscope. (See Section 1.1.)
• Aim the light beam at a projection surface (wall)
that is at least 3 m away.
In so doing, be sure not to look into
the light exit of the illuminator.
• Use ball-headed screwdriver SW 3 to set the
adjusting screw (Fig. 3-22/1) until both lamp
filament images are shown on the projection
surface as sharply defined as possible.
• Use the adjusting screws (Fig. 3-22/2 and 3) to
align the lamp filaments and their mirror image
in such a way to each other that the mirror
image fills up the spaces of the lamp filaments
(Fig. 3-22/5).
Fine Adjustment
• Reattach the microscope lamp to the microscope stand and fix it into position, using the clamping
screw.
• Switch off the diffusion disk (Fig. 2-9/26) and remove the filter from the light path.
• Use the ≤ 20x objective to focus on a mirror that has been put on and then go to a clean area of the
specimen.
• Remove the eyepiece. Use the adjusting screws (Fig. 3-22/2 and 3) to center the lamp filaments and
their mirror image in the pupil image.
• Optimize the overlapping, using the adjusting screw (Fig. 3-22/1).
• Switch on the diffusion disk and reactivate the filter.
Fig. 3-22 Adjusting the HAL 100 Illuminator