PUTTING THE INSTRUMENT INTO OPERATION
Carl Zeiss Mounting Optional Components Axio Vert.A1
70 431030-7044-001 05/2012
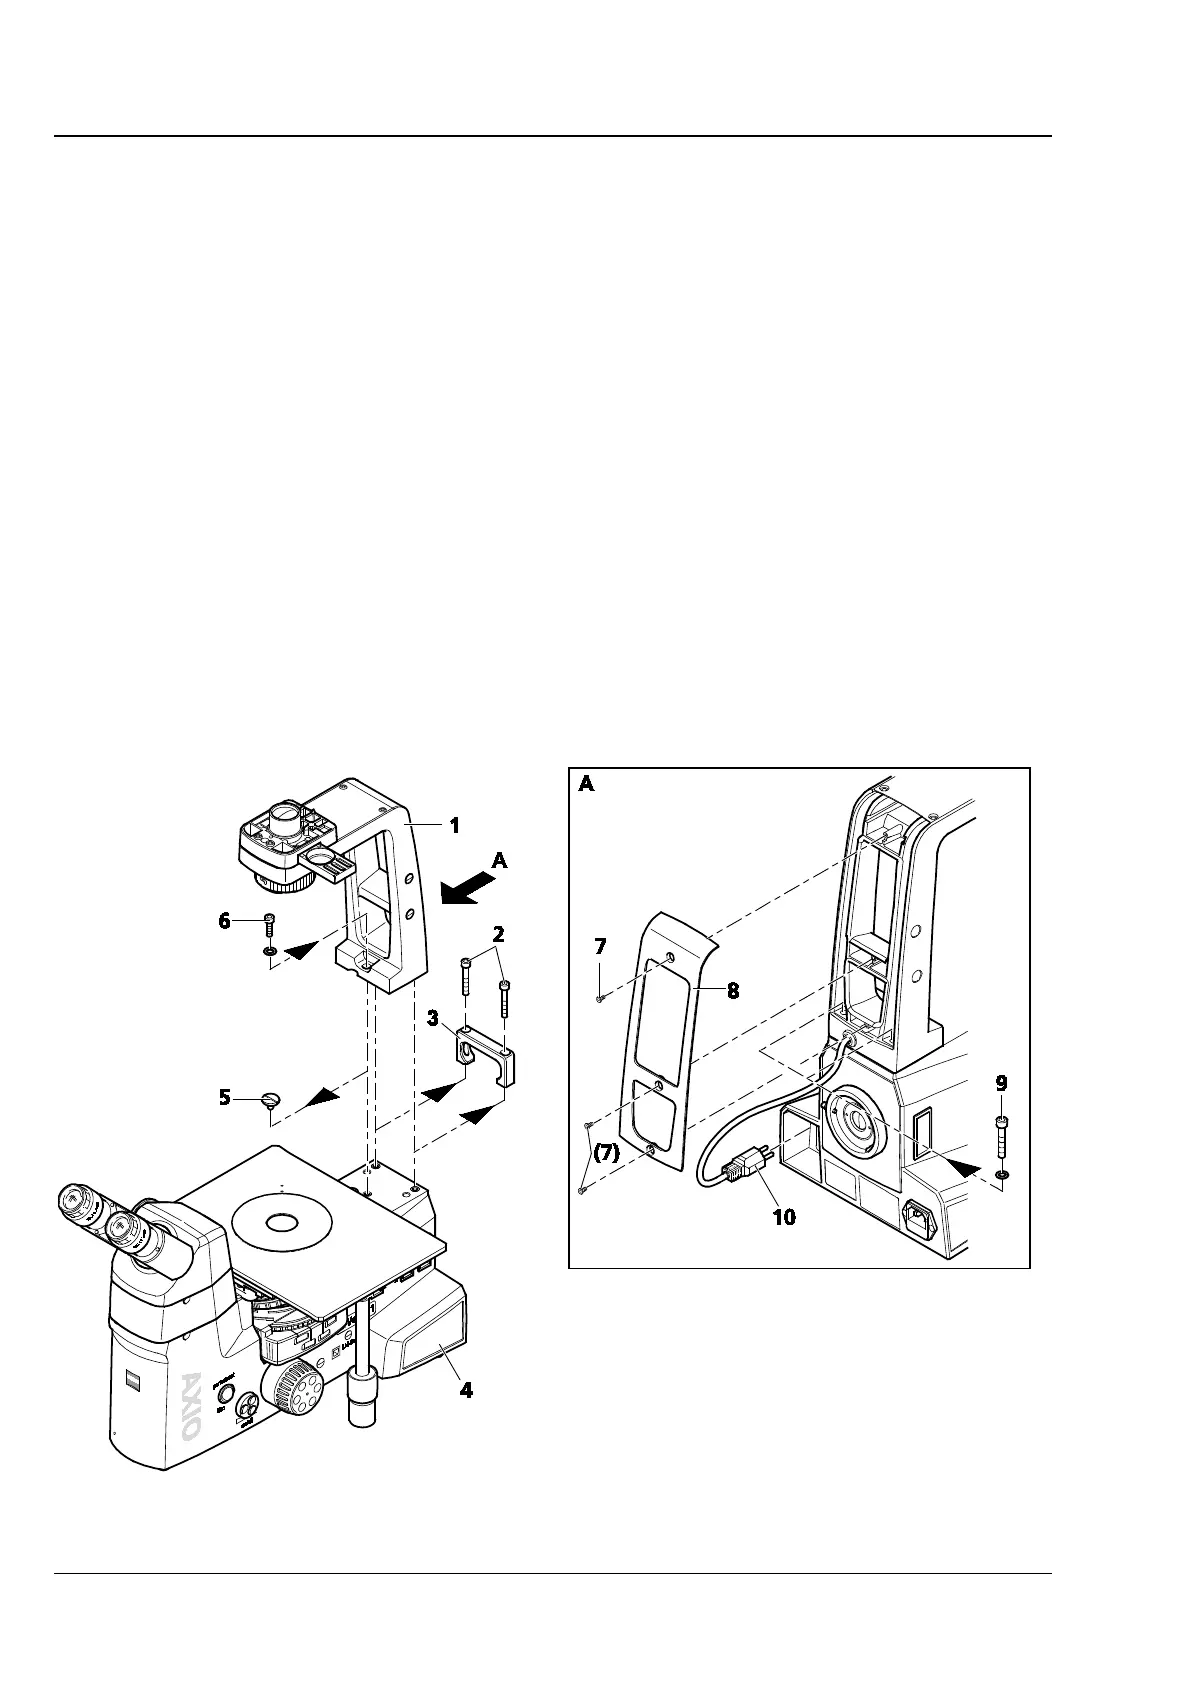
3.3.8 Mounting the Carrier for Transmitted Light Illumination onto the Axio Vert.A1 MAT
Stand
If the Axio Vert.A1 MAT stand is to be retrofitted with the optional transmitted light illumination, the
carrier for transmitted light illumination must be mounted by the user. If this stand is ordered with
transmitted light illumination, the stand will be delivered with the carrier already mounted by the
manufacturer.
Proceed as follows if you mount the carrier yourself:
• Use ball-headed screwdriver SW 5 to remove the two screws (Fig. 3-36/2) on the carrying handle
(Fig. 3-36/3) and then take off the carrying handle.
• Remove the cover screw (Fig. 3-36/5) from the tapped hole.
• Take the carrier (Fig. 3-36/1) out of the packaging.
• Turn out the three Phillips screws (Fig. 3-36/7) of the cover at the back of the carrier (Fig. 3-36/8) and
remove the cover from the carrier.
• Set the carrier onto the stand (Fig. 3-36/4) and loosely attach it with the three screws (Fig. 3-36/6 and
9) and washers, using the special screwdriver supplied.
• Insert the three-pin plug (Fig. 3-36/10) of the transmitted light illuminator into the upper socket (TL) at
the back of the stand.
• Mount both the condenser and the illuminator for the alignment of the carrier for transmitted light
illumination. Align the cone of light centrally to the objective, based on your own visual judgment.
Now, tighten the screws firmly.
• Attach the cover to the back of the carrier and loosely fasten it with the three screws.
Fig. 3-36 Mounting the Carrier for Transmitted Light Illumination