5 First Operating Steps | 5.7 Working with Specific Specimen Types ZEISS
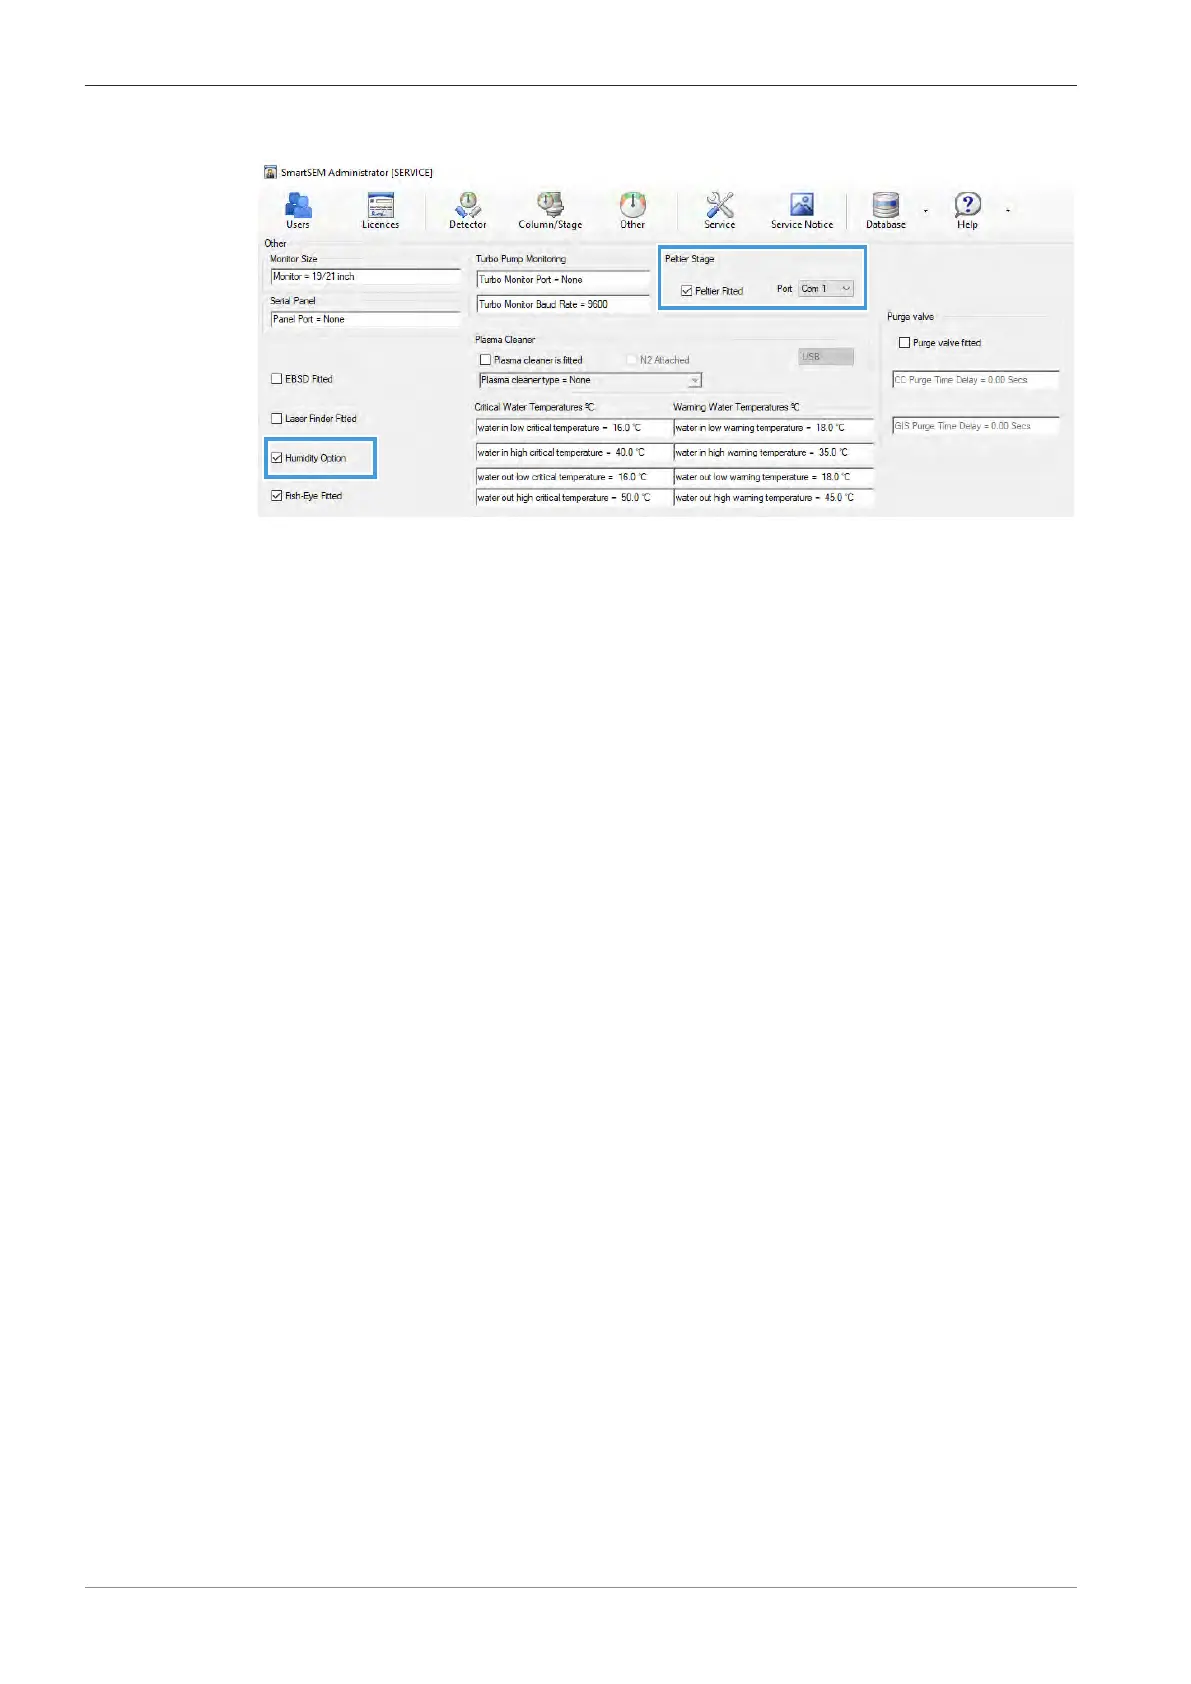
13. Select the USB connection and activate the Humidity Option checkbox.
14. In the Vacuum tab of the SEM Controls panel, select Go to EP.
15. Use the EP Target scroll bar to adjust the working pressure to 10Pa.
16. Adjust the other working parameters. For information on working parameters for different
specimens, refer to Hydrated Specimen [
}
97].
5.7.3.4 Purging the Chamber
You need to purge the chamber to remove air from the water bottle and to fill the chamber with
pure water vapor.
Procedure
1. From the Panel Configuration Bar, select Extended Pressure.
à The Extended Pressure window is displayed.
2. Activate the Peltier checkbox.
3. Click Purge Settings.
à The Purge Control window is displayed.
4. Check that EP Gas = Air is selected.
5. If the water kit has recently been fitted, filled with water, or has not been used for a while,
set Purge cycles to 10.
6. If the system has recently been used in the wet mode, set Purge cycles to 3.
7. Set Purge Max to 1000 Pa.
8. Set Purge Min to 100 Pa.
9. Click EP Gas = Air to toggle the vacuum status to EP Gas = Water vapour.
10. To start purging, click Manual Purge H2O.
à The pressure in the chamber varies between the set maximum and minimum levels. Bub-
bles may be seen in the water bottle. All air is eventually removed from the water bottle.
à The process can take a while to be completed. The progress is displayed in the status bar.
5.7.3.5 Setting Initial Operating Parameters
Procedure
1. In the Extended Pressure window, set the Peltier Target to 1°C.
2. Adjust Humidity Target to a suitable value.
3. Adjust the position of the green cross on the phase diagram to change the environment of
the specimen between water vapor, water, or ice.
4. Switch on the beam.
5. Use the stage navigation to position the specimen under the beam.
INFO: Use the Stage Navigation Bar or the chamberscope to monitor stage movement.
106 Instruction Manual ZEISS EVO | en-US | Rev. 10 | 354706-0780-006