5 First Operating Steps | 5.4 Acquiring an Image ZEISS
4. To accelerate the wobble speed, activate the Wobble Fast checkbox.
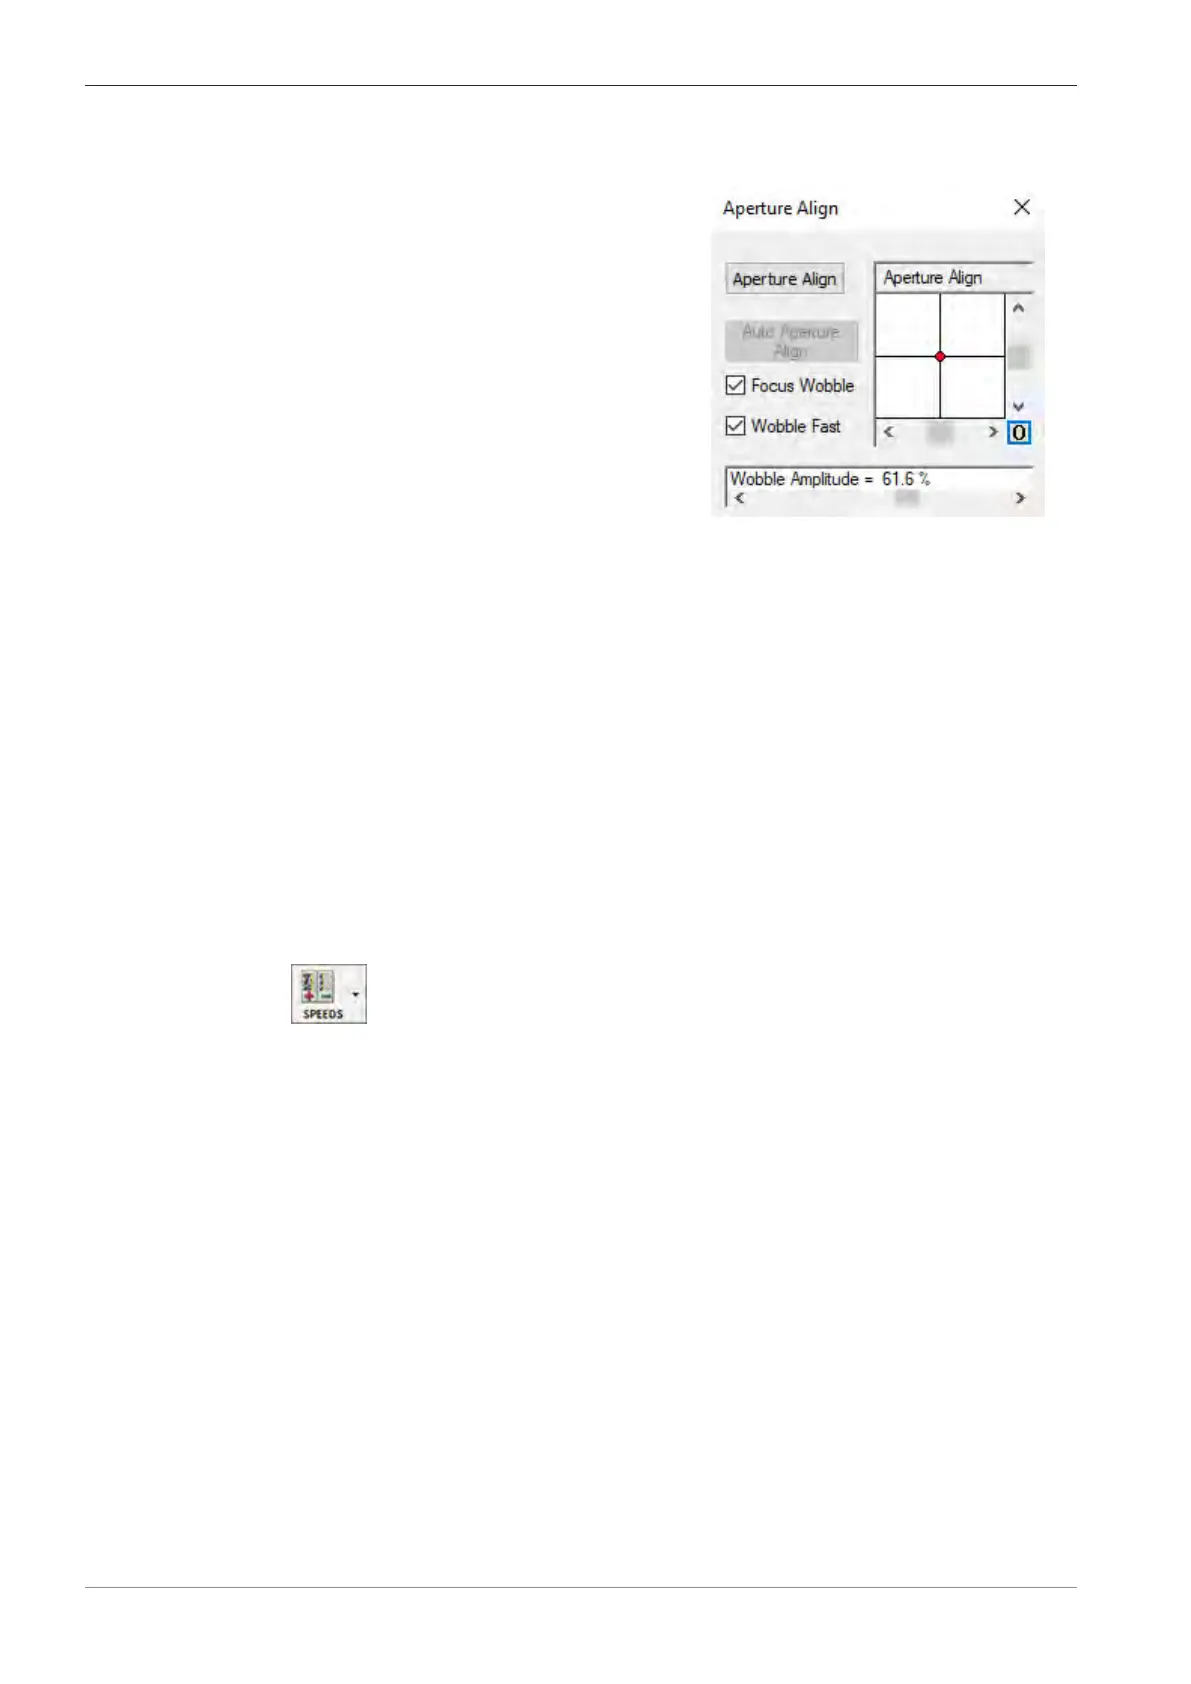
5. From the Panel Configuration Bar, select Aperture Align.
à
The Aperture Align window is displayed.
6. To set the Aperture Align value to zero, click the 0 button.
7. Carefully adjust the X and Y micrometers gauges to align the mid-column aperture and
eliminate any lateral image shift.
INFO: The specimen detail should just be pulsating without shifting.
8. Deactivate the Focus Wobble checkbox.
INFO: Once the alignment is optimized, DO NOT change the position of the X and Y mi-
crometer gauges on the mid-column aperture changer. It is now possible to work at any ac-
celeration voltage (EHT), probe current (I Probe) and working distance without the need to
change the position of the X and Y micrometer gauges on the mid-column aperture
changer.
INFO: If you change the EHT or the I Probe later during imaging, align the beam via Auto
Aperture Align in the Aperture Align window.
9. Refocus the image.
5.4.10.5 Selecting the Scan Speed
Procedure
1. In the Toolbar, from the Faster/Slower drop-down list, select Scan Speed = 7.
Alternatively, in the SEM Controls panel, select the Scanning tab, and from the Scan Speed
drop-down list, select Scan Speed = 7.
à The scan speed is set to Scan Speed = 7.
2. Bring the image into focus.
5.4.10.6 Correcting Astigmatism
Procedure
1. Ensure that the Reduced Raster function is active.
2. Select a detail (e.g. a mark or an edge) on the specimen surface.
Ensure that the selected detail is in the raster. You can move the stage or shift the beam for
this purpose.
3. In the SEM Controls panel, select the Apertures tab.
4. Click Stigmation.
78 Instruction Manual ZEISS EVO | en-US | Rev. 10 | 354706-0780-006