5 First Operating Steps | 5.7 Working with Specific Specimen Types ZEISS
15. Adjust the working parameters, refer to Non-conductive Specimen [
}
93].
16. To return to HV mode, repeat steps 1 to 5 and step 7 to dismount the aperture, deselect
the aperture in the Apertures tab and click Go To HV in the Vacuum tab.
5.7.2.2 Aligning the Gun and Mid-column Aperture for EasyVP Mode
To achieve an optimal alignment of the beam through the 20 μm mid-column aperture, you need
to perform an alignment procedure.
Info
You can refer to Using the Automatic Gun Alignment Functions [
}
79] and Using the Auto
Aperture Alignment Function [
}
80] to help you with these tasks.
Info
Once the alignment is optimized, do not change the position of the X and Y micrometer
gauges on the mid-column aperture changer.
Prerequisite
ü
The EasyVP aperture is fitted.
ü
The 20µm aperture is selected at the mid-column aperture changer (position 2).
Procedure
1. From the Menu Bar, select Tools > User Preferences.
à The User Preferences dialog is displayed.
2. Check that Auto Calibration and User Align are set to Yes.
3. Adjust the following settings in the SEM Controls panel:
Select the EasyVP Aperture
Optibeam = Resolution
Aperture Size = 20.00µm
EHT Target = 20.00 kV
I Probe = 100 pA
WD = 8.5 mm
Signal A = SE1
Operating Mode = Normal
INFO: For details on where to adjust these settings, refer to Acquiring an Image [
}
73].
4. To carry out a C1/C2/C3 lens hysteresis removal, press <Shift + F2>.
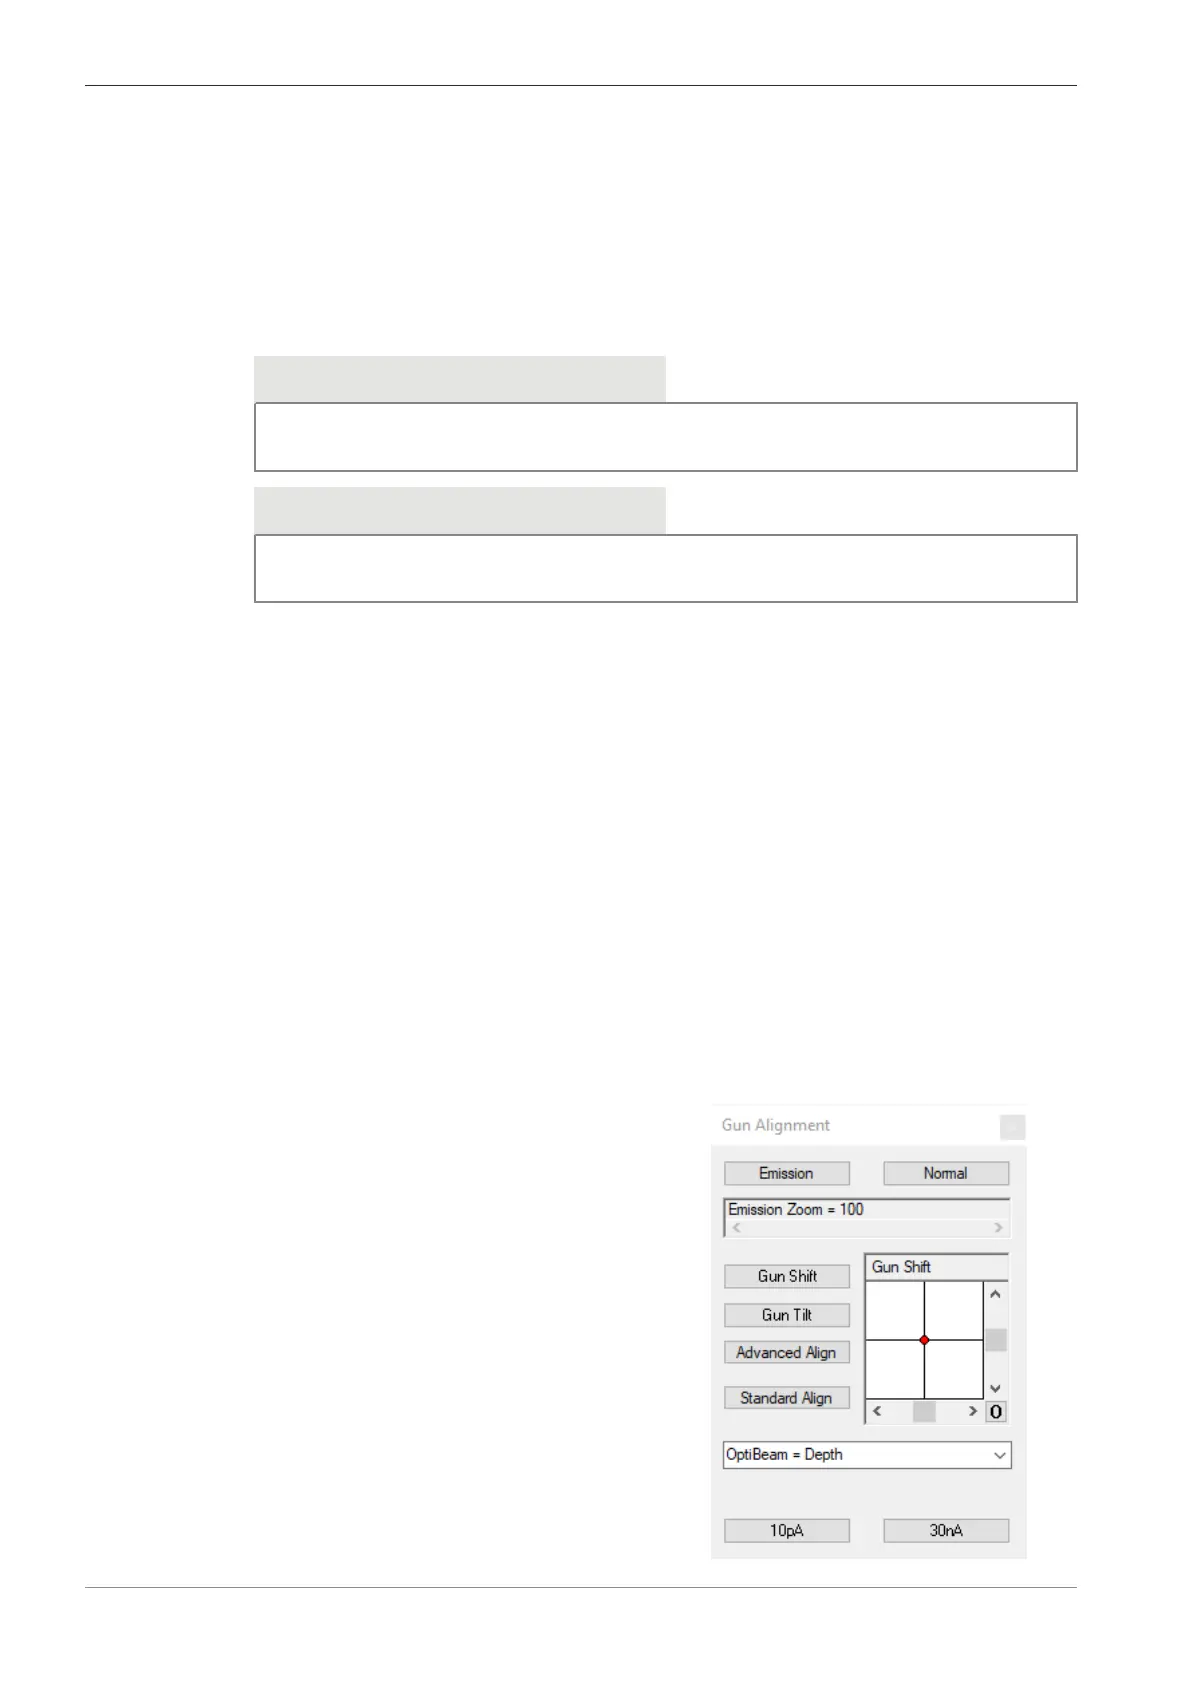
5. To create an emission image, select Beam > Gun Align from the Menu Bar.
à
The Gun Alignment window is displayed.
96 Instruction Manual ZEISS EVO | en-US | Rev. 10 | 354706-0780-006