HFA3 Instructions for Use 2660021166131 Rev. A 2018-11
Go to Contents Getting Started
3-13
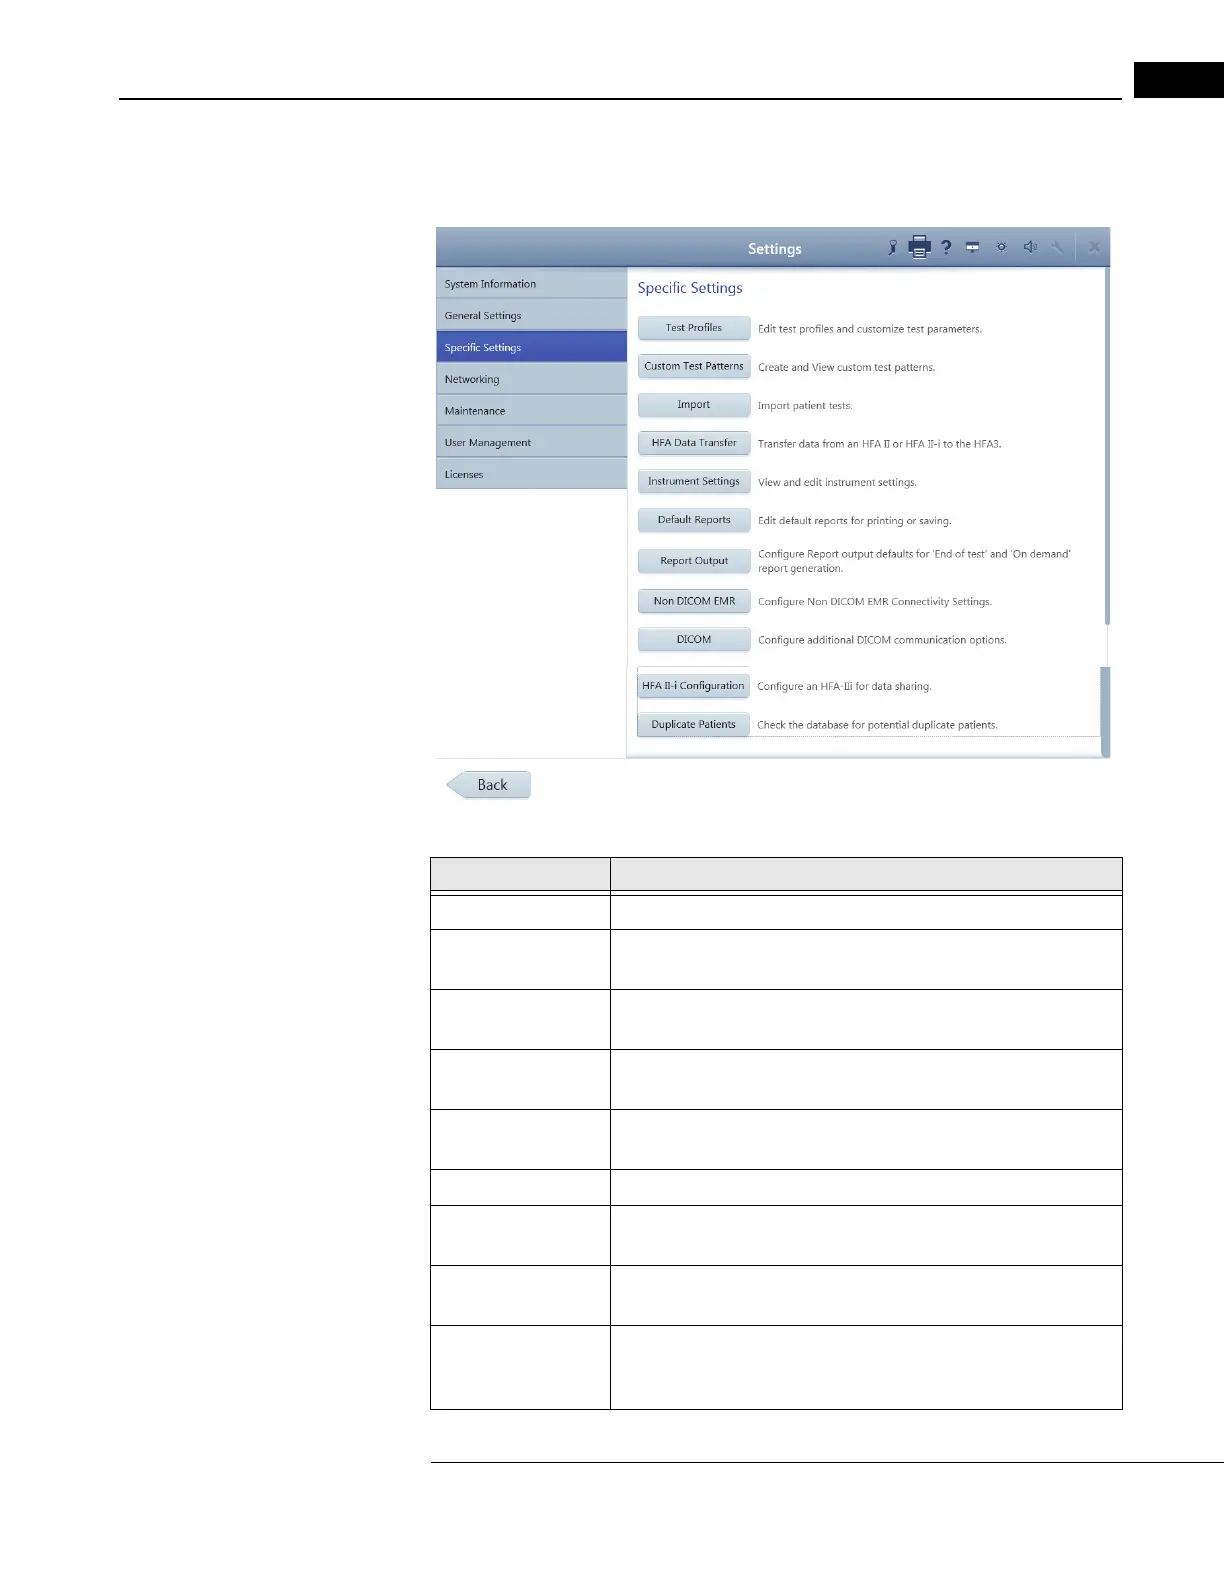
Specific Settings
Use the Specific
Settings screen to manage test profiles and custom test patterns, import and
transfer data, configure reports and instrument settings, and manage EMR settings.
Button Function
Specific Settings Select the default test and create new test profiles.
Test Profiles Edit test profiles and customize test parameters. See “Set up Test
Profiles,” on page 4-24 and “Test Patterns & Parameters,” on page A-1
Custom Test Patterns Create and view custom Static and Kinetic Test Patterns. See “Create
Custom Test Patterns,” on page 4-22. (Not available for Model 830)
Import Import patient tests from a shared network folder or USB storage
device. See “Import Tests,” on page 6-5.
HFA Data Transfer Transfer patient data from an HFA II or HFA II-
i to the HFA3 instrument
database. See “Data Transfer,” on page 9-1.
Instrument Settings Adjust instrument settings. See “Instrument Settings,” on page 3-10.
Default Reports Choose the default report types for manually printing and exporting
re
ports. See “View and Generate Test Reports,” on page 6-5.
Report Output Select to configure the format and destination for automatic and
manually generated
reports. See “Report Output,” on page 3-18.
Non DICOM EMR Configure non-DICOM EMR connectivity settings. See “Connect to a
Non-DICOM EMR,” on page 7-5. To use the instrument in local
database mode, turn off EM
R Mode.

 Loading...


