Networking Go to Contents
HFA3 Instructions for Use 2660021166131 Rev. A 2018-11
7-8
Connect to a Printer
This chapter contains instructions for:
• “Wireless Printers,” on page 7-8
• “Wired Printers,” on page 7-10
• “Shared Network Printers,” on page 7-10
Wireless Printers
Connect the HFA3 to a wireless prin
ter using a wireless adapter:
1. Ensure that both the HFA3 and printer are plugged in and turned on.
2. Open the side panel of the instrumen
t to access the USB ports (see “The HFA3– Side Panel
Opened,” on page 3-3).
3. Plug the USB wireless adapter into an HFA3 USB port.
4. Refer to the manufacturer’s printer instructions
to configure the printer. For the HP Officejet
Pro 251dw Wireless Color Printer use the following instructions:
A. On the printer screen select Setu
p > Network > Wireless. Set Wireless to On.
B. Use the Back button to return to the previous screen.
C. Select W
ireless Direct to access the Wireless Direct Settings. Select On.
D. Set Se
curity to On.
E. Select Security P
asscode and record the printer passcode visible on the screen. Select OK.
F. Se lec t W
ireless Direct Name and record the printer name. Select OK.
G. Return to the Setup Menu using the Back
button. Select Print Reports.
H. Select Netw
ork Configuration Page to print the page and obtain the printer IPv4 IP
address.
5. Access the Windows desktop on the HFA3:
A. In the Patient screen select Chan
ge user from the Close button menu . Log in as
Service using 000
0 as the password.
B. Select Sett
ings >Service.
C. In the Service screen select St
art service mode and log off.
D. Select the IT Administr
ator login and enter Admin@123 as the password. The Windows
desktop appears.
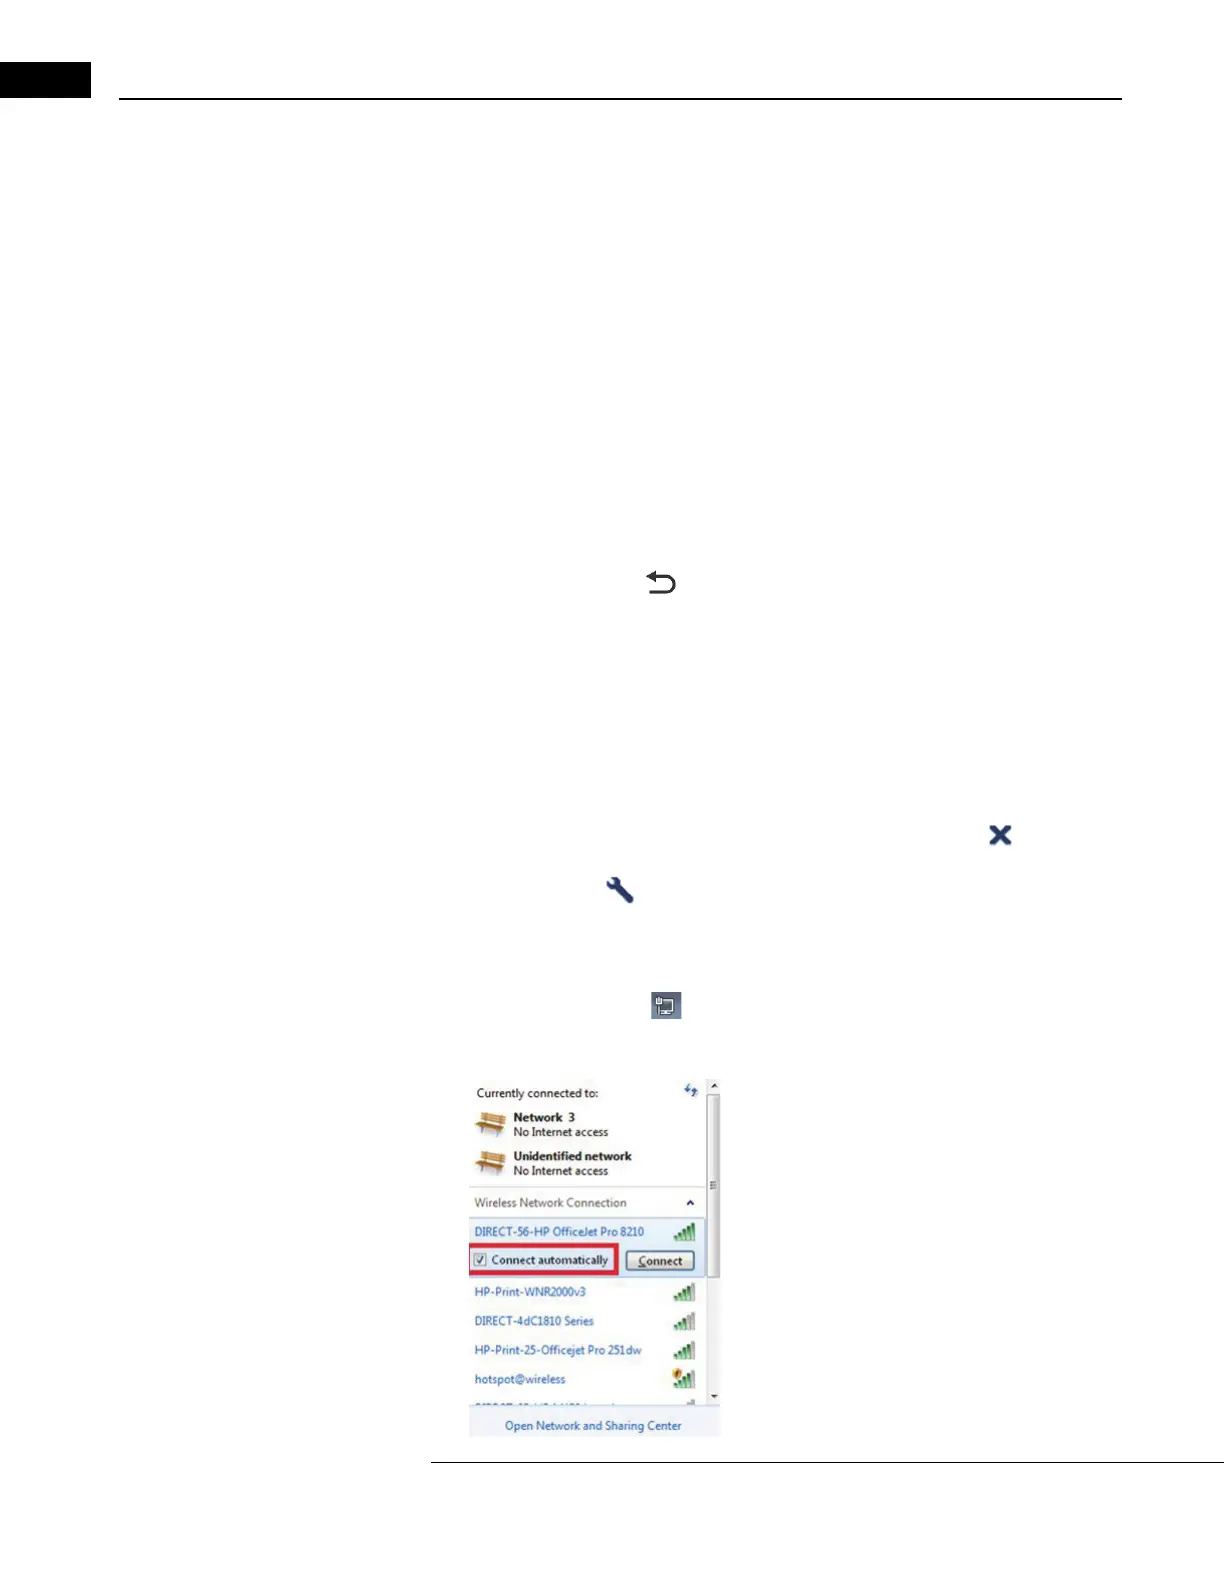
6. Click on the network icon located on the Task Bar in the Windows desktop.
7. Select the network connection for the w
ireless printer recorded in step 4.
8. Ensure that Connect automatically
is checked and select Connect.

 Loading...


