HFA3 Instructions for Use 2660021166131 Rev. A 2018-11
Go to Contents Setup and Testing
4-19
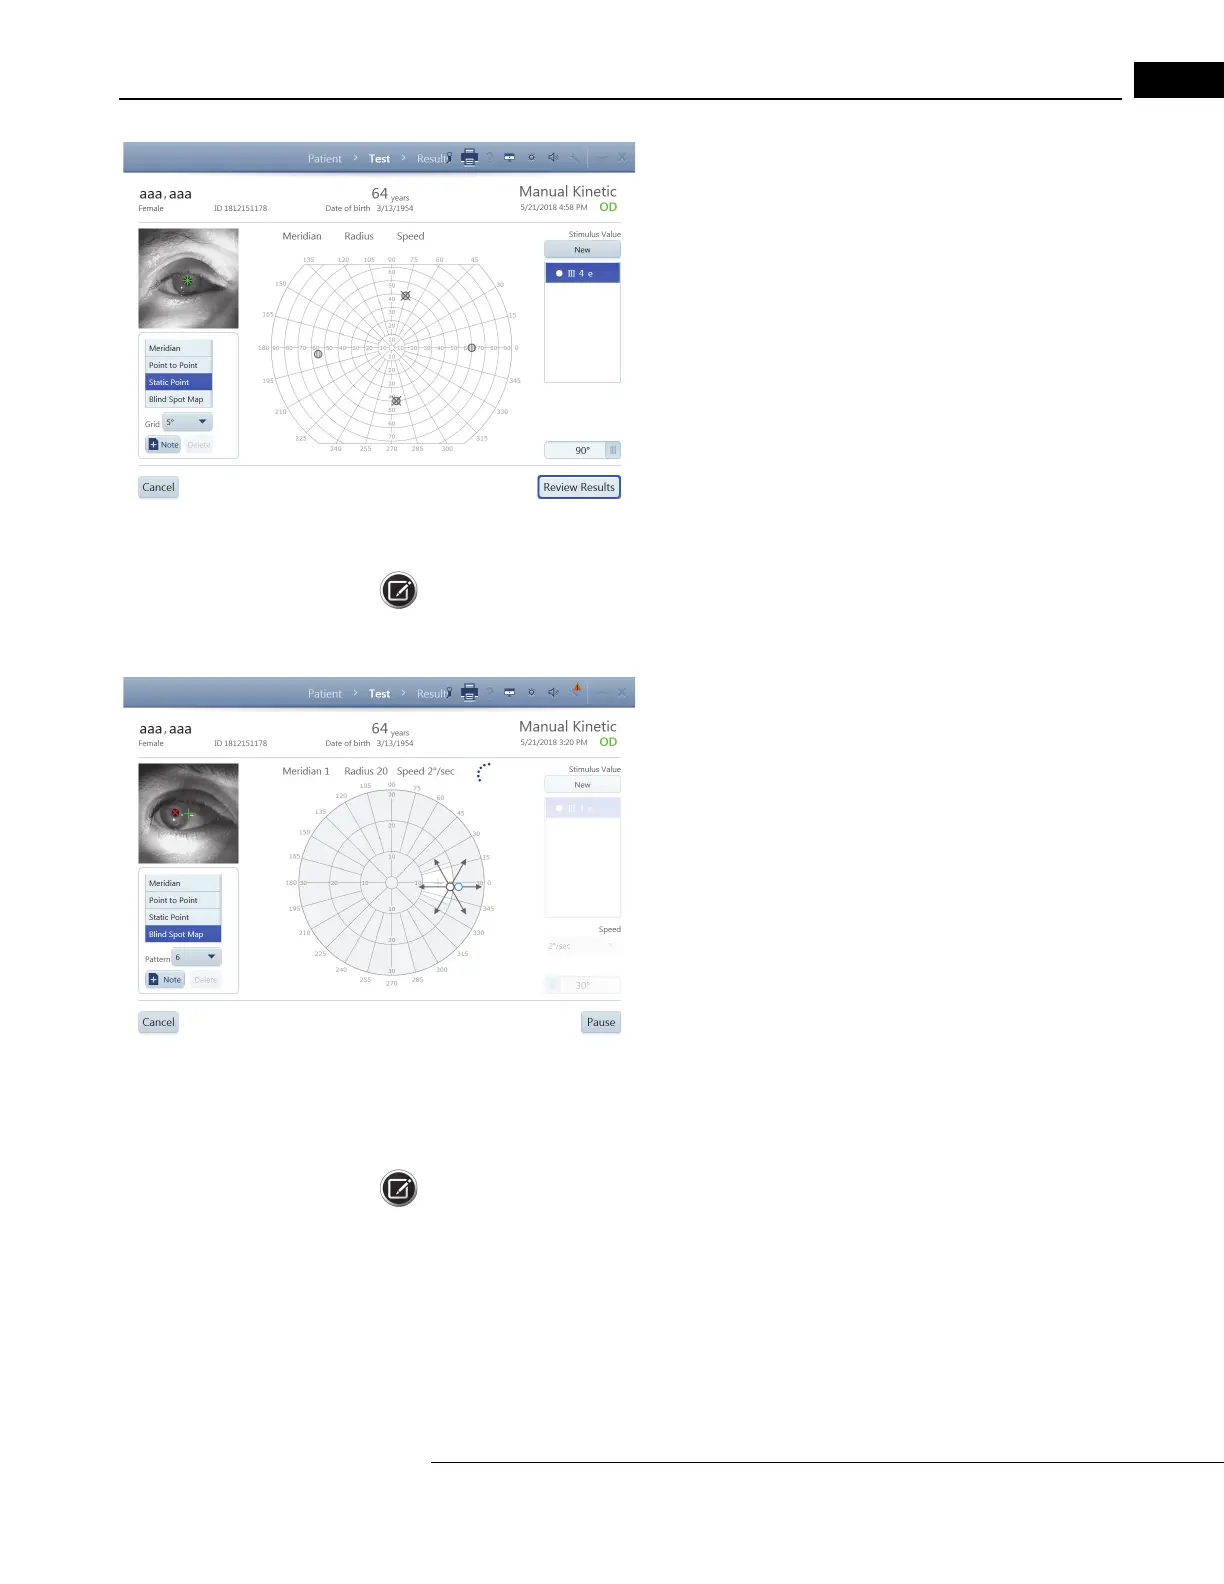
Static Point Mode
While the Static Point test mode is selected, perform the following
steps to present a stimulus to the patient:
1. Select a stimulus type from
the stimulus legend or choose a New
stimulus.
2. Touch screen, or click mouse, to place a point anywhere on the
test p
attern. If the point is outside the testable area, it will
automatically be placed at the maximum position.
3. Move finger, or depress the mouse, to reposition the point.
M
eridian and Radius values are updated.
4. Lift finger, or release mouse, to place stimulus.
5. Stimulus begins immediately and shines in
place for 0.5 seconds.
6. If the patient sees the stimulus, a gridded icon is displayed. If the
stimulus
is not seen, an X is drawn over the gridded icon.
The Speed drop-down menu is unavailable while in Static Point mode.
Note: To retest a point where a response was already made, touch or left-click on another area of
the screen and move finger or mouse to the point. Direct selection of the point will highlight it for
d
eletion. The HFA3 will only display the retested point once.
Blind Spot Map Mode
When Blind Spot Map is selected, the Grid drop-down menu
becomes the Pattern drop-down menu, the visual field automatically
zooms to 30 degrees (30°), stimulus speed is automatically set to 2
degrees (2°)/sec (speed), and the scan radius is set to 10 degrees
(10°). Speed and Field size settings cannot be changed.
1. Choose from a 4, 6, or 8 meridian
pattern, with 6 as the default.
Note: Each meridian of the
4 meridian pattern is separated by 90
degrees (90°), the meridians in the 6 pattern by 60 degrees (60°),
and the meridians in the 8 pattern by 45 degrees (45°).
2. Select a stimulus type from the stimulus legend or choo
se a New
stimulus.
3. Touch screen, or click mouse, to place a point anywhere in the
white-shaded r
egion on the test pattern. The stimulus can extend
outside the white area.
4. Lift finger or release the mouse to fix the point.
5. The stimulus immediately begins to move fr
om the center, along
the line, and stops when the patient responds.
Note: Standard coordinates for the average anatomical blind spot are: X = 15 degrees (15°),
Y = –1 degree (–1°).
Pause or Cancel the Test
Whether the test is paused or running, select Ca
ncel to access several options:
• Cancel Current Eye Test and Test Next Eye (results are not saved)
• Cancel Entire Test (results are not saved)
• Return to Current Eye Test
Select Pa
use to pause the test. This will be indicated on the screen. Select Restart Test to delete the
results and restart the test. Select Return to Test to go back to the Test screen.

 Loading...


