Networking Go to Contents
HFA3 Instructions for Use 2660021166131 Rev. A 2018-11
7-2
Configuration to Pre-existing Office Network
This section explains how to configure the HFA3 to communicate via a pre-existing office network
(LAN). To do this, the instrument must be connected to the office network by a standard network
patch cable. Make sure to plug one end of your standard network patch cable into the HFA3
Ethernet port (see Figure 3-5). Be sure to handle the cable connector gen
tly. It is the user’s
responsibility to install the necessary cables.
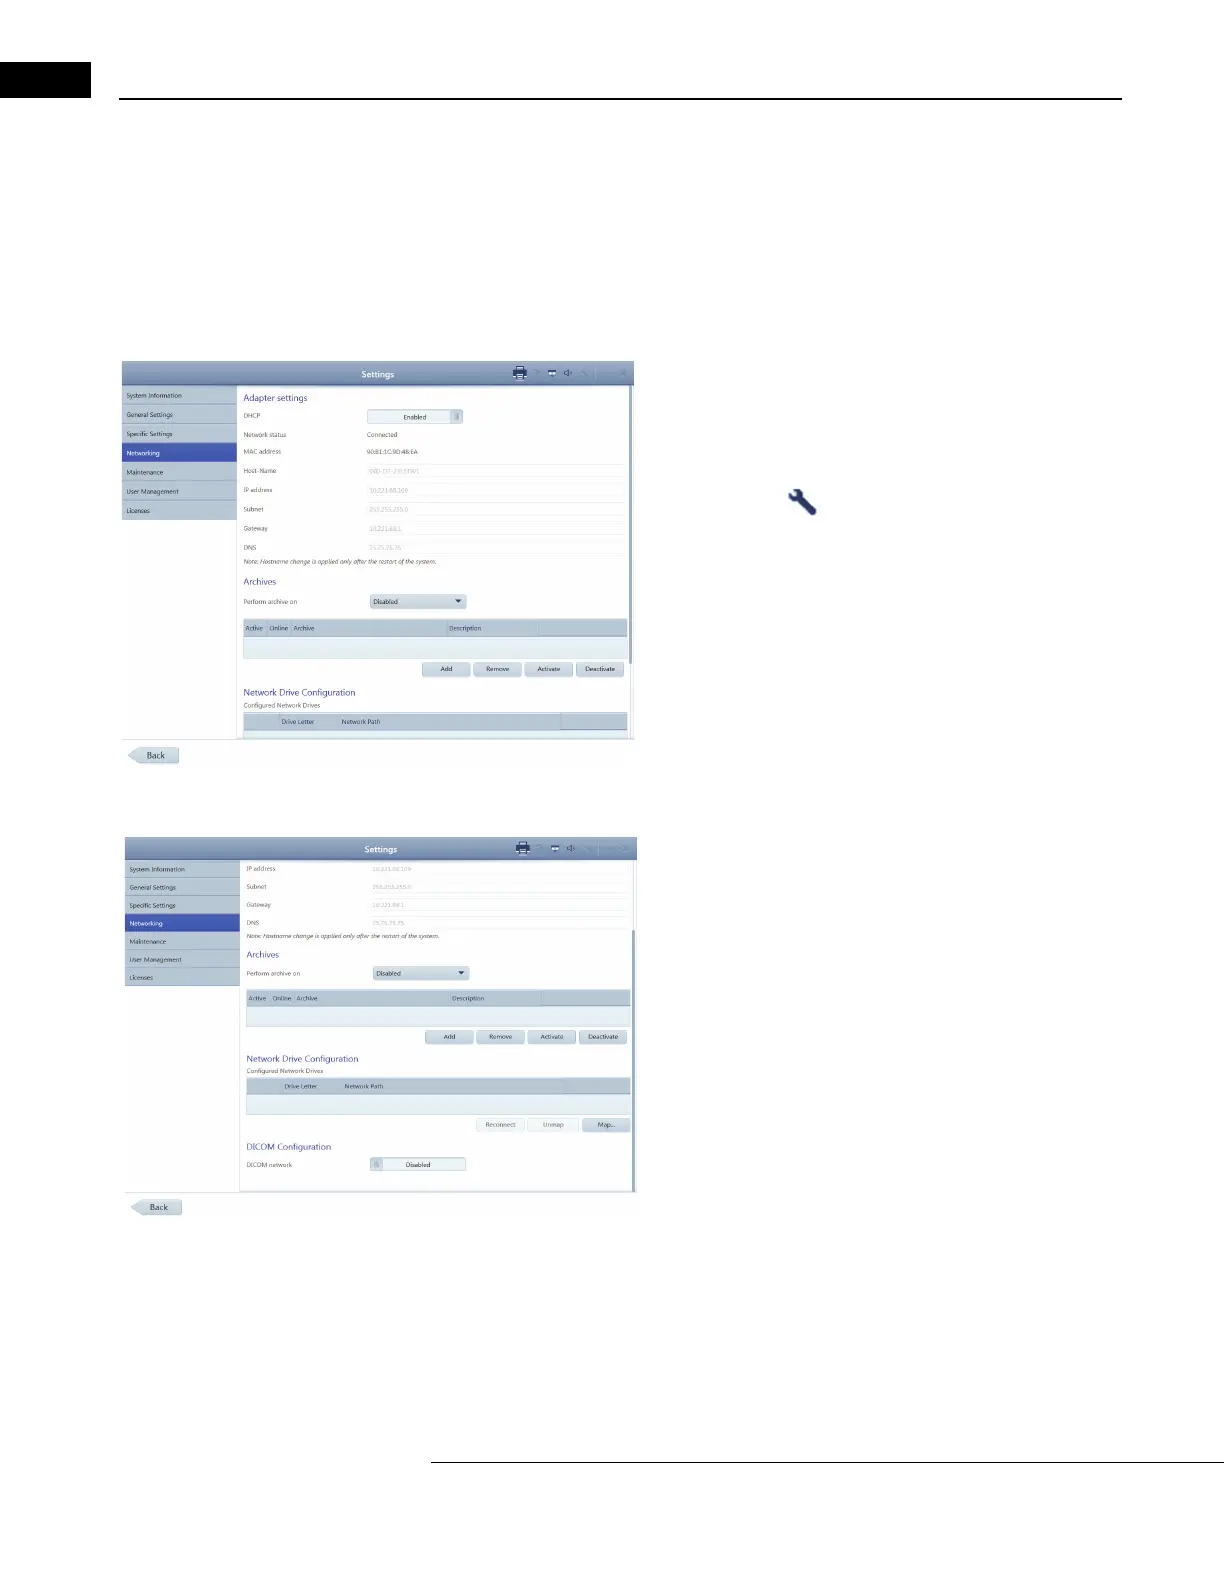
Configure Networking Settings on the HFA3
1.Start the instrument and log in
as an Administrator user. If the
instrument is already on, you may log in as another user by
selecting Change user from the Close button menu while in the
P
ATIENT screen.
2. Select Setti
ngs > Networking to display the Networking
screen.
3. Ensure that DHCP
(Dynamic Host Configuration Protocol) is
Enabled to automatically assign an IP address to the instrument.
4. If the network uses static IP add
resses, contact a network
administrator to have the HFA3 added, or set DHCP to Disabled
and fill in the IP Address, Subnet Mask, and Default Gateway fields.
Add Network Shared Folders
1.Make sure you are logged in as an Administrator user.
2. In the Networking scr
een select Map network drive under
Network drive configuration.
3. Perform the following steps in the r
esulting dialog window:
4. In N
etwork path, enter the network shared folder address.
Note: Y
ou may only map a shared folder where the target is a root
directory, or a subdirectory owned by a root directory. Attempting
to map lower level folders will result in a user name and password
error message. You can navigate to lower level folders to save
reports using the Printout and Report Output settings. See
“Instrument Settings,” on page 3-10.
5. Select an unused drive letter.
6. Enter Us
er name and Password for the shared folder. Do not
enter either if no password is required.
7. Select Ma
p.
8. You will return to the Network
ing screen. Make sure that the
mapped drive appears under Available network drives.

 Loading...


