1063D Systems, Inc.
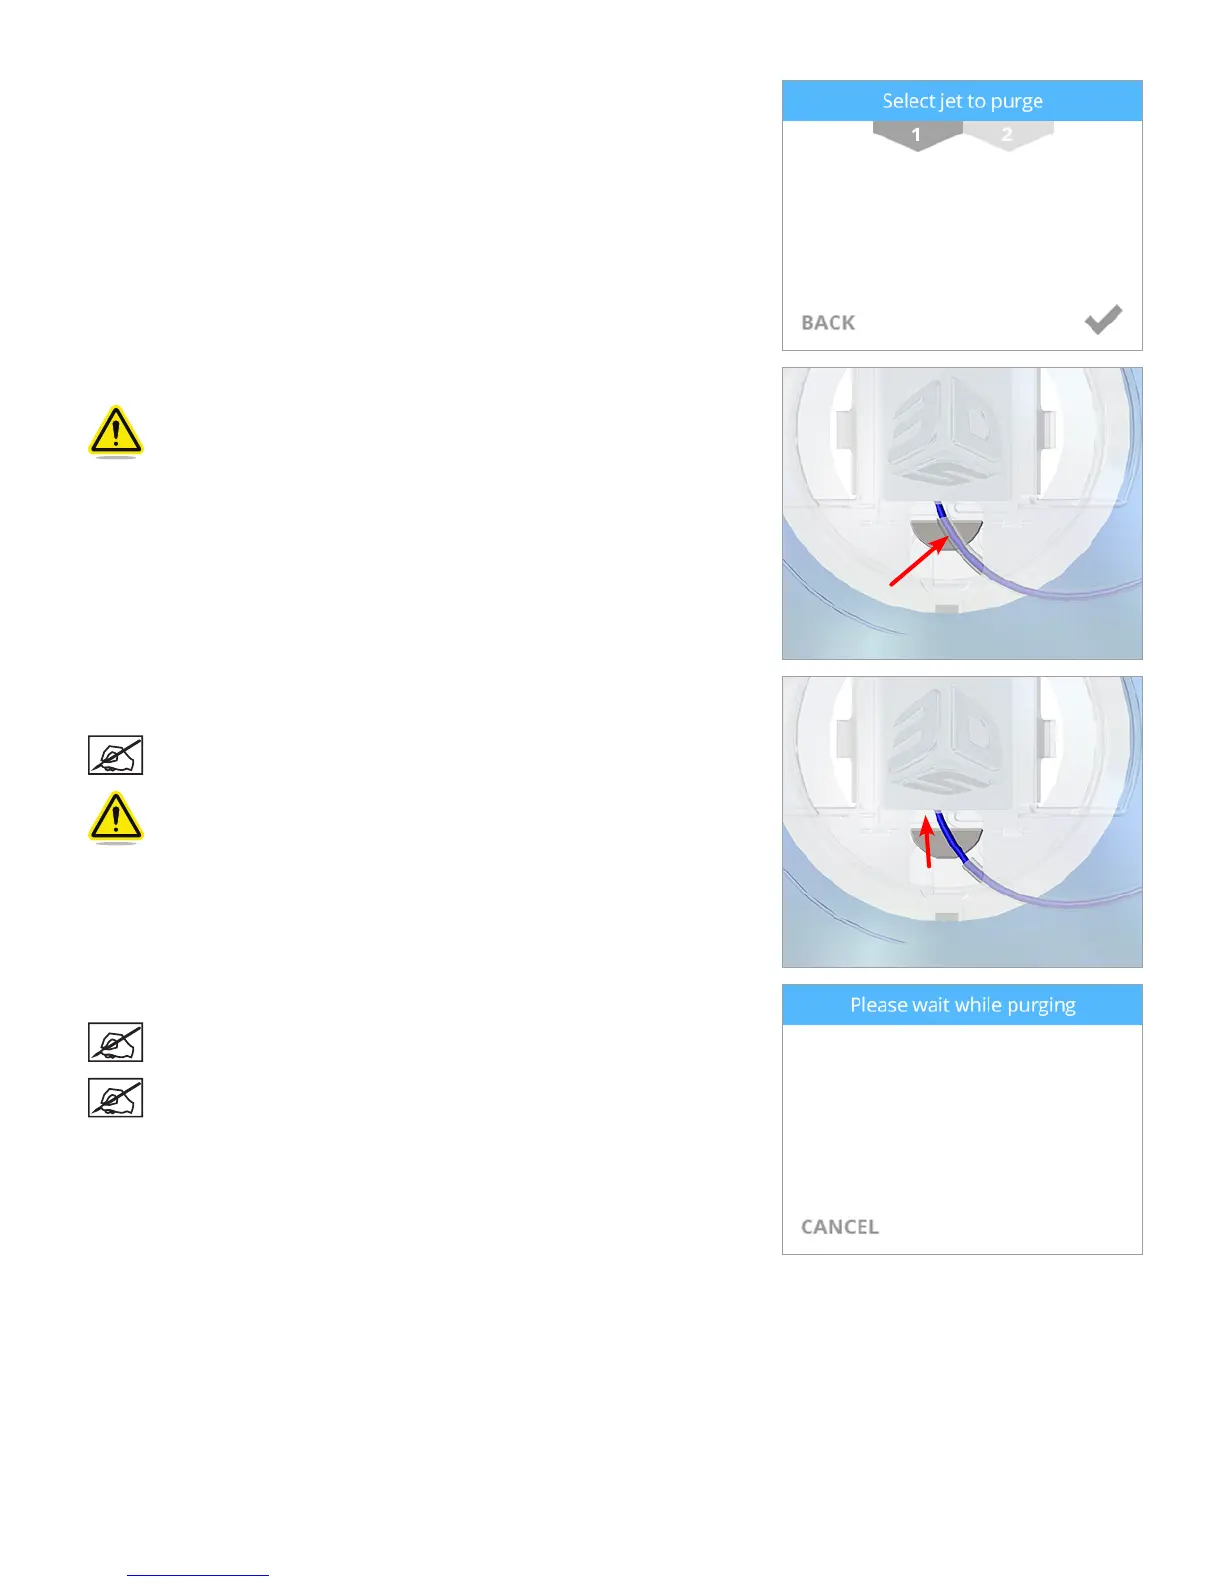
4. Select the print jet you would like to purge and select the checkmark to continue.
5. Using the pliers from the tool kit, carefully pull down the material sleeve.
Caution: Do not pinch or twist the lament sleeve.
6. Using the pliers, grasp the print material just above the sleeve and push the
material upward.
NOTE: Once the print jet begins to purge, the upward pressure will
allow the feeder to engage the print material.
Caution: Exercise caution when handling the print material to
ensure it does not break.
7. Continue to push the print material upward until the print jet begins purging.
NOTE: Once the print jet reached the operating temperature, it will
begin to purge.
NOTE: After purging, the print jets will cool down.