953D Systems, Inc.
PRINTER CALIBRATION
Printer Calibration is originally performed by the manufacturer. When Level Gap, Auto Gap and Manual Gap have been successful but
the bottom layer of your print appears stringy and not tightly fused together, your printer should be calibrated.
NOTE: Auto Level should always be performed before the Auto Gap procedure.
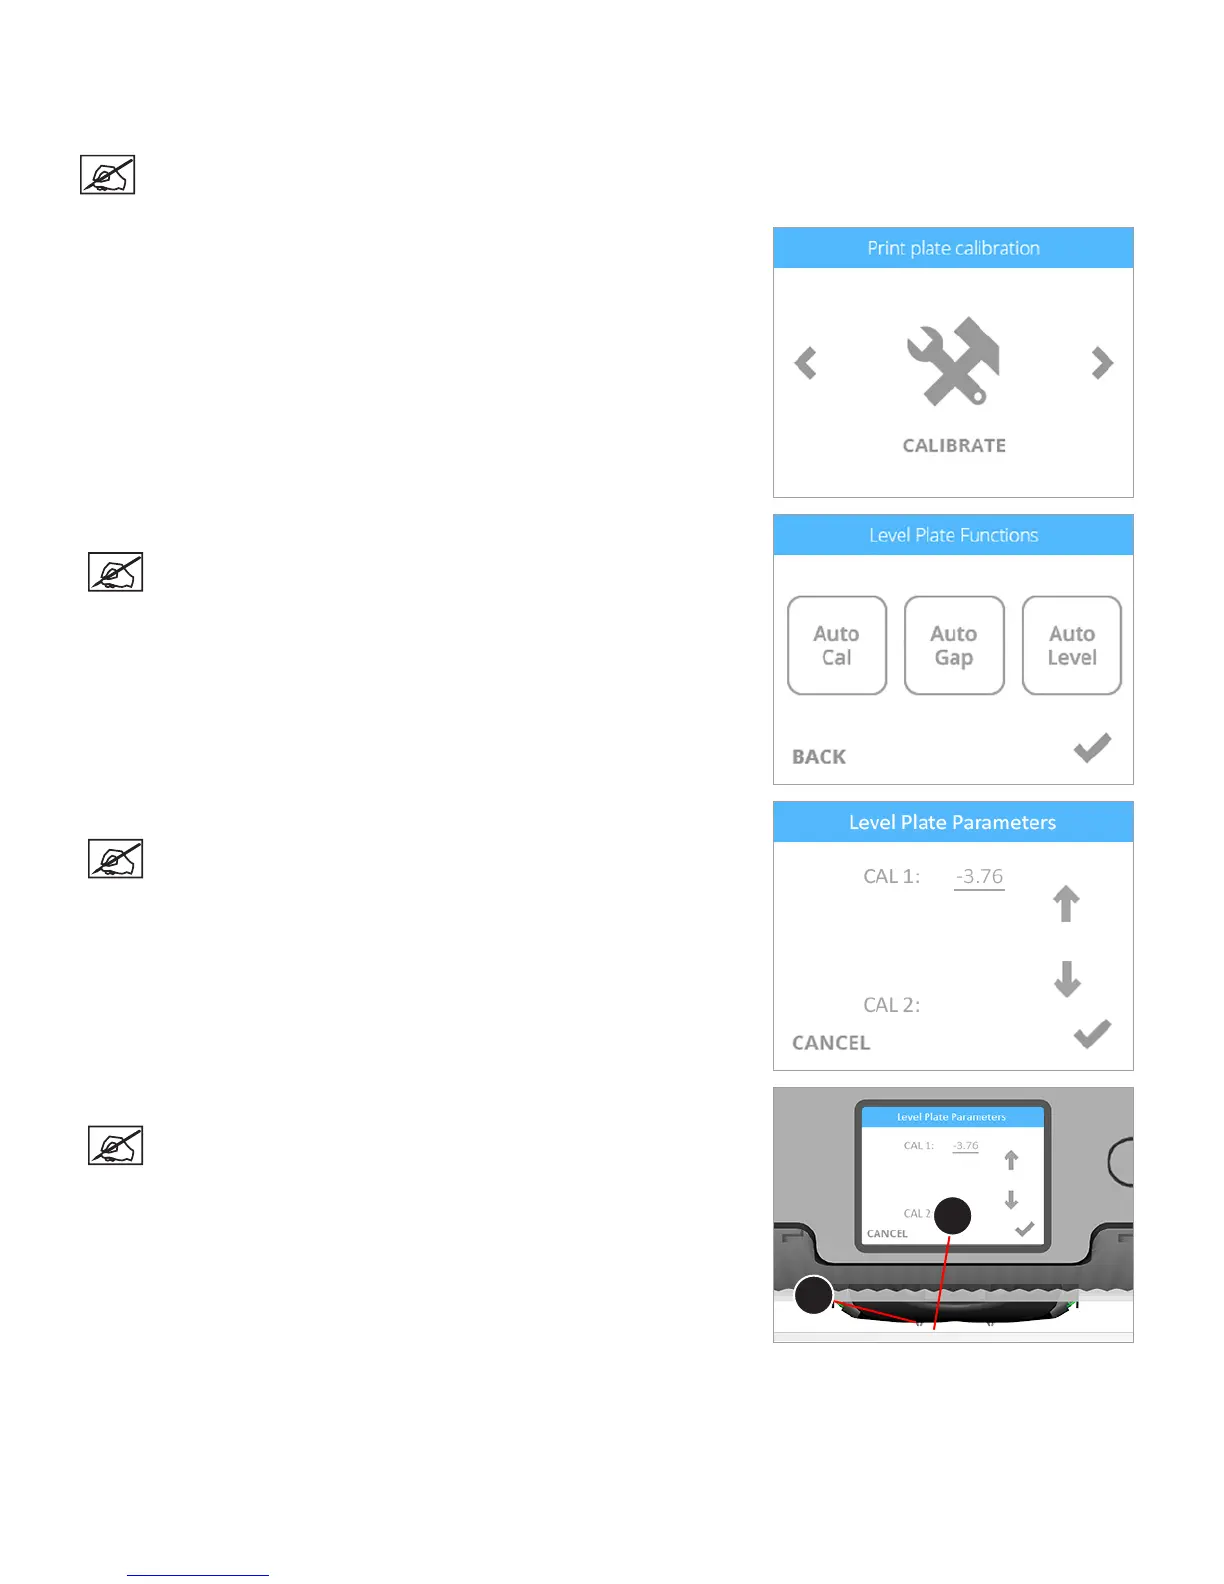
1. Navigate to the Printer Calibration screen and select CALIBRATE.
2. Select Auto Cal.
NOTE: The printer will maneuver the print pad to center it and then
position it under the print jet nozzles.
3. Lower the value on your display by 1.00 using the down arrow.
NOTE: The value displayed may be different from the illustration.
Referring to this illustration, your target value would be close to
-4.76. If the value displayed is 6.23, your target value would be close
to 5.23. The nal adjustment value should be close to the target
value but does not need to be exact.
4. Insert the gap gauge between the print pad (A) and the left print jet nozzle (B).
NOTE: The left print jet is print jet 1.
A
B