EasyManuals Logo

3D Systems CUBE User Manual

3D Systems CUBE
121 pages
To Next Page IconTo Next Page
To Previous Page IconTo Previous Page
Page #13 background imageLoading...
Page #13 background image
93D Systems, Inc.
4. Open the box.
5. Remove the upper foam support.
6. Remove the printer from the box and remove the protective bag from the printer.
Place the printer on a solid, level base where you intend to use it.
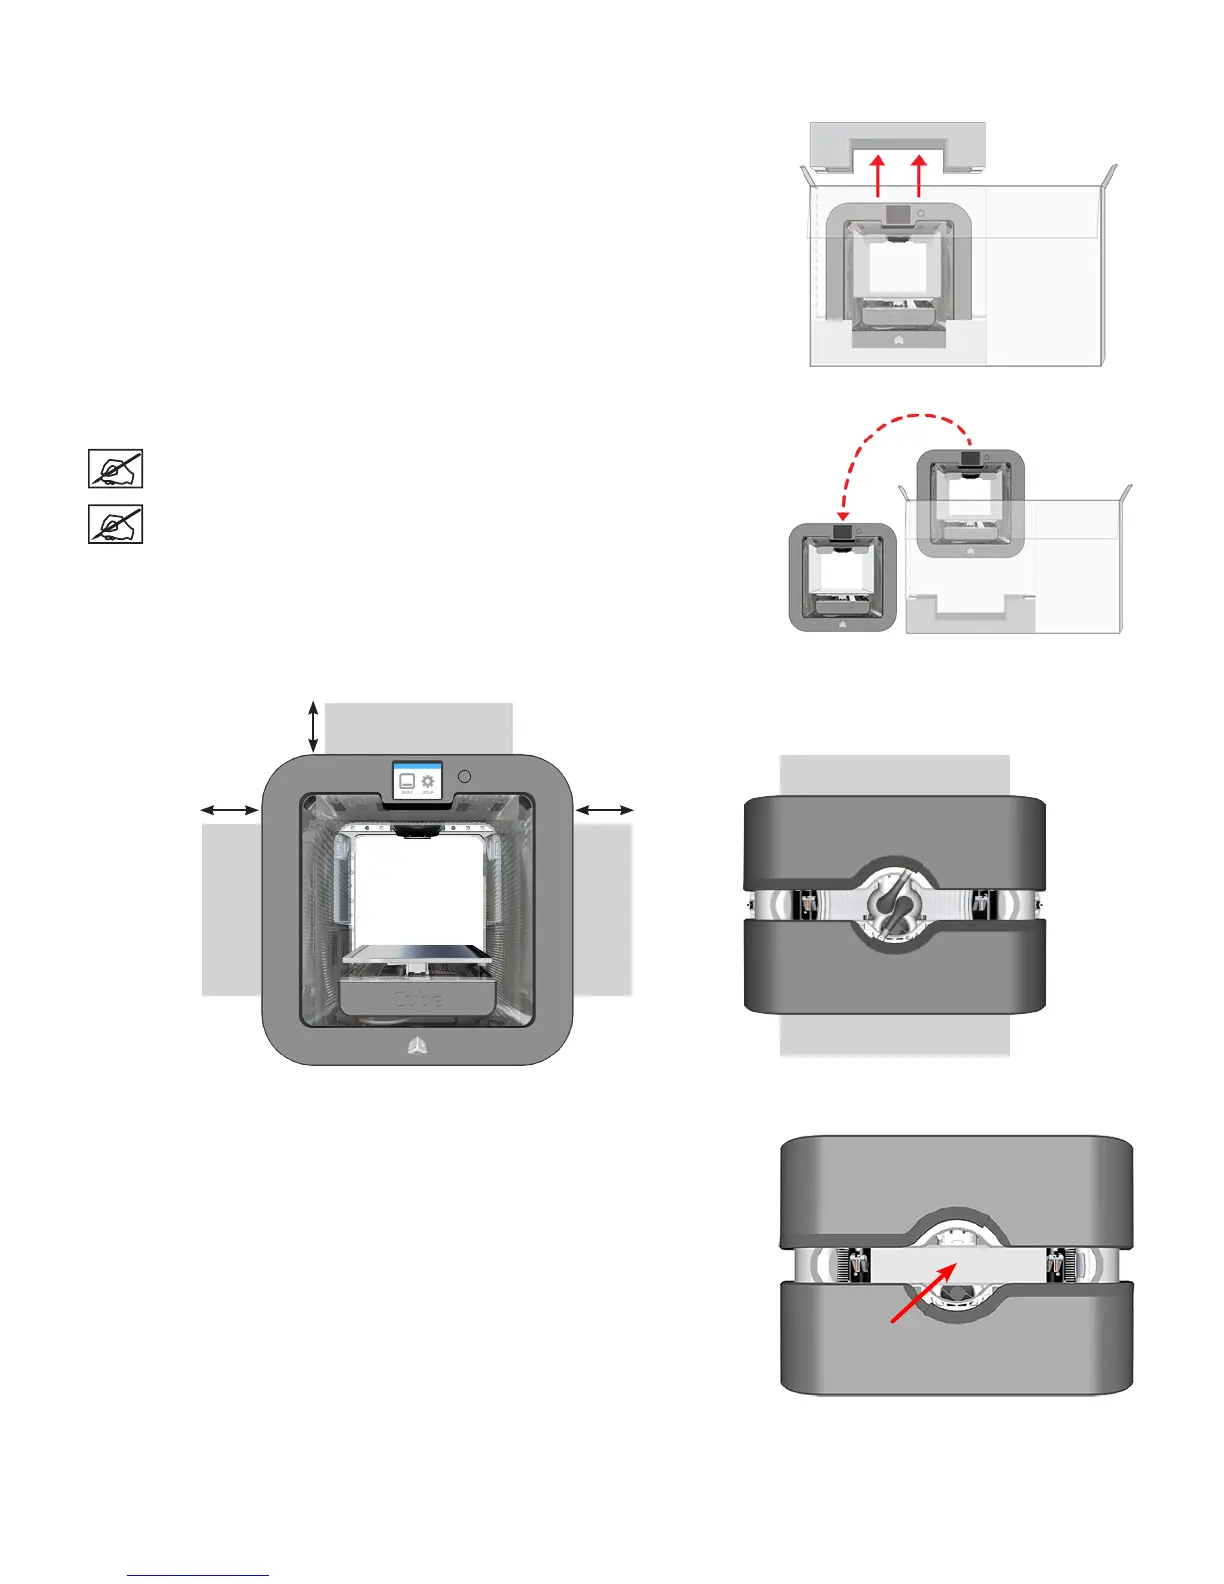
NOTE: When installing the printer there must be a minimum of 8”
(203 mm) of space on top and on either side of the printer.
NOTE: There must be a minimum of 4” (102 mm) space in front of
and behind the printer.
7. Remove the top insert.
8” (203 mm)
8” (203 mm)
8” (203 mm)
Hand Clearance Around the Printer Build Plate Travel Area
4” (102 mm)
4” (102 mm)
Back
Front
Front View Top View

Table of Contents

Other manuals for 3D Systems CUBE

Questions and Answers:

Question and Answer IconNeed help?

Do you have a question about the 3D Systems CUBE and is the answer not in the manual?

3D Systems CUBE Specifications

General IconGeneral
Print technologyPlastic Jet Printing (PJP)
Printing materialABS, Polylactic acid (PLA)
Number of printing colors16
Maximum build size (WxDxH)- mm
Plug and PlayYes
USB version2.0
Ethernet LANNo
Card reader integrated-
Product colorSilver

Related product manuals