Configuring the terminal | 65
Configuring the IP settings
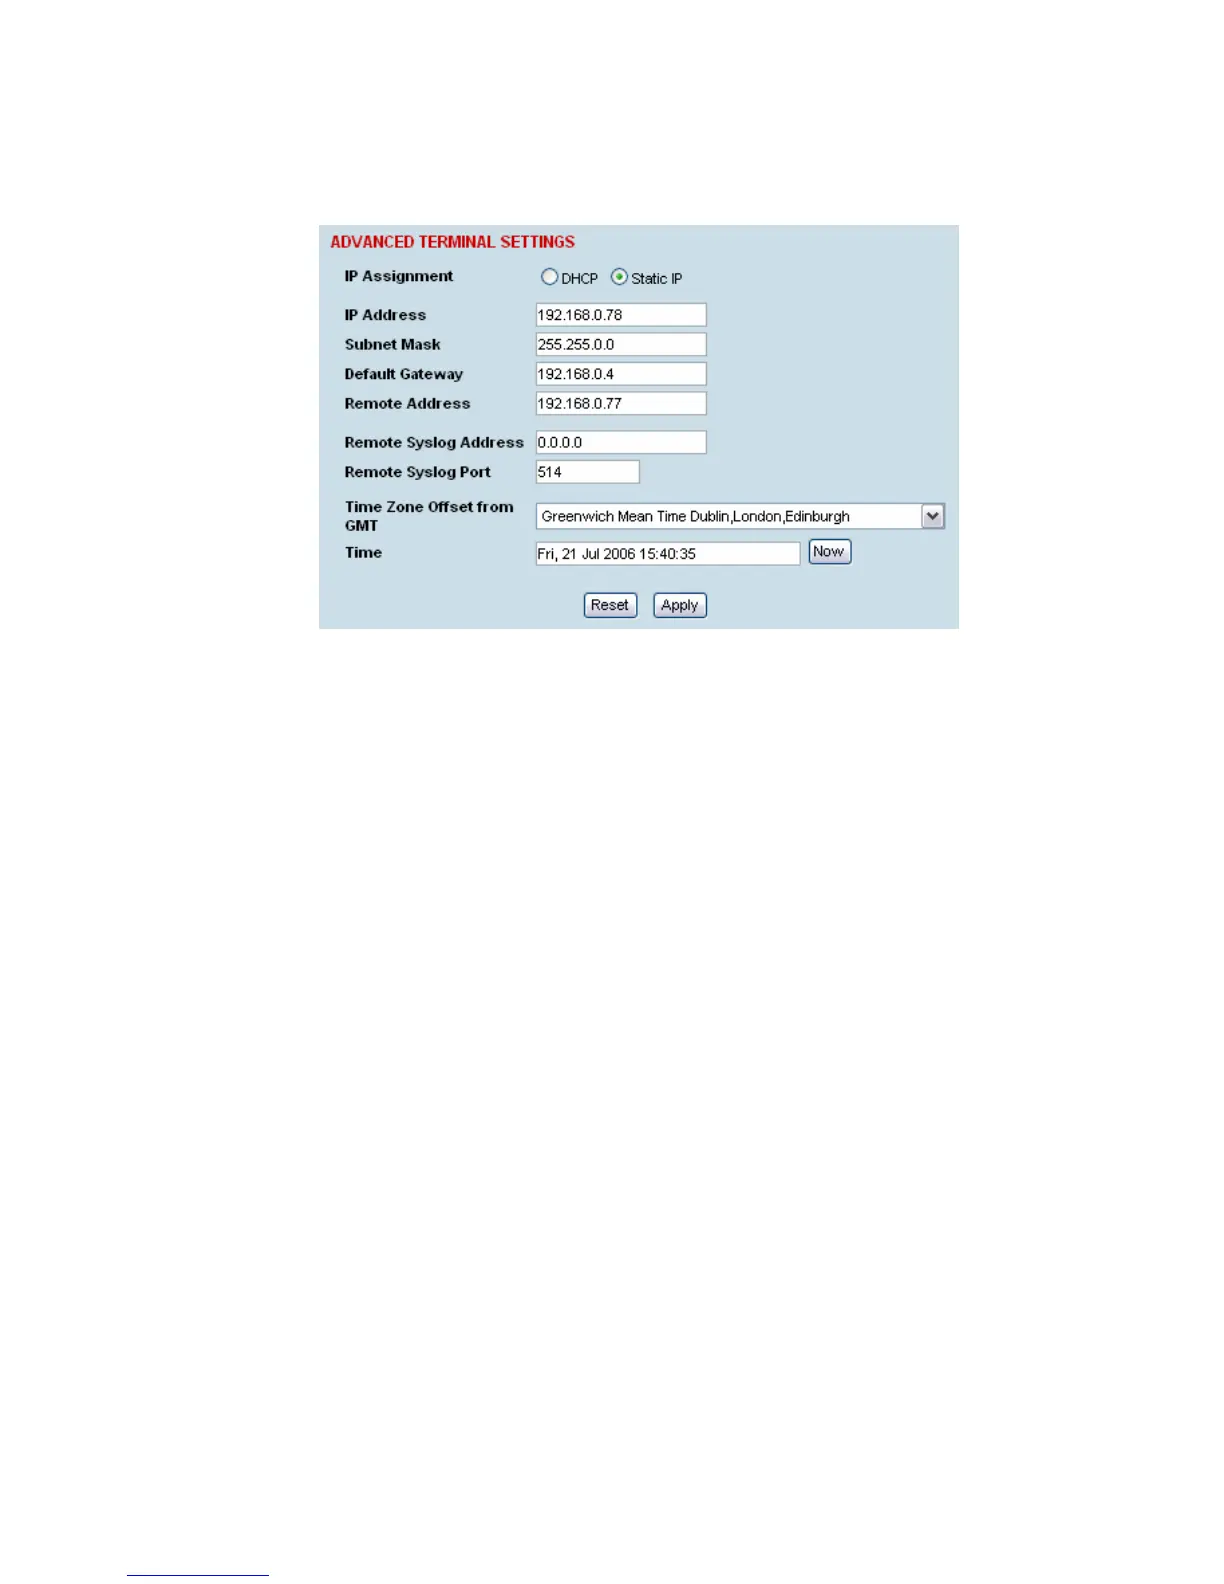
1. Select Link or Local or Remote > Terminal > Advanced.
2. Select either DHCP or Static IP addressing.
3. If you select Static IP, you must also:
Enter the IP Address for the terminal assigned by your site network administrator. Use the
standard format xxx.xxx.xxx.xxx. The default IP address is in the range 169.254.50.xx.
Enter the Subnet Mask for the terminal using the standard format xxx.xxx.xxx.xxx. The default
subnet mask is 255.255.0.0.
Enter the Default Gateway for the terminal, if required, using the standard format
xxx.xxx.xxx.xxx (There is no default gateway set by default.)
4. In Remote Address, enter the IP address of the remote terminal using the standard format
xxx.xxx.xxx.xxx (The default IP address is in the range 169.254.50.xx.)
5. If you are setting up for remote logging (see page 209), enter the Syslog Address and the Syslog
Port for the remote terminal.
6. In Time Zone Offset from GMT, select the time zone from the list (optional) .
7. To set the Time to the PC real-time clock, click Now.
8. Click Apply to apply changes or Reset to restore the previous configuration.