Disassembly/Assembly
Guidelines
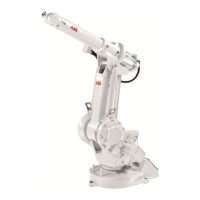
IRB 6400
Page 10 - 3
Cables Guidelines
LOWER CABLE (B18) Installation
WARNING! BE SURE ELECTRICAL DISCONNECT SWITCH IS
OFF AND LOCKED IN OFF POSITION
1. INSERT LOWER CABLE (B18) INTO BASE HOUSING (B24):
a. Carefully feed lower cable (B18) into access hole at left rear of
base housing (B24).
b. Pull cable ends through the holes in the shoulder frame housing
(S21) and position them ready for connection.
c. Use Loctite 242 (B11) on screws (B10) and fasten lower cable to
base housing (B24). Use washers (B12) with screws (B10).
d. Use Loctite 242 on screws (B20) and fasten cable (B18) to sup-
port rail. Use washers (B19) with screws (B20).
3. INSTALL CABLE GUIDE RAIL (B16):
a. Position cable guide rail (B16) against lower cable (B18) and
engaged with loosened screw (B13).
b. Use Loctite 242 on right side screw (B13) and fasten cable guide
rail (B16) to base housing (B24). Use washer (B15) with screw
(B13).
c. Remove left side screw (B13), apply Loctite (B14), and reinsert
with washer (B15). Tighten to secure guide rail (B16).
4. CHECK THAT LOWER CABLE IS FREE TO MOVE AS ROBOT
ROTATES. LOOSEN (B10) AND (B13) TO ADJUST CABLE AND RAIL
AS NECESSARY. RETIGHTEN SCREWS AFTER ADJUSTMENTS.
5. CONNECT LOWER CABLE (B18) CONNECTORS:
a. Connect R3.BU1-6(X8), R3.BU1-3(X9), & R3.BU4-6(X10) to the
brake release unit (S64). Mount the unit into housing (S21) and
secure with screws (S65).
b. Connect R2.SMB1(X2) to the signal measuring board on the
measure card unit (S10). Mount the unit (S10) with screws (S12).
c. Connect R2.MP1, R2.MP2, R2.MP3, R2.MP4, R2.MP5-6,
R2.FAN (if equipped), R2.CP (if equipped), R2.CS (if equipped).
6. CONNECT EARTH WIRE TO CONTACT PLATE IN BASE HOUSING
(B24).
E
E
REFERENCE DRAWINGS
Exploded Views:
“B” (pg 10-11, 12-1)
Assemblies:
Hand Tools
REQUIRED TOOLS
3HAB 4161-4 (pg 13-2)
3HAA 0001-AAS (pg 14-A)
3HAB 4248-2 (pg 14-G)
3HAB 4161-4 (pg 13-1)
“S” (pg 10-12, 12-2)

 Loading...