Disassembly/Assembly
Guidelines
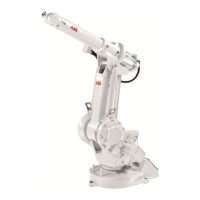
IRB 6400
Page 1 - 2
Introduction
Section 6 - AXES 2 & 3 DISASSEMBLY/ASSEMBL Y
GUIDELINES
Section 6 contains the outlines you can use as guidelines when you disasse m-
ble and assemble components associated with the robot’s Axes 2 & 3. These
outlines are presented in a clear, step by step format. Each part involved in a
procedure is identified by a number that is in a list and on an exploded illustr a-
tion. For example, motor socket plate (S37) is illustrated on the “S” exploded
illustration and listed in the illustration’s accompanying parts list in Section 12 .
Section 7 - AXIS 4 DISASSEMBLY/ASSEMBLY GUIDELINE S
Section 7 contains the outlines you can use as guidelines when you disasse m-
ble and assemble components associated with the robot’s Axis 4. These ou t-
lines are presented in a clear, step by step format. Each part involved in a
procedure is identified by a number that is in a list and on an exploded illustr a-
tion. For example, screw (U85) is illustrated on the “U” exploded illustration and
listed in the illustration’s accompanying parts list in Section 12.
Section 8 - AXIS 5 DISASSEMBLY/ASSEMBLY GUIDELINE S
Section 8 contains the outlines you can use as guidelines when you disasse m-
ble and assemble components associated with the robot’s Axis 5. These ou t-
lines are presented in a clear, step by step format. Each part involved in a
procedure is identified by a number that is in a list and on an exploded illustr a-
tion. For example, motor (W52) is illustrated on the “W” exploded illustration
and listed in the illustration’s accompanying parts list in Section 12.
Section 9 - AXIS 6 DISASSEMBLY/ASSEMBLY GUIDELINE S
Section 9 contains the outlines you can use as guidelines when you disasse m-
ble and assemble components associated with the robot’s Axis 6. These ou t-
lines are presented in a clear, step by step format. Each part involved in a
procedure is identified by a number that is in a list and on an exploded illustr a-
tion. For example, wrist assembly (U10) is illustrated on the “U” exploded illu s-
tration and listed in the illustration’s accompanying parts list in Section 12 .
Section 10 - CABLES GUIDELINE S
Section 10 contains the outlines you can use as guidelines when you remove
and install the electrical cables. These outlines are presented in a clear, step
by step format. Each part involved in a procedure is identified by a number that
is in a list and on an exploded illustration. For example, lower cable (B18) is
illustrated on the “B” exploded illustration and listed in the illustration’s acco m-
panying parts list in Section 12.

 Loading...