4-52 Service Guide E8361-90001
Troubleshooting PNA Series Microwave Network Analyzers
Measurement System Troubleshooting E8361A
Checking the Receiver Group
Equipment Used for These Tests
Getting Ready to Test
Before checking the assemblies, you must open the analyzer.
CAUTION Use an antistatic work surface and wrist strap to reduce the chance of
electrostatic discharge for all of the procedures in this chapter.
1. Turn off the analyzer power.
2. Unplug the power to the analyzer and disconnect all rear panel connections.
3. Remove the covers from the analyzer. Refer to “Removing the Covers” on page 7-6.
4. With the covers off, plug in the analyzer and turn on the power.
5. For Port 1 measurements, set the network analyzer for an S
11
measurement with a CW
frequency of 1 GHz.
For Port 2 measurements, set the network analyzer for an S
22
measurement with a CW
frequency of 1 GHz.
Checking the A27 through A30 First Converter Outputs
Perform this procedure if you observe a problem in all bands on a single channel.
1. Refer to the block diagram at the end of this chapter and to “Bottom RF Cables, No
Options” on page 6-22. Locate the cables W23, W24, W25, and W26 at the first
converters, A27, A28, A29, and A30, respectively.
2. Using a 5/16-inch torque wrench, disconnect the semirigid cable associated with the
faulty channel, from the first converter.
3. Connect the spectrum analyzer to the connector to which this cable was connected.
4. The measured signal on the spectrum analyzer should be at 8.333 MHz.
5. If the signal is not present, replace the faulty first converter. Refer to “Removing and
Replacing the A27, A28, A29, and A30 First Converters (Mixers) and Mixer Bias Board”
on page 7-48.
6. If the signal is present, reconnect the cable and continue with “Checking the LO Reject
Filter Board Outputs” on page 4-53.
Equipment Type
Model or
Part Number
Alternate Model
or Part Number
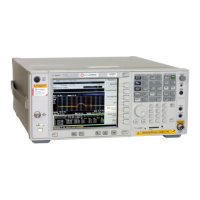
Spectrum analyzer 8565E
856xE
1
1. Must be capable of measuring signals at 8.333 MHz and 41.667 MHz.

 Loading...


