Enova DGX DXLink™ Fiber Boards, Duplex
109
Instruction Manual – Enova DGX 8/16/32/64 Digital Media Switchers
Integrating DXLink Fiber Units in NetLinx Studio
DXLink Fiber Transmitters and Receivers must have their DIP switch toggles set before they will display as part of a
Enova DGX system in NetLinx Studio (v3.5.960 or later is required). In NetLinx Studio, the DXLink Fiber units can be
bound to the integrated Master by right-clicking on the device and selecting Network Bind/Unbind Device.
DIP Switch Toggles
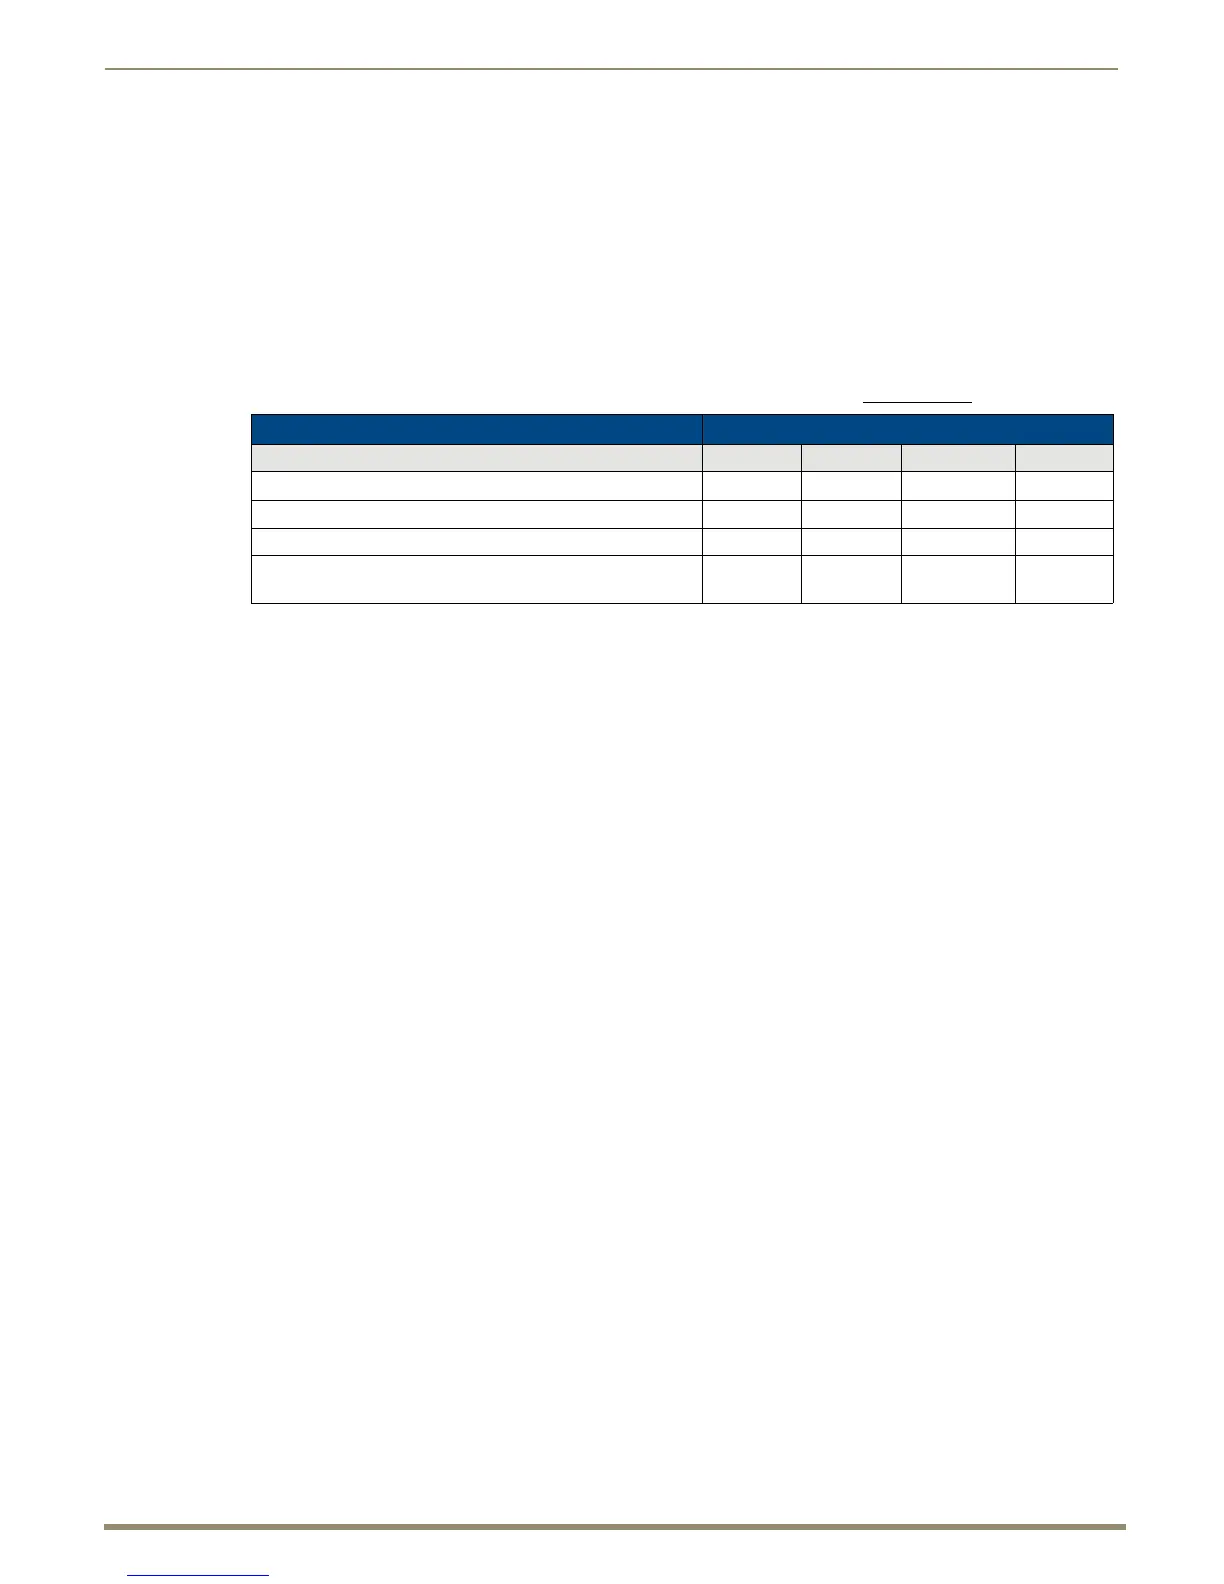
The following table contains some of the most common scenarios for setting up DXLink Fiber Transmitters and
Receivers with an Enova DGX Switcher (the default for all four DIP switch toggles is OFF).
Important: Find the scenario in the table below that you want to use and set the DIP switches accordingly.
The DIP switches are on the bottom of the DXLink Fiber units. A detailed description of functions for each toggle is
provided in the Instruction Manual – DXLink™ Fiber Transmitters and Receivers at www.amx.com
.
* Connect the ICS LAN 10/100 port of the DXLink Fiber unit to the network device (e.g., laptop, IP controlled projector,
AMX ICSLan EXB device).
Tip: Each toggle’s ON position is toward the connectors on the rear of the DXLink Fiber units.
Binding DXLink Fiber Units to Enova DGX Integrated Master
After you set the DIP switches per the table above, follow the instructions below to display the DXLink Fiber units in
NetLinx Studio.
To bind DXLink Fiber units to Enova DGX integrated Master:
1.
Verify the following:
a. Verify that an Ethernet/RJ-45 cable is connected from the Enova DGX Switcher’s integrated Master to the
network (e.g., from the switcher’s LAN 100/1000 port to a LAN).
b. Verify that the target Transmitter or Receiver is connected via its DXLink Fiber connector to a DXLink Fiber
Input or Output Board (respectively) on the switcher.
c. Verify that the switcher is powered on.
2. Launch NetLinx Studio and open the OnLine Tree.
3. Bind the target Transmitter or Receiver to the integrated Master:
a. Select and right-click the TX or RX.
b. From the context sensitive menu, select Network Bind/Unbind Device (be sure the check box is selected).
c. Click OK.
Note: For additional information on DXLink Fiber units, see the “Instruction Manual – DXLink™ Fiber
Transmitters and Receivers.”
Common Scenarios DIP Switch Toggle Settings
Switcher Setup – TX/RX with Enova DGX 8/16/32/64 1 2 3 4
AV signals only OFF OFF OFF OFF
AV with Ethernet pass-through to networked device* ON OFF OFF OFF
AV with NetLinx control of TX/RX unit and serial/IR ports OFF OFF ON OFF
AV with NetLinx control of TX/RX unit and serial/IR ports, plus
Ethernet pass-through to networked device*
ON OFF ON OFF

 Loading...


