Appendix E – Adding or Replacing Boards
222
Instruction Manual – Enova DGX 8/16/32/64 Digital Media Switchers
Board Troubleshooting
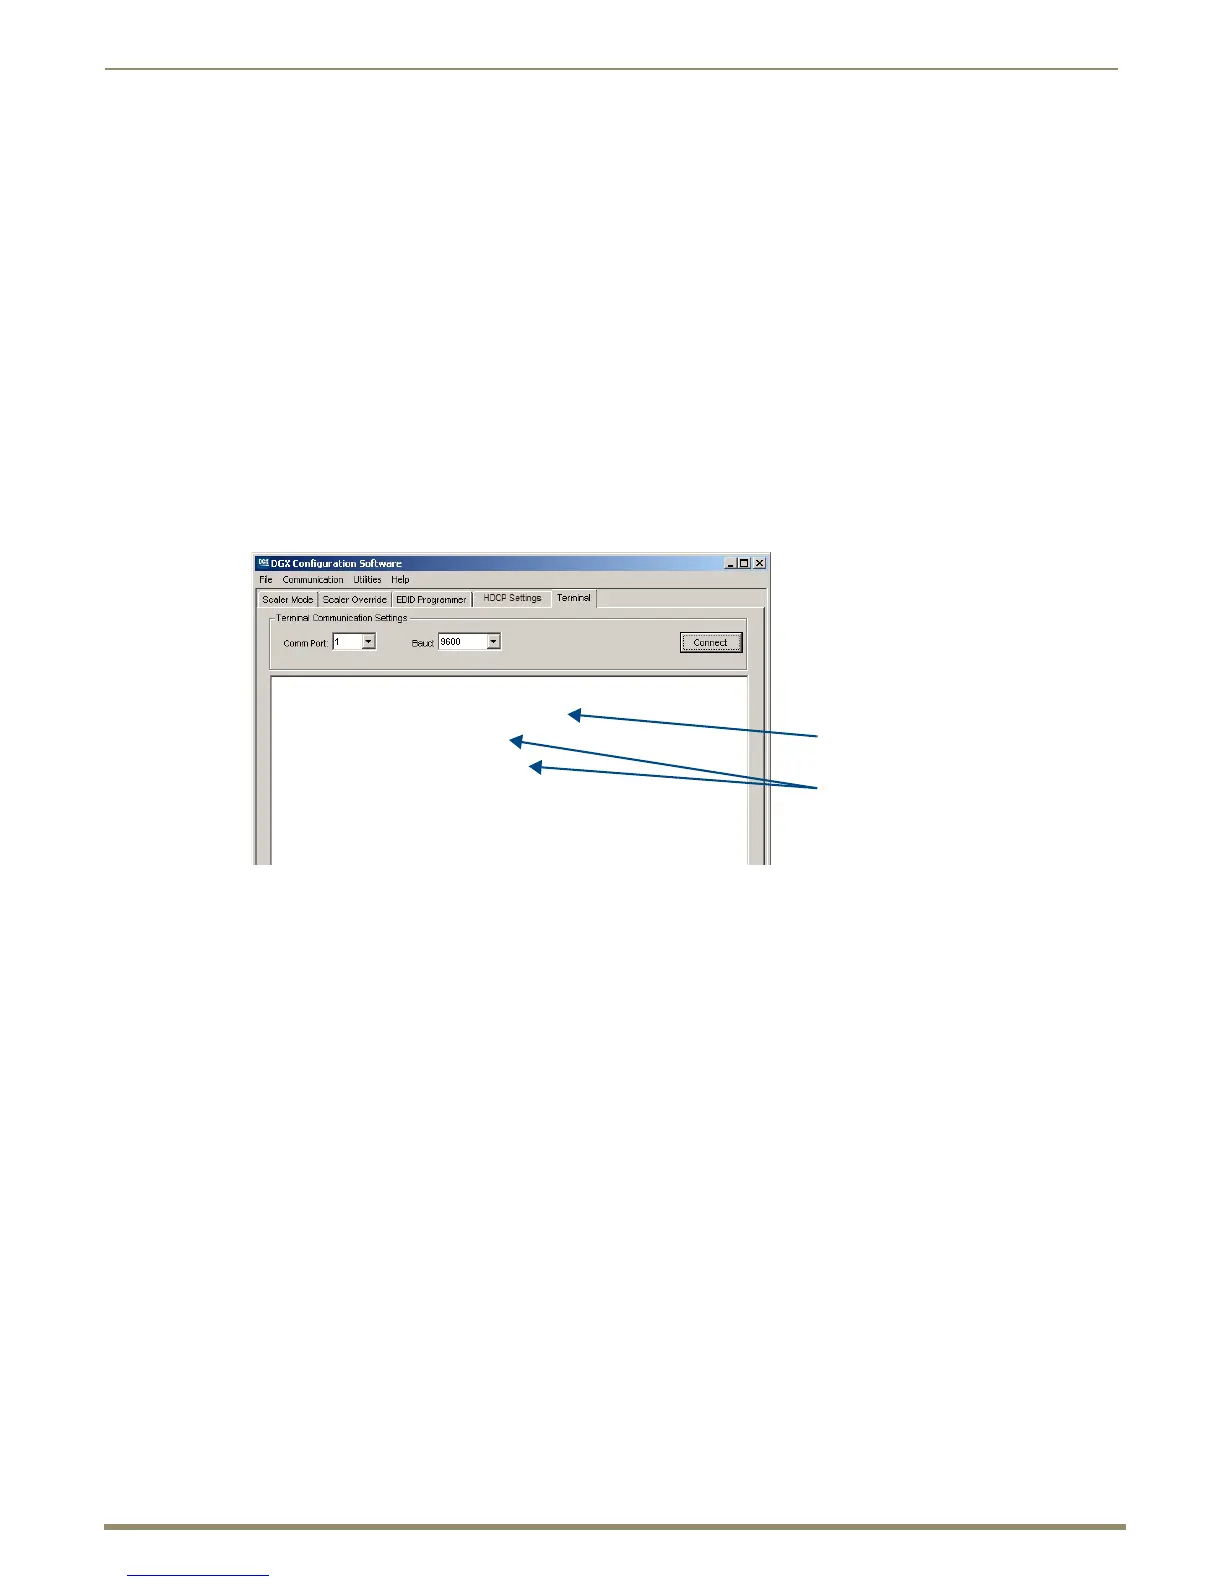
If you cannot execute switches with the new board after it has been installed, the first thing to do is verify the system’s
configuration by entering ~scri5v3! in a terminal emulation program (FIG. 128). This command retrieves
information on the crosspoint size of the virtual matrices (VMs), which determine the routing of signals.
Note: The configuration file is automatically generated by the system based on its hardware – input and
output boards, expansion boards, front control panel, CPU, etc. If boards are added during runtime, they are
immediately added to the system’s configuration.
From the factory, the automatically generated configuration contains two VMs: VM 0 = all signals and VM 1 = video
signals.
The crosspoint size for each VM is set at:
8x8 for an Enova DGX 8 (two input and two output boards)
16x16 for an Enova DGX 16 (four input and four output boards)
32x32 for an Enova DGX 32 (eight input and eight output boards)
64x64 for an Enova DGX 64 (sixteen input and sixteen output boards)
If the crosspoint size is less than full (e.g., 24x24 in an Enova DGX 32) and the new board increases the size past the size
indicated on the splash screen, then the system was customized for a non-standard crosspoint size that is not large
enough to accommodate the new board. The configuration file must be updated before the new board will work (see
“Updating the Configuration File” below).
If the crosspoint size is large enough to accommodate the new board and you still cannot execute switches, contact
technical support (see page 69).
Updating the Configuration File
If the configuration file requires updating (as explained in the previous section), read both choices listed to determine
how to proceed.
If the system’s configuration file has not been modified since it was shipped from the factory, enter ~def!
in a terminal emulation program (e.g., DGX Configuration Software; see page 187) to establish the default
configuration of 8x8, 16x16, 32x32, or 64x64 with two VMs.
If the original configuration has been modified in any way (e.g., local presets were added), we recommend
sending a copy of the modified file to technical support (see page 69), so they can add support for the board
change to the modified file before you download the file to the CPU (downloading requires XNConnect
software; see page 198).
FIG. 128 Splash screen information indicating a standard configuration file for an Enova DGX 32
~scri5v3!
[5:VM Configuration] count = 2
[vm 0] 'All' 32x32x1
[vm 1] 'Video' 32x32x1
[vm 0 master] 0x11000 master 0 0 1 (self)
[vm 1 master] 0x11000 master 0 0 1 (self)
Standard VM count is “2”
Crosspoint size (full)

 Loading...


