Installation and Setup
35
Instruction Manual – Enova DGX 8/16/32/64 Digital Media Switchers
Options for System Setup with SC Fiber
The table below contains the options in an Enova DGX Switcher for using SC Optical Boards in conjunction with DGX
Fiber Modules.
Note: DGX Fiber Modules for SC Fiber can also be used as a standalone, end-to-end solution; see the
“Instruction Manual – DGX Transmitters & Receivers.”
A typical system setup for a source and a destination is illustrated on page 116 and shows an Enova DGX 32 with
DGX SC Optical Boards used in conjunction with DGX Fiber Modules.
The DGX HD-15 and DGX DVI Transmitter Modules can be installed interchangeably. The DGX HD-15 and DGX DVI
Receiver Modules are interchangeable as well, providing for an extremely flexible system. For example, in the same
system, a source device can send a DVI signal and the destination device(s) can receive an RGBHV signal.
Note: In addition to the system setup options listed in the table above, optical signal flow between Enova
DGX Switcher and Epica DGX 16/32/144 enclosures (from SC fiber connector to SC fiber connector) is
supported. Contact your AMX representative for these and other system design possibilities.
* The transceiver on the DXLink Fiber Boards must match the transceiver on the DXLink Fiber unit, multimode to
multimode and single mode to single mode.
Rack Installation and System Setup
Enova DGX Switchers can be mounted in a standard EIA 19 in. (48.26 cm) rack.
Required Items for Rack Installation:
Enclosure
DGX 64 only – two rack mounting handles (provided)
Standard EIA 19 in. (48.26 cm) rack
Screwdriver
Screws that fit your rack for mounting the enclosure
Power cords (provided)
Surge-protector – highly recommended
Optional Items for Rack Installation:
A PC or laptop computer with a null modem cable for communication with the enclosure via the
RS-232 serial (Control) port
Installation Recommendations:
Write the serial numbers (normally located on rear of enclosure) in an easily accessible location before
installing the enclosure in a rack.
Use an earth-grounded power cord / system with an Enova DGX Switcher.
Attach all power cords to a single surge protector and/or an AC line conditioner.
Apply power to the Enova DGX Switcher before applying power to its source and destination devices.
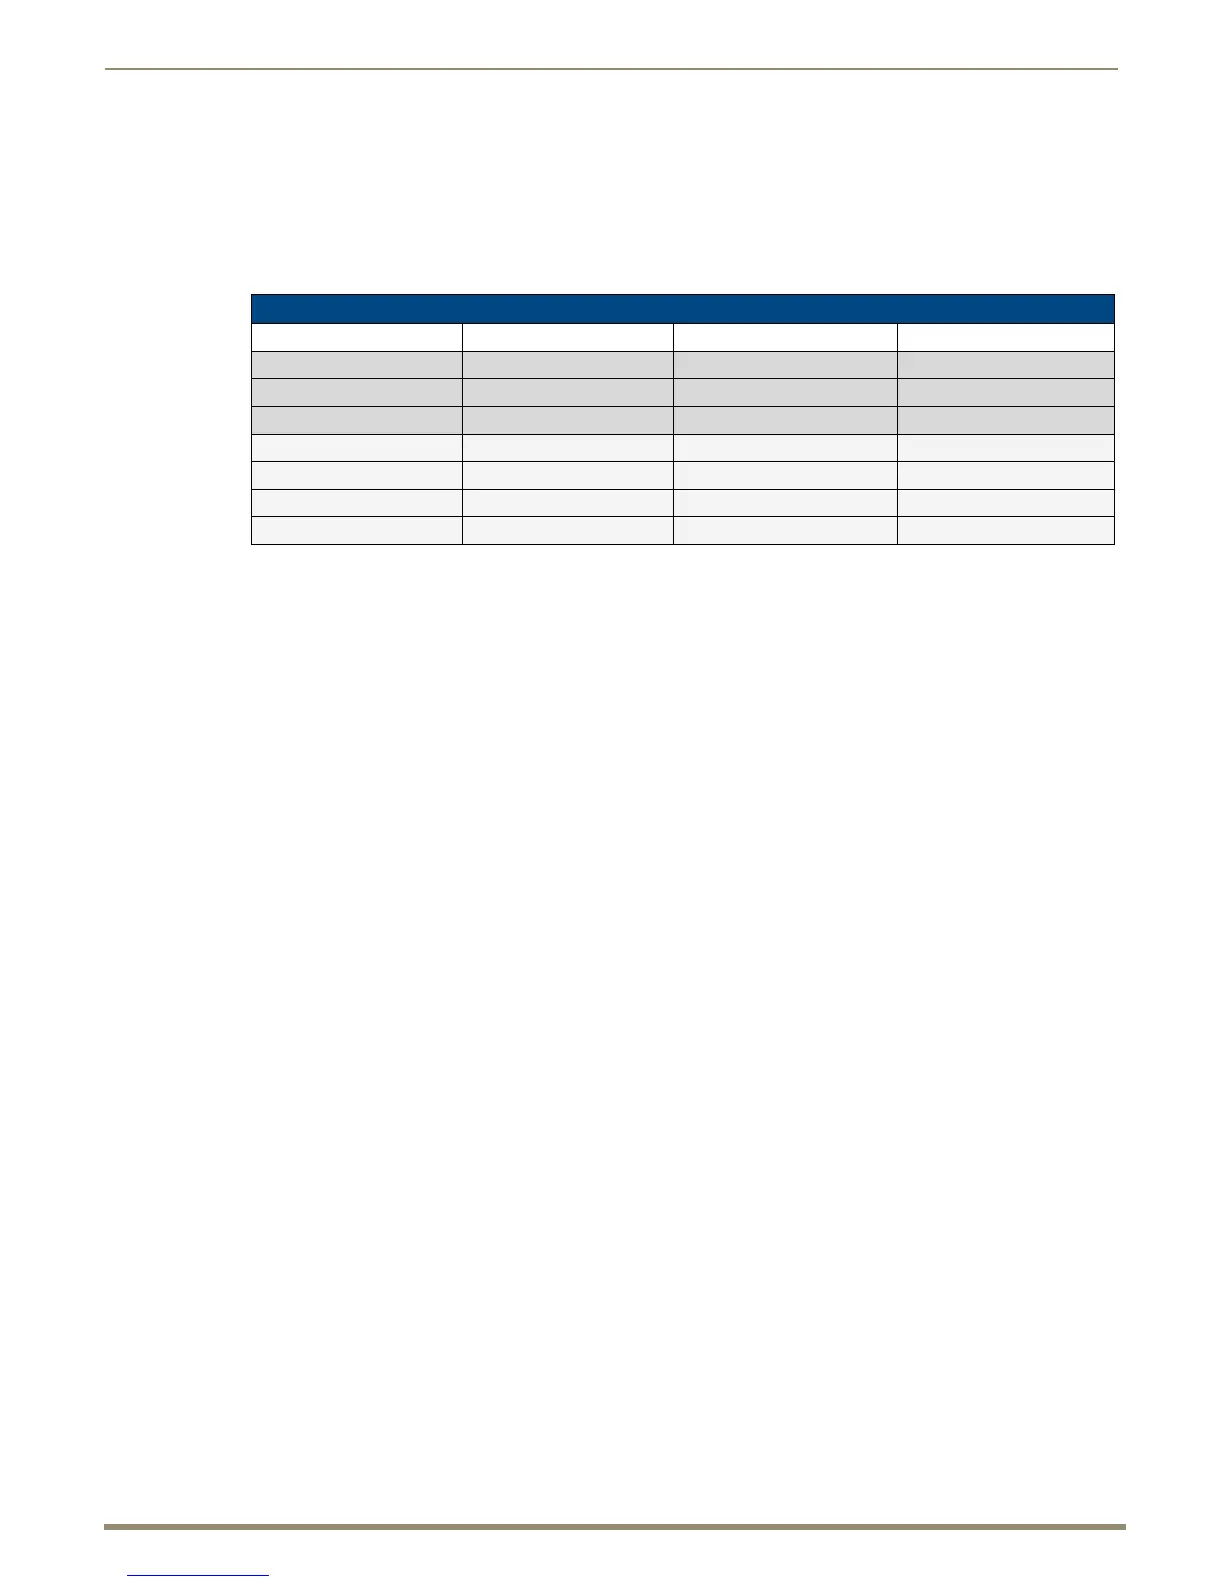
System Setup Options – Enova DGX Boards with DGX Fiber Modules
DGX Fiber Module Enova DGX Input Board Enova DGX Output Board DGX Fiber Module
HD-15 or DVI TX SC Optical DVI or HDMI Not Applicable
HD-15 or DVI TX SC Optical DXLink (requires DXLink RX)
HD-15 or DVI TX SC Optical DXLink Fiber* (requires DXLink Fiber RX*)
Not Applicable DVI or HDMI SC Optical HD-15 or DVI RX
(requires DXLink TX) DXLink SC Optical HD-15 or DVI RX
(requires DXLink Fiber TX*) DXLink Fiber* SC Optical HD-15 or DVI RX
HD-15 or DVI TX SC Optical SC Optical HD-15 or DVI RX

 Loading...


