A3 PLUS - A5 - A6 PLUS - L6
SURGICAL SINGLE CART
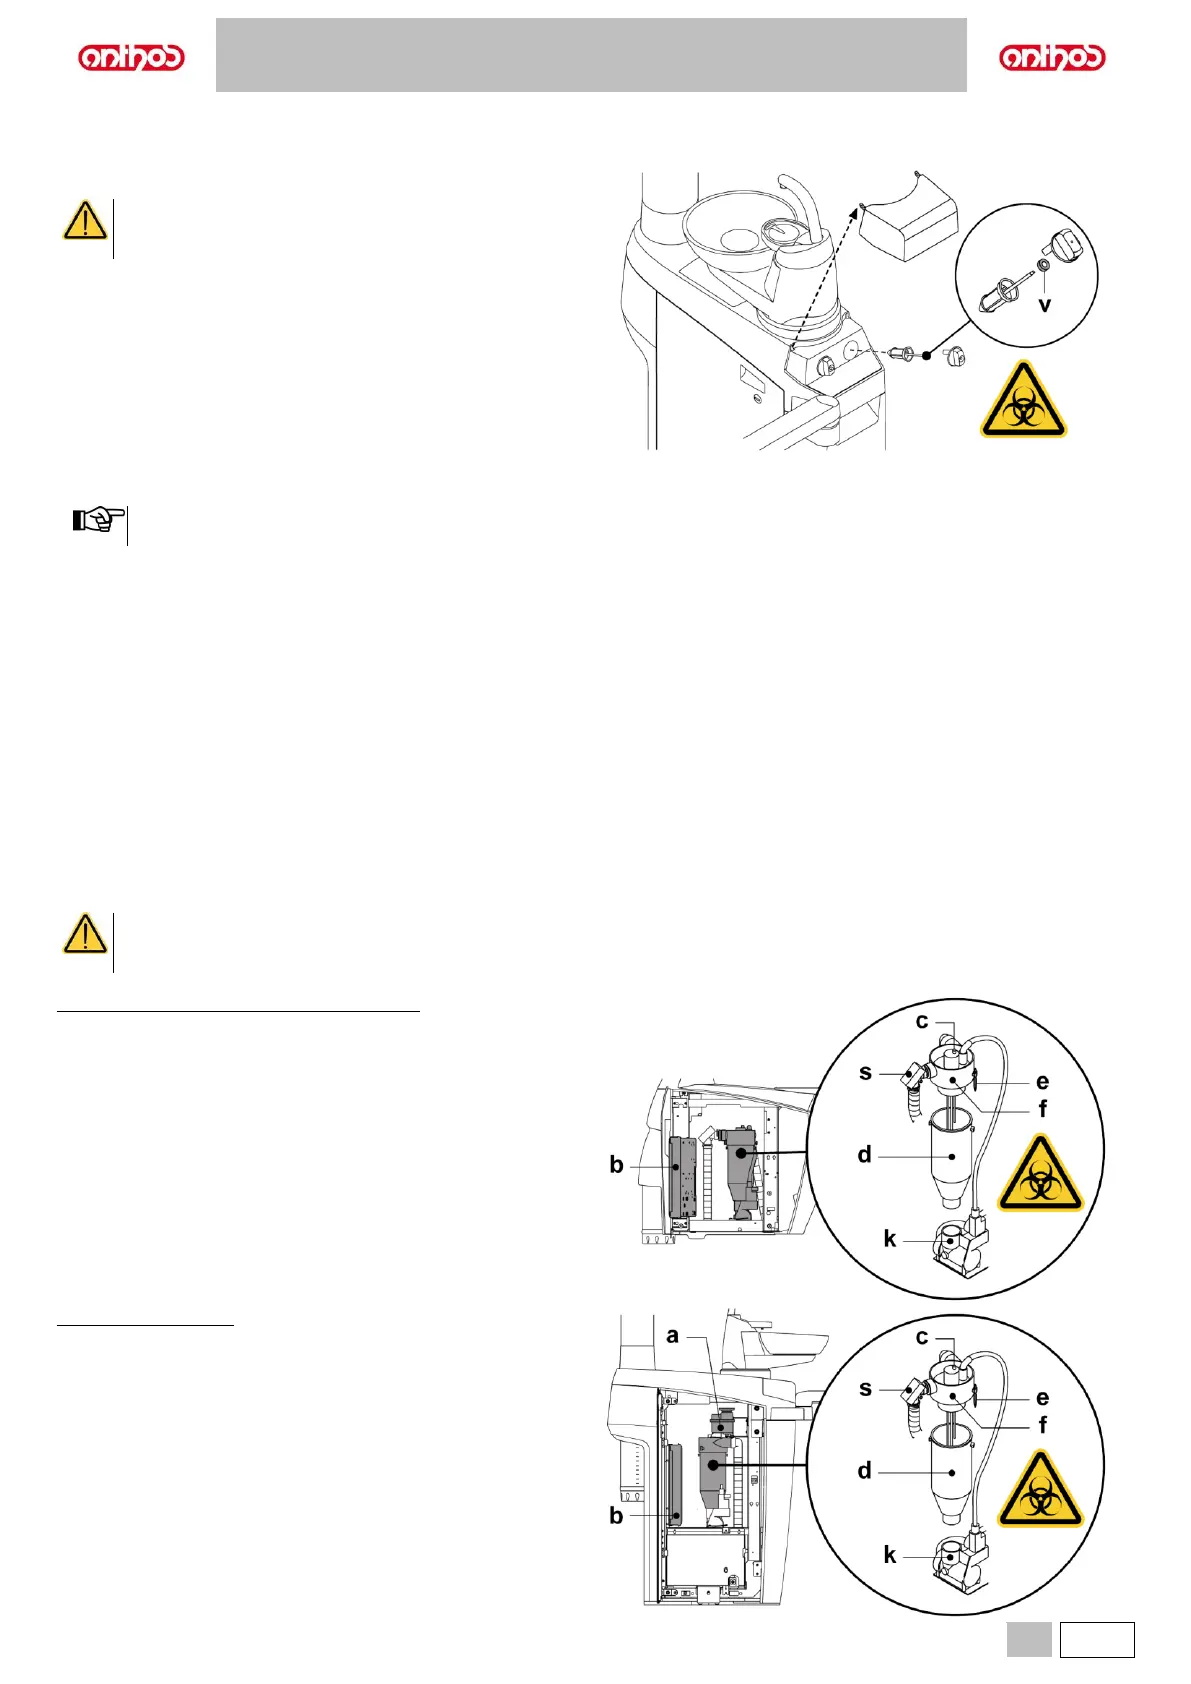
9.5. AIR-LIQUID SEPARATOR CANISTER BY CATTANI
At the beginning of each working day.
Insert inside filter (d) a defoaming tablet (v).
BIOLOGICAL HAZARD
Always wear gloves and goggles to prevent contact with
infected material when carrying out this operation.
At the end of each surgical procedure.
• Perform an automatic flushing cycle or suck in about 1/2 litre of
sanitising solution with each one of the suction tubes used.
• Sterilize the suction tube holder terminals in a steam autoclave up to
135°C following the instructions for use of the device.
At the end of each working day.
• Suck in 1 litre of water with each suction tube, alternating water and air
(keep the suction tube alternately in and out of the water).
• After rinsing with water, suck in about 1/2 litre of sanitising solution
with each one of the suction tubes used.
After flushing and disinfection, it is good practice to suck in air
only to dry the entire suction system (5 minutes).
Every 15 days.
• Clean the separator container and probes with a soft non-abrasive
sponge and neutral detergent.
• Clean the drain valve for the separator’s container with the brush
provided for this purpose.
Once a year.
• By technician: check the siphons and drains, check all the internal
tubes and plastic and rubber parts subject to wear.
Before leaving the surgery for a few days.
• Start suction and run it for 20-30 minutes without sucking in any
liquids. The suction unit will dry completely. As a result, salt caused by
moisture and basic substances will not form. Said salt may cause fan
seizure and motor blockage.
How to remove the separator’s container.
BIOLOGICAL HAZARD
Always wear gloves to prevent contact with infected
material when carrying out the following operation.
Dental units of A3 PLUS, A5 and A6 PLUS models:
• Move the dental chair fully up.
• Open the water side unit cover (see paragraph 7.7.).
• Turn the electric box (b) after releasing the corresponding retainer.
• Completely empty the separator container, pressing the proper timed
button (c) located on the cover.
• If present, remove the valve (s) for centralised systems.
• Turn and raise the container until it is detached from the drain pump
(k).
• Detach the container (d) from the cover (f) pulling up the two side
rubber bands (e).
• After the cleaning operations, refit the container (d) after lubricating the
O-rings with S1-Protective Lubricant for O-Rings (CEFLA s.c.).
Dental units of L6 model:
• Open the water side unit cover (see paragraph 7.7.).
• Turn the electric box (b) after releasing the corresponding retainer.
• If the tank (a) is installed, rotate it to release separator container (d).
• Completely empty the separator container, pressing the proper timed
button (c) located on the cover.
• If present, remove the valve (s) for centralised systems.
• Turn and raise the container (d) until it is detached from the drain
pump (k).
• Detach the container (d) from the cover (f) pulling up the two side
rubber bands (e).
• After the cleaning operations, refit the container (d) after lubricating the
O-rings with S1-Protective Lubricant for O-Rings (CEFLA s.c.).
• Close the electric box (b) locking it with the relevant retainer and close
the water unit side cover.